AI Live Stream Guide
Embark on a transformative streaming journey with the AI Live Stream User Guide, where seamless connectivity meets technological brilliance.
Launching Your Live Room
Explore step-by-step instructions on decorating your space, uploading local images and videos, adding engaging AI interactions, etc. Elevate your streaming experience and captivate your audience with a seamlessly executed live room. Dive into our comprehensive guide now!
Index
Decorating Your Live Room
Decoration Guidance
-
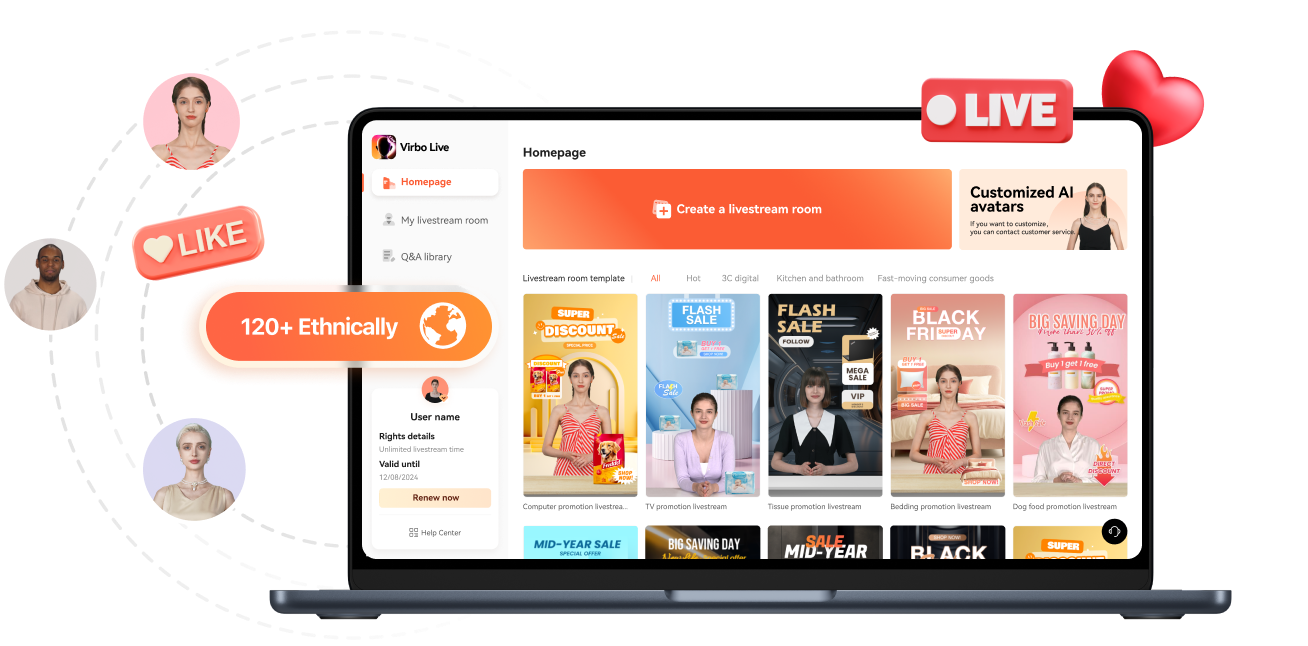
- Click on the product homepage and create a blank live room to initiate a new live session.

Create a blank live room
-
- Upon creating a blank live room, the live room editing page will open. The left side serves as the operation area, the right side as the canvas area, and the materials area is located above.

Livestream room navigation
- Click on the templates to use pre-designed combinations of background, virtual hosts, and stickers.

Select a template
-
- Customize the background from the background library. During the live broadcast, only one background can be used.

Livestream room customization
- Choose a virtual host from the virtual host library. Only one virtual host can be used during the live session.
Choose a virtual host
-
- Add stickers from the sticker library. Multiple stickers can be used during the live broadcast.
- After selecting materials, adjust their position and size in the canvas area. Right-click to modify layers, copy, or delete materials.
Uploading Local Images and Videos
Upload background images or videos
- Upload: Click Background -> Upload Background -> Select file to upload. Materials will be displayed in "My Background" after uploading.

Upload Background
- Apply: Click Background -> My Background, then click on the material to use it on the canvas.
- Delete: Hover over the material and click the delete icon to remove it.

Delete Background
Note:
Background upload requirements:- Image and video dimensions should be 9:16
- Image formats: JPG/JPEG/PNG
- Video formats: MP4/MOV
- Resolution should not exceed 1080P
- Video duration should not exceed 30 minutes
- File size should not exceed 1GB
Upload sticker images or videos
-
- Upload: Click Sticker -> Upload Sticker -> Select file to upload. Materials will be displayed in "My Sticker" after uploading.

Upload Sticker
- Apply: Click Sticker -> My Sticker, then click on the material to use it on the canvas.
- Delete: Click Sticker -> My Sticker, hover over the material, click the delete icon to remove it.

Delete Sticker
Note:
Sticker upload requirements:- Image and video dimensions are flexible.
- Image formats: JPG/JPEG/PNG
- Video formats: MP4/MOV
- Resolution should not exceed 1080P
- Video duration should not exceed 30 minutes
- File size should not exceed 1GB
Text-Driven Live Room
Script Guidance
-
- Input script text: Copy and paste your script into the script dialogue box.

Text Scripts Inset
- Choose a matching tone: Click the voice-over entrance above, select a suitable tone, and preview it.
- Preview: Click the "Preview" button below the text to listen.
Audio-Driven Live Room
Audio Guidance
-
- Upload audio: Click Script -> Audio -> Upload local voice and upload the local file.

Upload Audio
-
- Preview audio: After uploading, click to preview the audio.

Preview Audio
-
- Audio sorting: Hold and drag to sort the audio files.
 Audio sorting
Modifying Live Room Name
Method Guidance
- Method 1: Click the edit button in the upper-left corner of the edit page to rename the live room.

Rename Livestream Room
-
- Method 2: Product homepage -> My Live Rooms -> Click on the more options for an individual live room -> Choose Rename.
Adding AI Identification
Step Guidance
- On the live room editing page, click on the checkbox before the AI identification to enable or disable it.
AI Intelligent Script Generation
Generation Guidance
- Click the "AI Intelligent Script" button below the script, a popup will appear.
- Enter your product name (mandatory), selling points (optional), promotional information (optional), select language and style, then click generate.

AI Script
-
- The generated result can be further modified, click "Use" to add it to the script dialogue box.
AI Translation
Translation Guidance
- Click the "AI Translation" button below the script, a popup will appear.
- Place the text to be translated on the left, click the middle arrow to select the language for translation (e.g., English), and click translate.

AI Translation
- The generated result can be further modified, click "Use" to add it to the script dialogue box.

AI Translation Result
Manual Interaction
Microphone Interaction
- Operational Flow:
-
- Click Manual Interaction -> Microphone, and select the microphone device.
- Speak into the microphone and observe the sound wave status.
- Open "Start Live," wait for the appearance of the virtual host image, and click "Open Mic Takeover." The virtual host's mouth will be closed, and your voice will drive the virtual host to speak.
- After speaking, click "End Takeover," and the virtual host will resume reading the scripted dialogue.
-
- Grant Browser Microphone Access:
- Google Chrome:
- Open Chrome, click the settings icon in the top right.
- Click "Settings," open the settings page. Select "Privacy and Security" and then click "Site Settings."
- Enter the site settings page, click "Microphone."
- On the microphone authorization page, select that the site can request the use of your microphone.
- After these settings, when the browser needs to use the camera or microphone, a device request box will pop up on the page. Select "Allow."
- Mozilla Firefox:
- Open Firefox, click the settings icon in the top right, and click "Settings."
- Open the settings page, click "Privacy & Security," and find "Microphone Permissions." Click "Settings" next to "Microphone."
- Enter the settings page, add the site that requests the use of your microphone to the list, and click "Save Changes."
- After these settings, when the browser needs to use the camera or microphone, a device request box will pop up on the page. Select "Allow."
- Sogou Browser:
- Open Sogou Browser, click the settings icon in the top right, and click "Options."
- Open the options page, click "Advanced," find "Privacy
- Browsers on the Mac System:
- Locate "System Preferences" on your Mac dock and click the icon. Once opened, find "Security & Privacy" and click to open.
- On the "Security & Privacy" page, select "Privacy," then click on "Microphone" and set the applications that need to use the microphone to "Allow."
- Google Chrome:
Text Interaction
-
- Click on "Artificial Interaction" and enter interaction scripts in the input box below.
- Click "Add Text" to add it to the interaction list. After starting the live broadcast, each interaction script will have a send button.

Text Interactionn
- Click "Send" to trigger the AI to speak according to the interaction script.
Intelligent Interaction
Note:
The current intelligent interaction feature only supports Alibaba International. If you are streaming on other platforms, you can skip this step.Setting Entrance
- On the live broadcast page, click on "Intelligent Interaction," select the live platform, and the supported intelligent interaction features will be randomly displayed.
Q&A Library Settings
- Creating a New Q&A:
- On the product homepage, click on Q&A Library - Add Q&A, and a popup window will appear.
- Fill in the rule name, keywords, reply text, and upload a reply video. Click Save.
Note:
Rule Name: Name the rule for easy identification.Keywords: If a viewer's question in the live room contains any of these keywords, it will trigger the AI to answer.
Reply Content: You can add up to 5 replies. Include variables like [Viewer's Nickname] and [Viewer's Country] for personalized responses.
Sequential Reply: Replies in sequence when triggered.
Random Reply: Randomly selects a reply when triggered.
Reply Video: If configured, the video will be displayed at the specified position until the AI's reply ends.
- Adjusting Q&A Activation Status:
- Click Q&A Library - Switch to close or open the Q&A rule. When closed, the Q&A rule will not take effect after the live broadcast starts.
- Turning on Q&A Library Switch in the Live Room:
- On the live broadcast editing page, click Intelligent Interaction - Platform, select "Alibaba International," and turn on the Q&A Library switch. This must be done after starting the live broadcast and capturing the barrage for the function to work.
Greeting Rules Settings
- Greeting Content: You can add up to 5 replies, including variables like [Viewer's Nickname] and [Viewer's Country].
- Sequential Reply: Replies in sequence when triggered.
- Random Reply: Randomly selects a reply when triggered.
- On the live broadcast editing page, click Intelligent Interaction - Platform, select "Alibaba International," turn on the Greeting switch, and click the edit icon to open the editing window. Fill in the reply text and click Save.
Sending Business Cards and Product Catalogs
- On the live broadcast editing page, click Intelligent Interaction - Platform, select "Alibaba International," turn on the "Send Business Cards" switch, and turn on the "Send Product Catalogs" switch.
Note:
These functions will only take effect after starting the live broadcast and capturing the barrage.How to Start Live Barrage Capture
- Start Broadcasting in Virbo Live
- Follow the steps for "Start/End Broadcast" on the live broadcast editing page.
- Install the Plugin in Chrome
- Ensure Chrome is up to date, then download the plugin from the provided link. After downloading, unzip locally.
- Configure the Plugin in Chrome
- Open Chrome, go to Settings - Extensions - Manage Extensions, enable Developer mode, click "Load Unpacked," and select the unzipped folder. Enable "Allow in incognito mode" in the plugin details.
- Copy the Live Control Page Link
- Copy the link of your live control page (web version) from the live platform. Paste the link into the live broadcast editing page under Intelligent Interaction - Live Room Link Input, then click "Start Capturing."
Note:
Alibaba International currently supports automatic Q&A, automatic greetings, automatic business card sending, and automatic product catalog sending. You can turn on the corresponding switches and then configure the detailed settings for each item.Starting/Ending the Live Broadcast
Starting the Live Broadcast
-
- On the live broadcast editing page, click "Start Broadcasting."
- The AI live broadcast window will appear shortly after, displaying the AI live broadcast.
Using Your Broadcasting Partner or OBS
Note:
Keep the AI live broadcast window open on the desktop during the broadcast, or it will not broadcast properly.-
- Open your broadcasting partner or OBS, add a window, select the Wondershare VVB (Live Version) live window.
- Click "Start Broadcasting." Use Alt + mouse to crop out the web bar or use the zoom function to remove it.
- During the live broadcast, you can only modify the "Artificial Interaction" function; other broadcast settings cannot be changed.
Ending the Broadcast
-
- When concluding the live broadcast, initiate the termination of the live stream on the platform's broadcasting partner first, followed by clicking the "End Live" button on Virbo Live to finalize the shutdown process.