AI Live Stream Guide
Common Platforms for Live Streaming
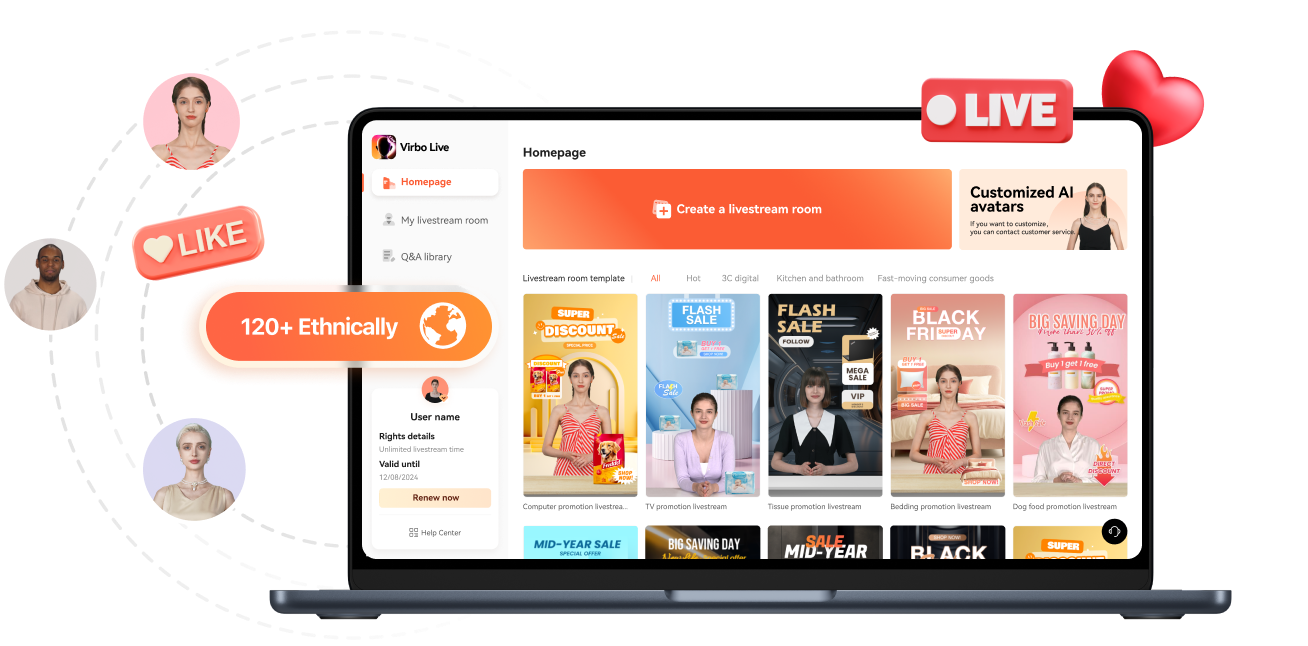
Maximize your reach with Virbo AI Live Stream on popular live streaming platforms. Uncover the common platforms compatible with our technology!
Alibaba International
Operational Steps
- Prepare Equipment, Network, and Browser
- Install Virtual Sound Card
- Due to audio restrictions on Alibaba International, a virtual sound card is required. If your computer's sound device has a "stereo mix," it can be used as an alternative. Check the path: My Computer - Properties - Sound - Sound Control Panel - Recording.
- Set Up "Stereo Mix"
- Skip this step if using a virtual sound card.
- Click My Computer - Properties - Sound - Sound Control Panel - Recording, activate stereo sound effects, and set it as default.
- Click Properties - Listen, select your speaker device, and click OK.
- Confirm the settings by playing a video on your computer. If both speakers and the microphone show sound detection, the setup is successful.
- Download and Install OBS
- As Alibaba International has restrictions on webcams, OBS is needed as a virtual camera (future Virbo Live product features will support this).
- After installation, go to Settings - Video and change the resolution to "1080x1920." Select the "+" sign - Window Capture, and add the window of the Live Explosion (Live Version).
- Crop the URL bar by holding Ctrl + left-click. Click "Start Virtual Camera."
- Prepare Materials
- Initiate the Live Stream
- Start Live Streaming on Alibaba Seller's Live Companion
- Log in to Alibaba Seller, open the live stream, and the Alibaba Live Companion window will pop up.
- Choose "Free Mode," add the camera, select Logitech c930e, and display it to cover the entire screen.
- Set the microphone to stereo mix or virtual sound card, click OK, and confirm the microphone has fluctuations.
- After adding products, click "Start Live" or "Start Reception."
1688 Live Platform
Operational Steps
- Prepare Equipment, Network, and Browser
- Prepare Materials
- Initiate the Live Stream
- Start Live Streaming on 1688 Live Companion
- Log in to the 1688 Live Companion client, click the material management "+" sign - Window, select the digital person live window, and click OK.
- Zoom in the window to remove the URL bar. Click "Start Streaming," and the live stream has started.
Youtube
Operational Steps
Part 1 Platform Features
- Supports capturing camera, window, screen, mobile screen, game process, images and videos, text
- Please make sure that your YouTube account is eligible for live streaming and that you have enabled live streaming privileges.
part 2 Basic Configuration
1. Computer Requirements
- A computer with standard configuration; both desktop and laptop computers are acceptable.
2. Network Requirements
- The average internet speed in the computer's network environment should not be lower than 5 Mbps. A poor internet connection can cause the live stream to be unstable.
- It is recommended to use a wired connection as Wi-Fi networks can be unstable.
- It is recommended to use a dedicated network and avoid using public networks.
Part 3 Software Installation
There are two software programs to install.
1. OBS Studio
Step1 Download and install OBS
Download Links:https://obsproject.com/
Step2:Rename OBS Virtual Camera
- Open OBS and click to start the virtual camera.
- Change the OBS display to portrait mode.
In OBS, go to Settings > Video, and manually change the resolution to "1080x1920."
2. Third-party plug-in installation
1. Download and unzip the plugin
Download Links:https://drive.google.com/file/d/1gf6-1UHUZ6tSsIIT5hk3TPQHzHQDvb6A/view?usp=sharing
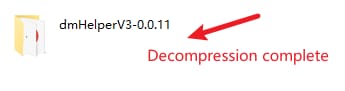
After the plugin is downloaded, unzip it locally.
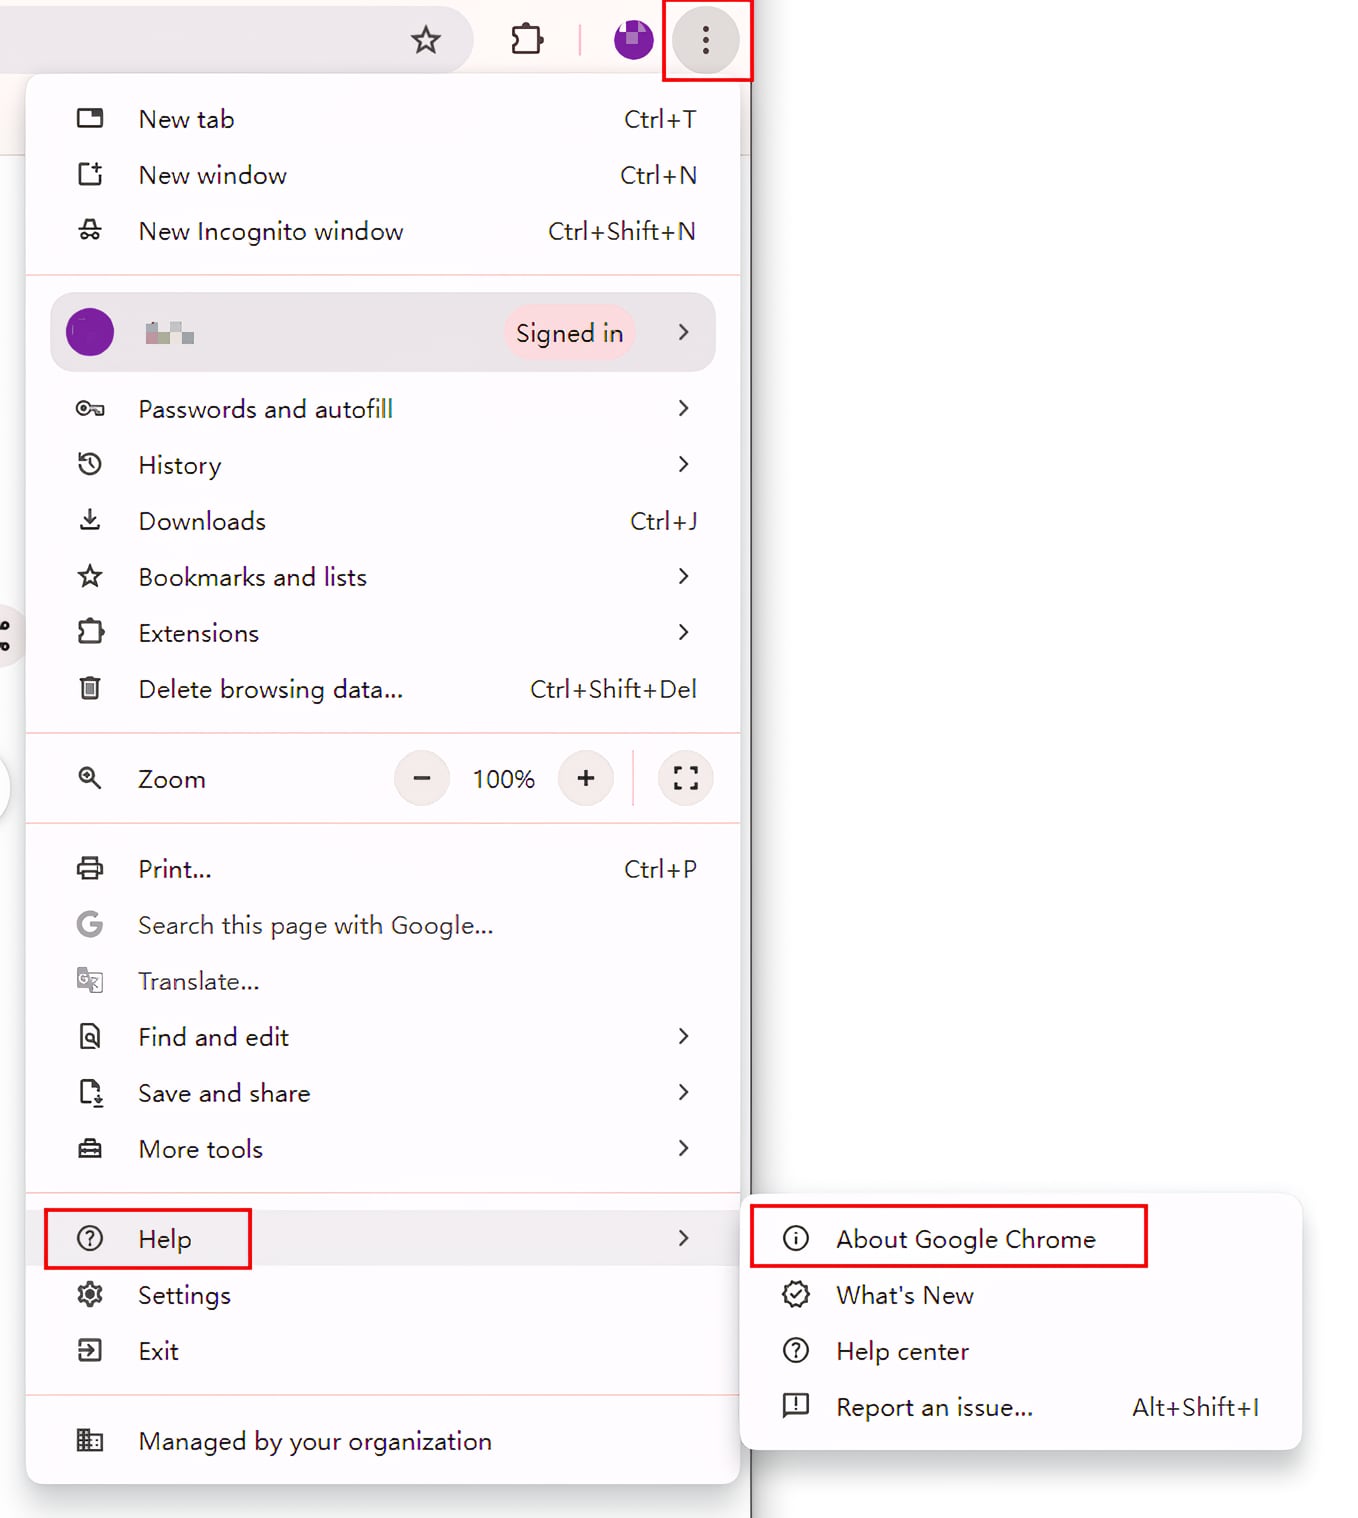
2. Updating Chrome to the latest version
Step3 Loading Plug-ins
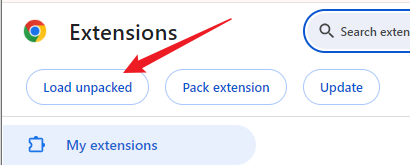
- Open Chrome browser, go to Settings > Extensions > Manage Extensions, enable Developer Mode, then click 'Load unpacked’.
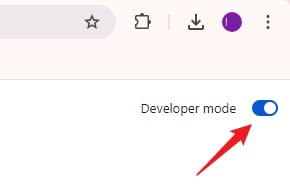
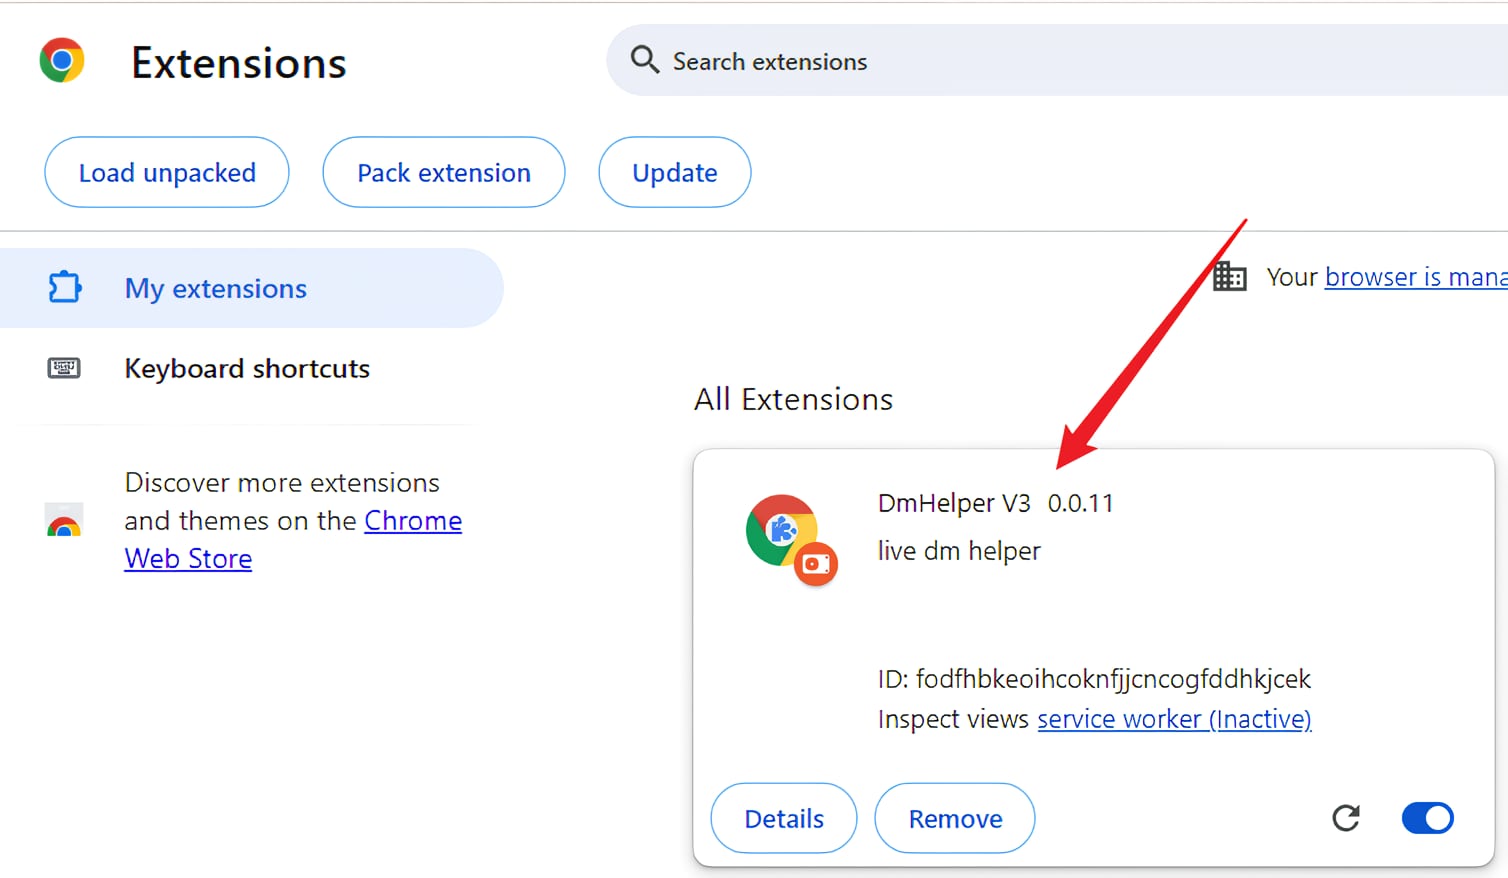
- Select the local plugin folder that was unpacked in the previous step; the plugin will now be displayed on the page (as shown in the image).
Choose dmHelperV3-0.0.11
Select the local plugin folder
- Click on 'Details' and enable the 'Pin' option. If you plan to use Incognito mode, you also need to enable the 'Allow in Incognito' option.

- Refresh the browser; the plugin is now enabled and the setup is complete!
Part 4 Preparation for Broadcasting - Preparing Live Streaming Materials
1. Live Script:
- Word Count: It is recommended to have at least 5,000 words and up to 50,000 words.
- Framework Reference: Write multiple rounds using the structure of "Interactive Dialogue + Company Introduction + Product Introduction + Promotional Dialogue + Closing Dialogue."
2. Product Images or Videos:
You can upload background images, product images, or product videos. You can use common materials provided by the products, but using your own materials will result in a better live streaming effect.
Background Images: Company showroom, culture wall, factory, or sample room images, etc., with a 9:16 aspect ratio and size not exceeding 1GB.
Product Images: Transparent channel images of the products.
Product Videos: No size limit, size not exceeding 1GB, and individual video length not exceeding 30 minutes.
3. Greeting Scripts (1-5 lines)
Example, one greeting script:
"Hello, David, you are from the US, right? The US is indeed one of our main markets, and we have special designs for the US market. Could you kindly tell us what products you are looking for?"
4. Q&A Scripts (up to 50 sets)
Example, one Q&A set:
Question Keywords: OEM; ODM; custom; customize; customized
Response 1: "Yes, we support OEM and ODM customization services, and we have done many customization cases. You can send us your design & functions, then we will provide you with a full quotation."
Response 2: "Thank you for your message. We support customized services. Do you have your own design ready? Please tell us your needs."
Response 3: ...
Part 5 How to Start Broadcasting?
1. Starting in Wondershare Virbo (Live Version)
- Step 1 Configuring the Q&A Library
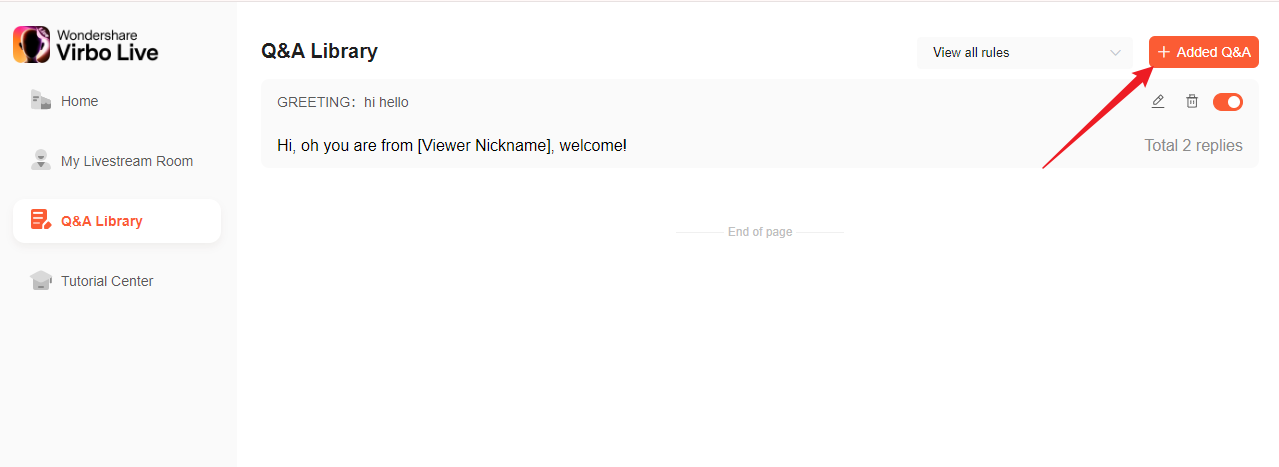
On the product homepage, click on "Q&A Library" and then "Add Q&A." A functional pop-up window will appear where you can enter the Q&A scripts you have prepared in advance. Below are explanations for each field to fill out.
- Q&A Rule: Name this rule for easy identification. On the product homepage, you can see multiple live room templates to choose from. You can click on any template to start broadcasting directly, or you can delete some materials from the template and replace them with your own uploads.
- Keywords: If a viewer's question in the live room contains any of the keywords, the rule will be matched, and the digital avatar will respond. You can enter multiple keywords, separated by semicolons.
- Response Content: You can add up to five responses. The response content can include variables such as [Viewer Nickname], [Viewer Country], etc., which will automatically be filled with the viewer's ID and country each time it is triggered.
- For example, if a viewer asks in the live room, "How do I buy this?" and you have set keywords like "buy; sell; purchase; order; book," the digital avatar will match the keyword in the viewer's question and verbally deliver the response you set. If you choose a sequential response mode for the content, the digital avatar will respond with one of the responses in order each time the Q&A is triggered. If you choose a random response mode, the digital avatar will randomly select one response to deliver each time the rule is triggered.
- Video Display: If you upload a video for this rule, the video will be displayed in the specified position on the live screen when this Q&A rule is triggered, until the digital avatar finishes delivering the response. There are three positions available for the video: top third, middle third, and bottom third of the screen.
- The last setting is for anti-spam control. This is used to control the frequency of responses from the digital avatar. The larger the interval time you set, the lower the frequency of responses from the digital avatar. You can adjust this according to the interaction frequency in your live room.
- Step 2. Setting Up a Live Room
Create a new live room by selecting a digital avatar and adding materials on the canvas.
There are two methods to set up a live room:
Method 1: Choosing a Built-in Template
On the product homepage, you can see multiple live room templates to choose from. You can click on any template to start broadcasting directly, or you can delete some materials from the template and replace them with your own uploads.
Method 2: Building a Personalized Live Room
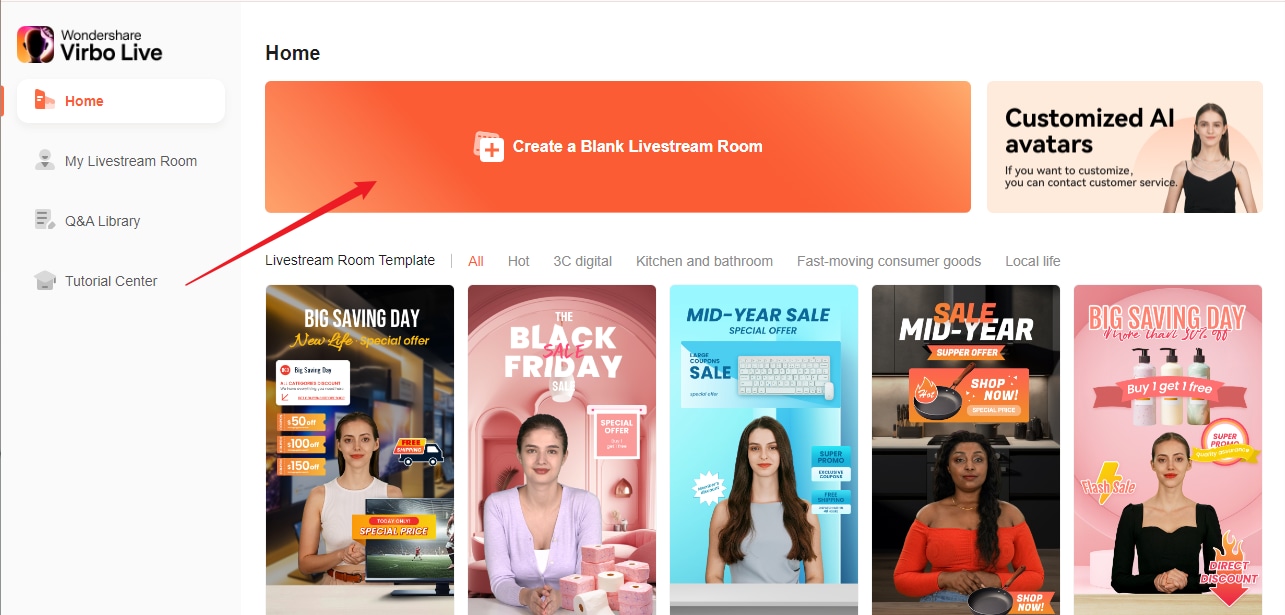
On the product homepage, click "Create Blank Live Room," then you can upload and use your own images or videos to freely design the live room.
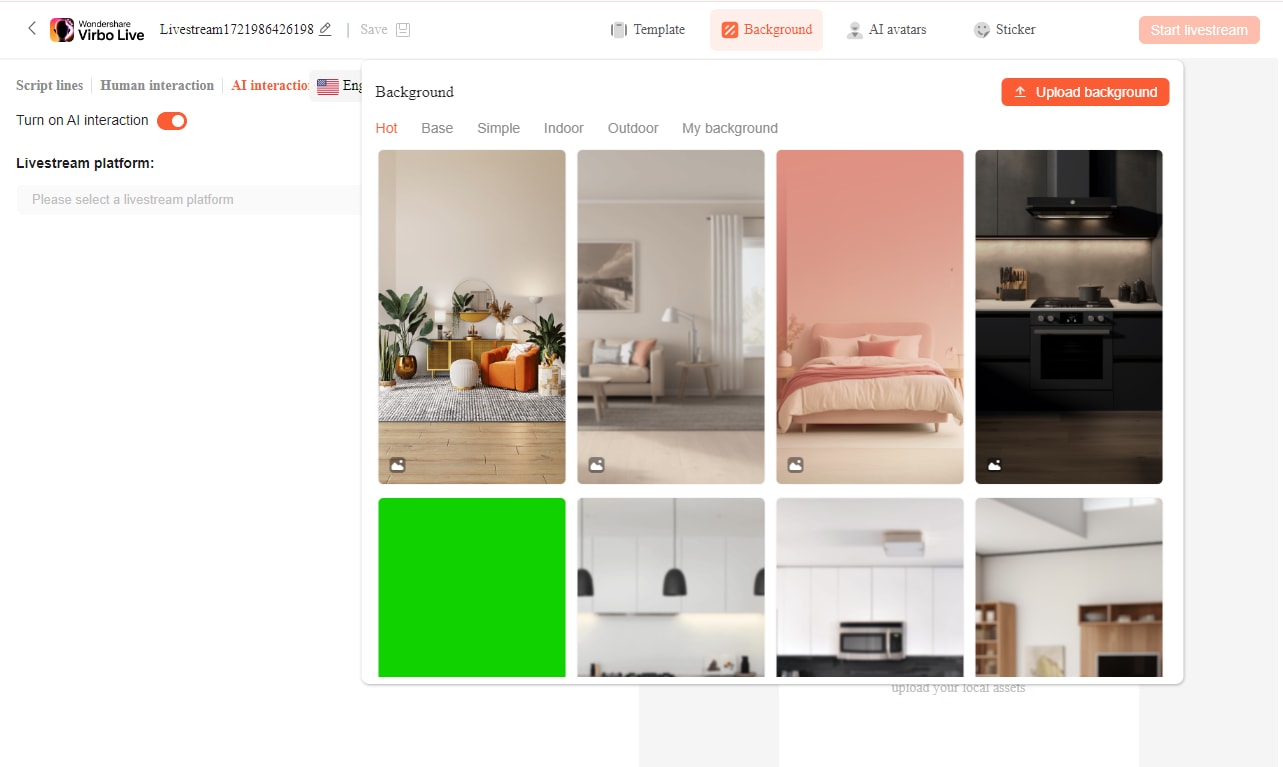
- First, click "Background," then "Upload Background," and select an image, such as a company showroom, culture wall, sample room, or factory image (something that reflects the company's strength, culture, or products).
- After uploading, click "My Background" and select the image just uploaded to set it as the background.
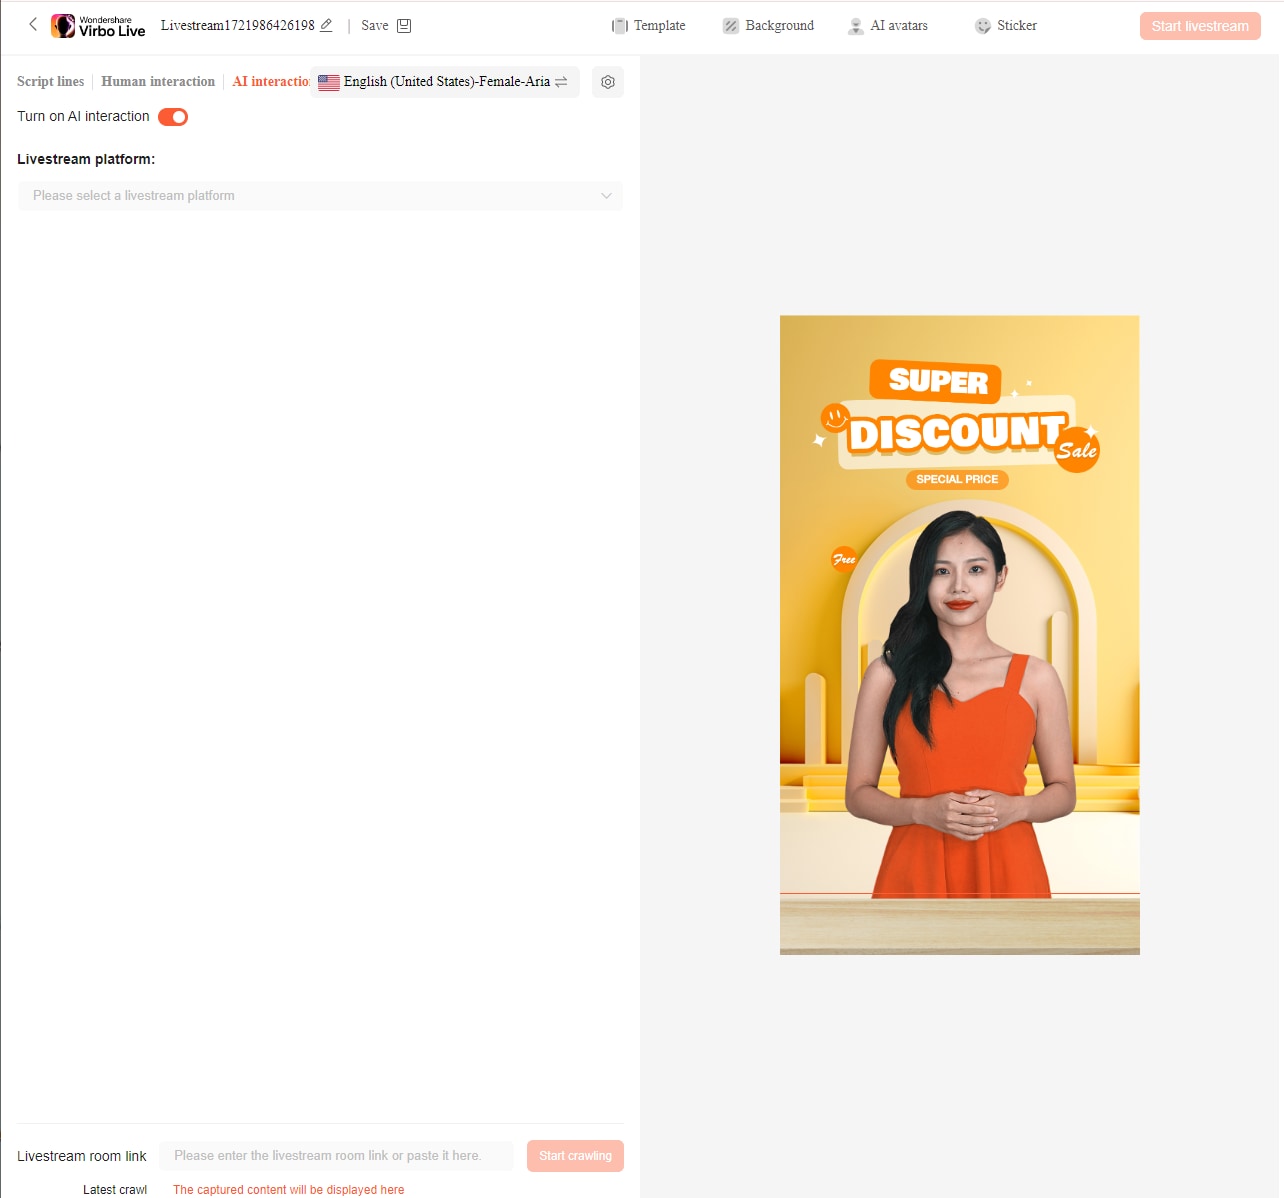
- Next, click "AI Avatar" and choose the digital avatar image, then place it in an appropriate position.
- Then, click "Sticker" and select a table from the sticker library, placing it in front of the digital avatar to simulate a real table.
- After that, click "Upload Sticker" to upload product images or short videos.
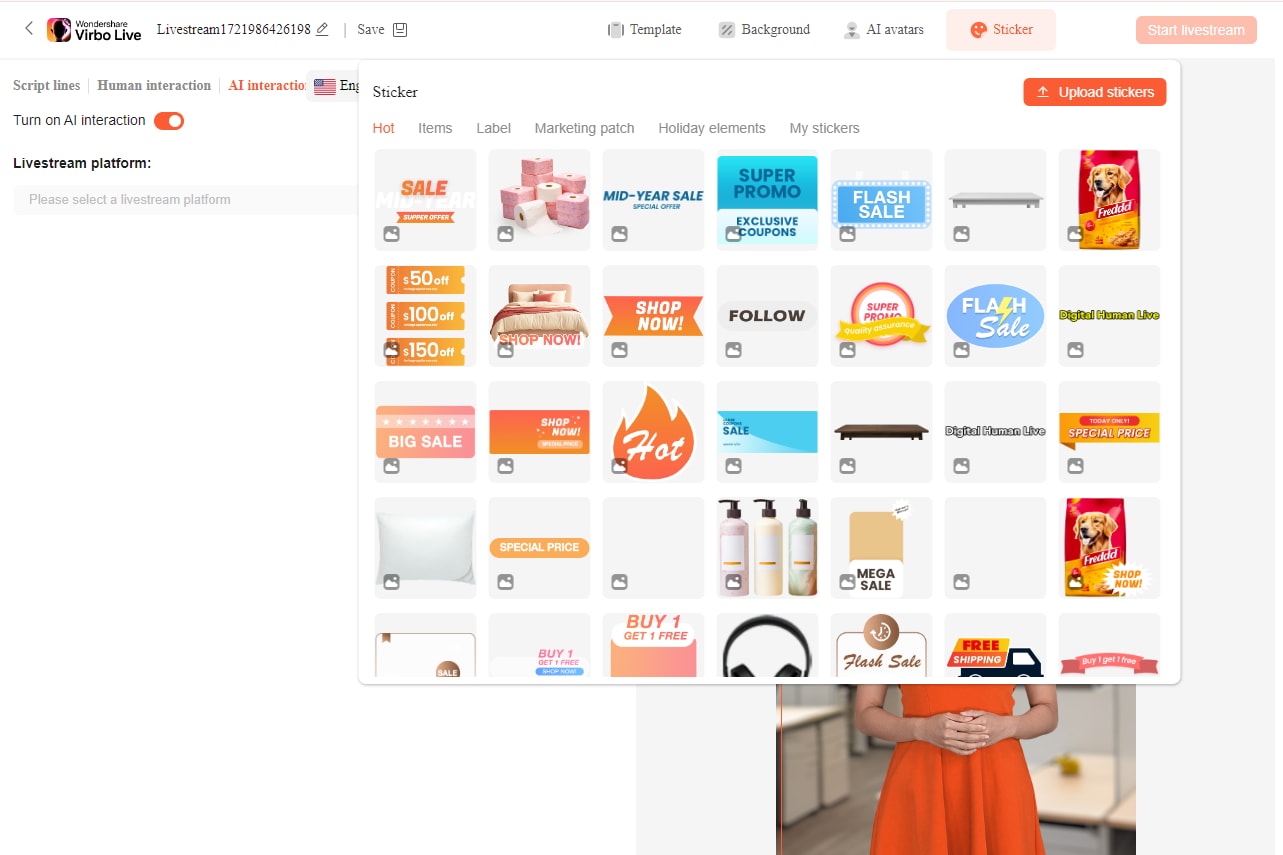
- Once uploaded, click "My Stickers" and select the product or short video. The product can be placed on the table and the short video at the top. This completes the setup of the personalized live room.
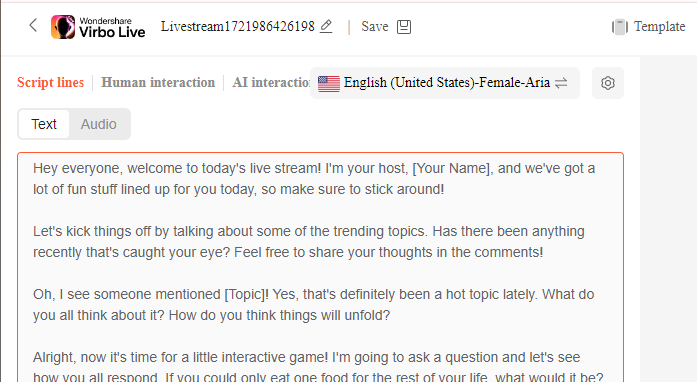
- Step 3 Configuring the Live Script
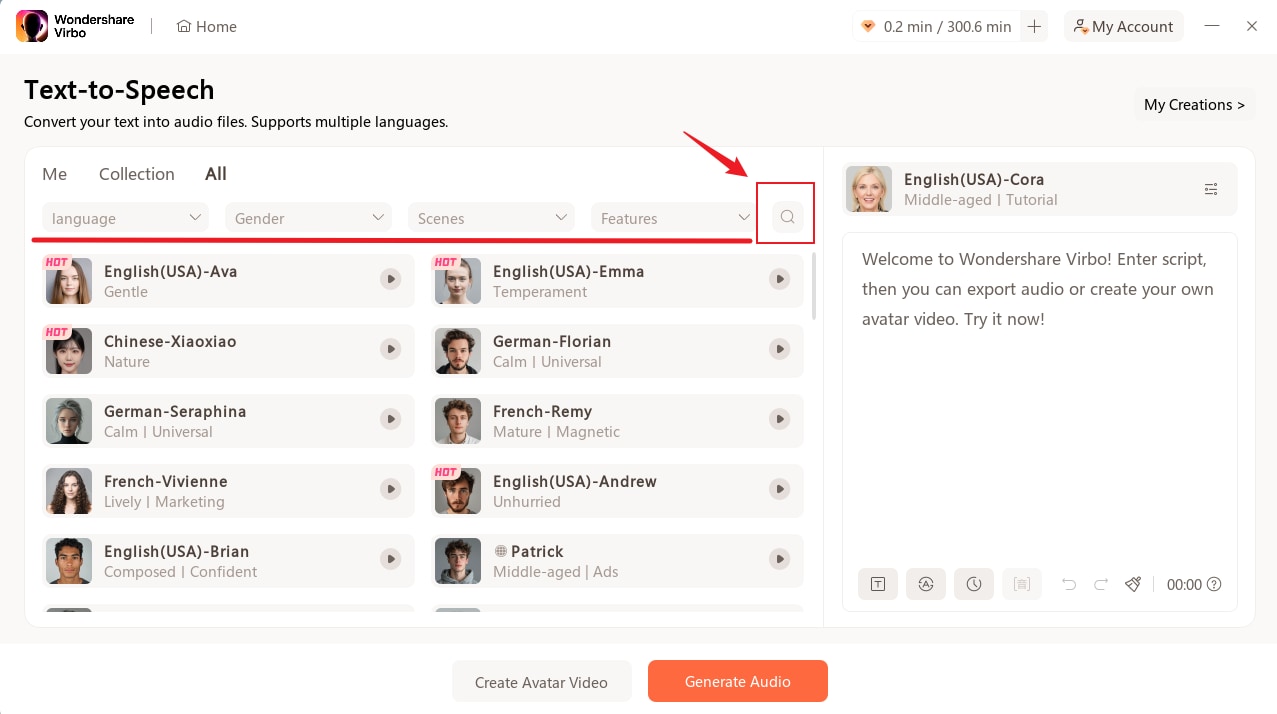
Copy the pre-prepared "Live Script" into the script input box, and select an appropriate voice tone.
Note: The language of the voice tone you choose must match the language of the script. If your script is written in English, you should select an English voice tone.
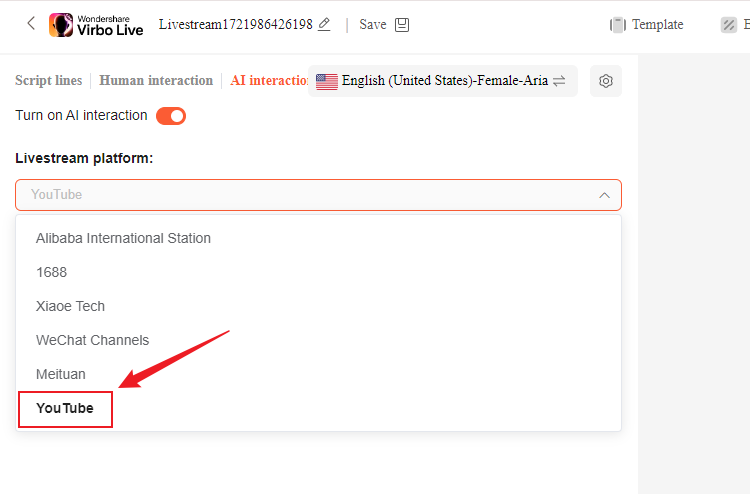
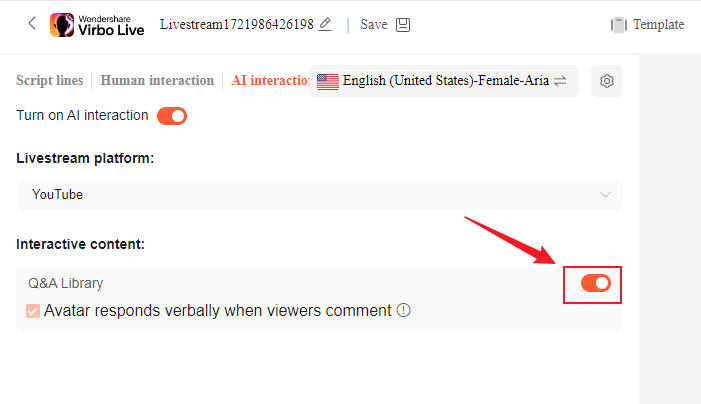
- Step 4: Setting Up Smart Interaction
Open "AI Interaction" and select the platform as "YouTube." Then turn on the Q&A library switch under Smart Interaction.
- Step 5: Activating the Digital Avatar
Click on "Start Live" in the top right corner. A digital avatar window will pop up, showing "Starting up."

Wait until the digital avatar appears on the screen, then the setup is complete.
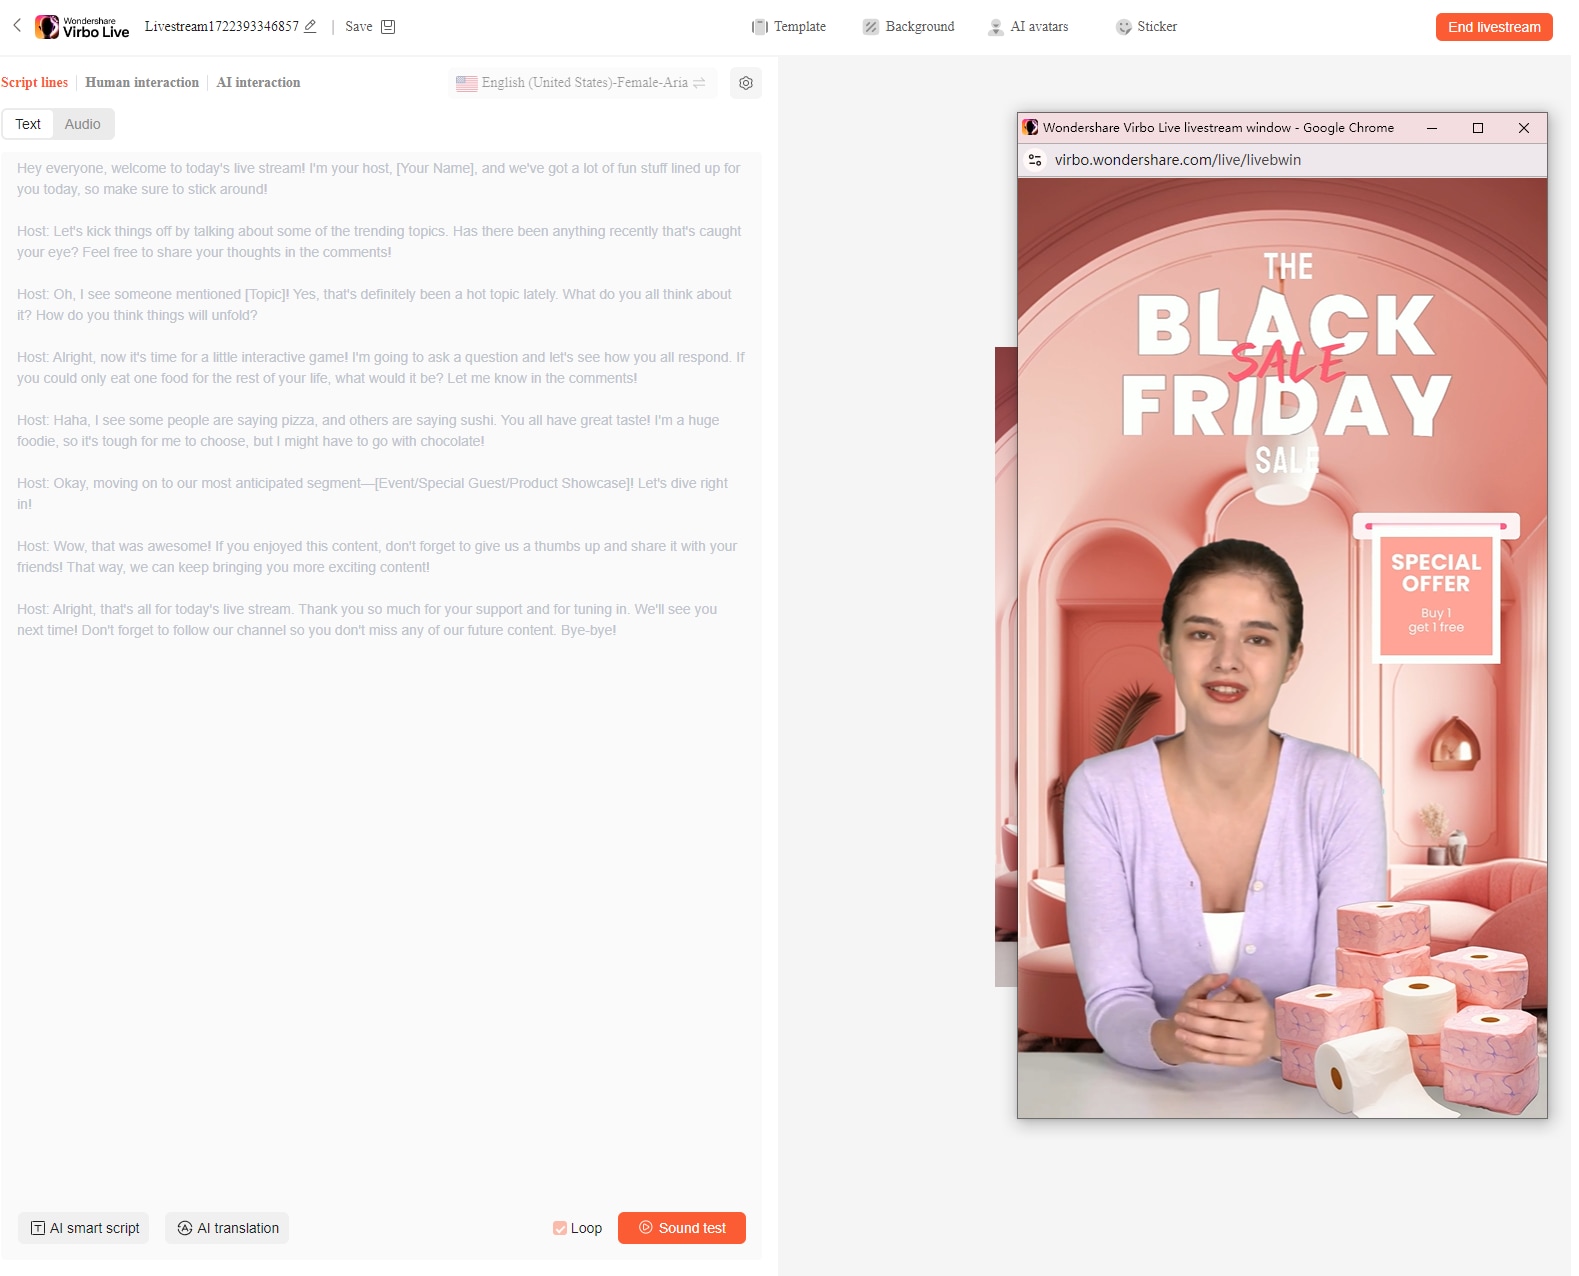
Note: If you have a second vertical screen, you can press F11 to go full screen for clearer quality. If you don't have a vertical screen, you can ignore this step.
2. Streaming Live with OBS Studio
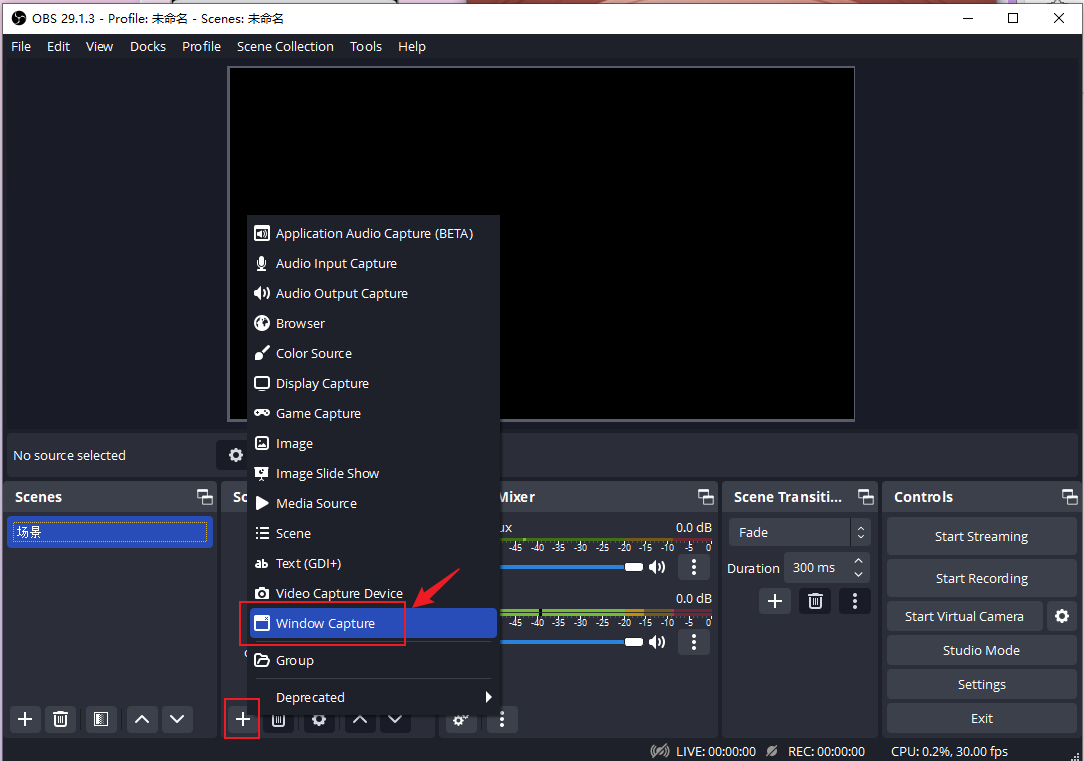
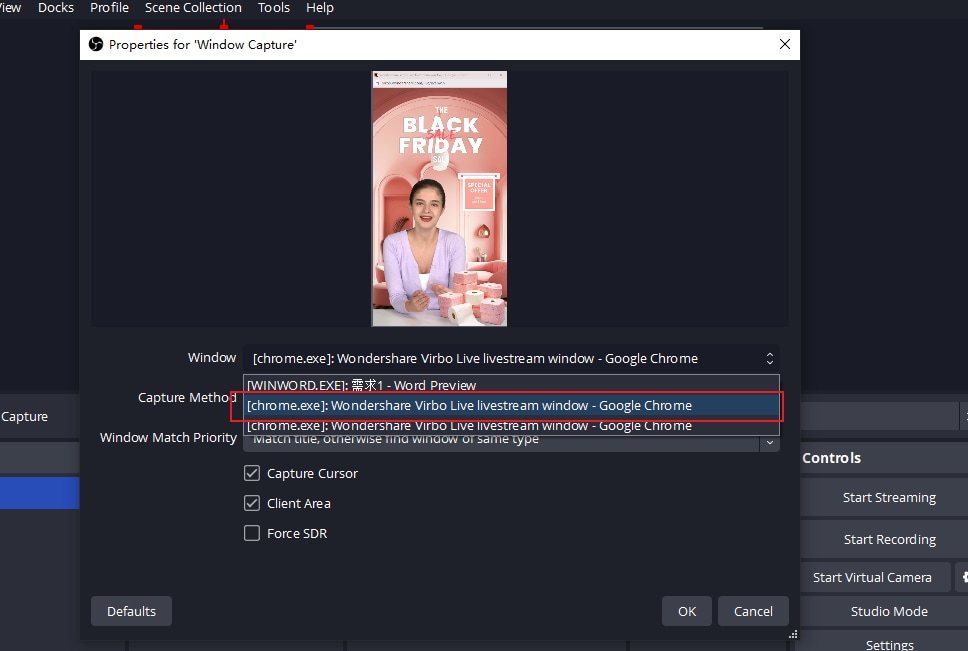
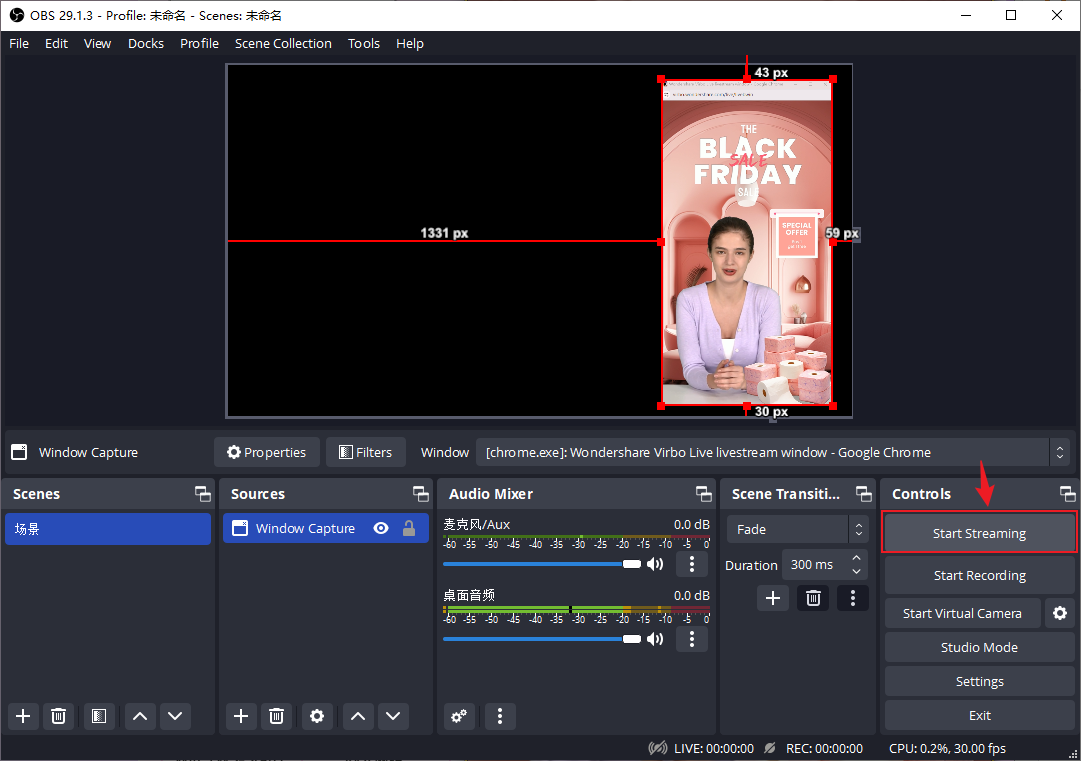
- Open OBS Studio, click the + icon, select "Window Capture," choose the digital avatar live window, and click OK.
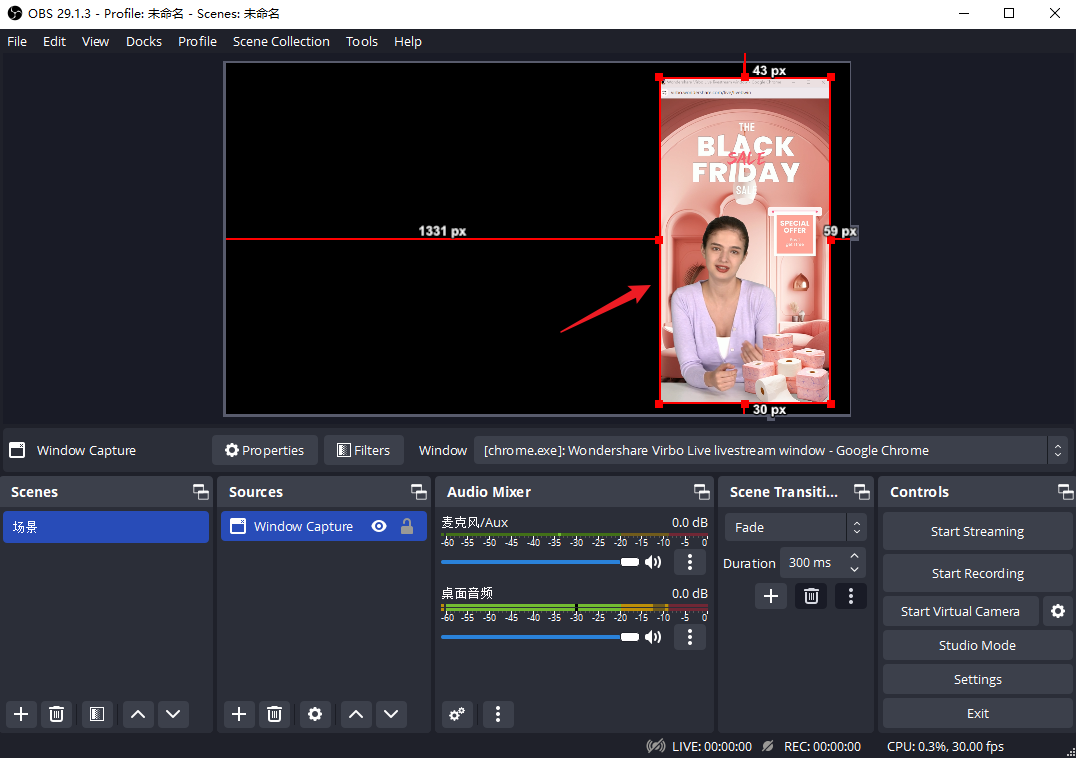
- Adjust the size and position of the window as needed. You can use Alt + mouse to resize or crop the window to remove the URL bar if necessary.
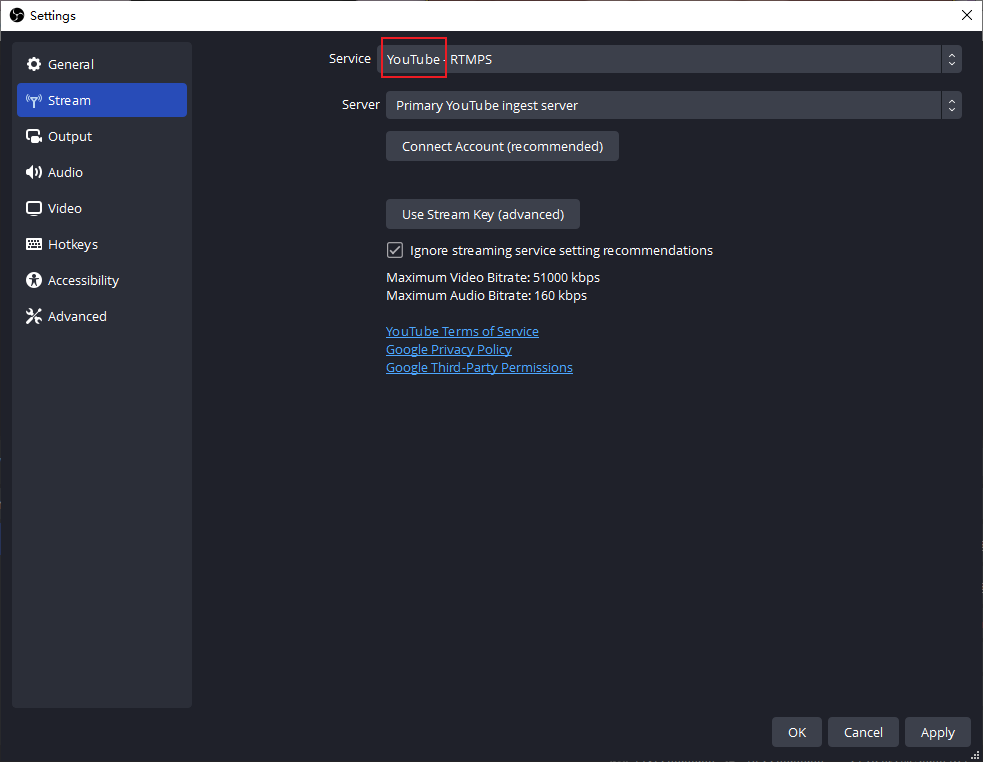
- In OBS Studio, go to Settings > Stream, select the streaming platform as YOUTUBE, then link your YouTube account and click OK.

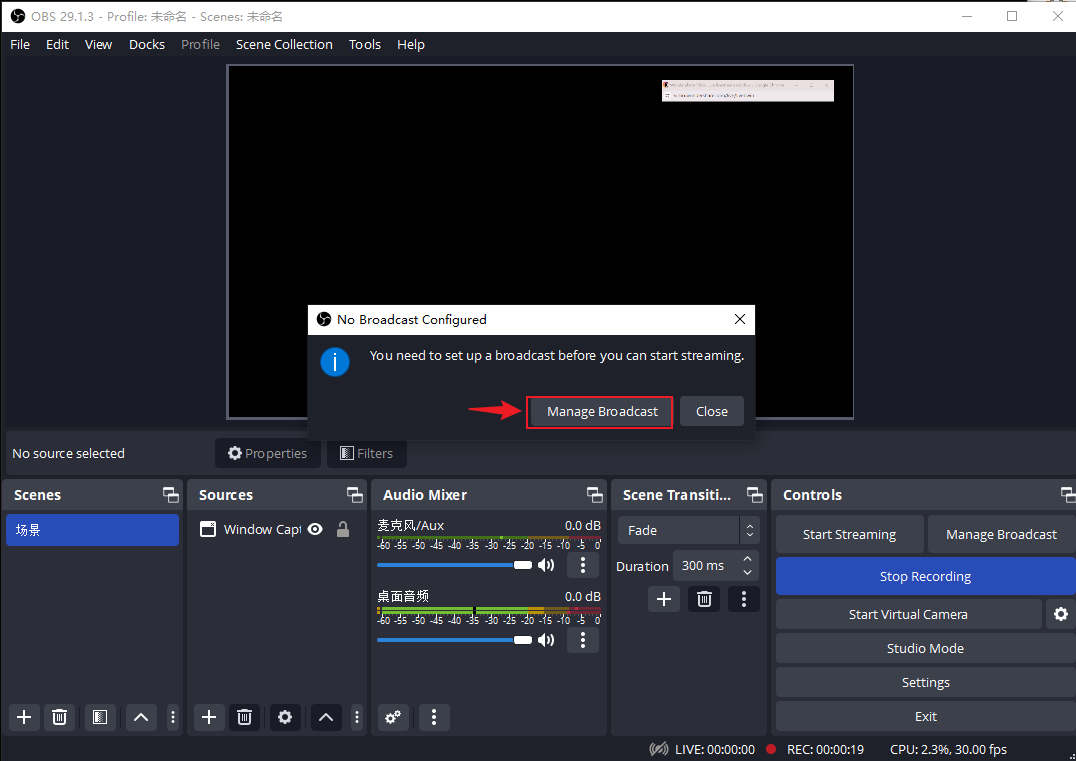
- Click "Start Streaming" in OBS Studio! You will be prompted to manage the stream; follow the instructions to create a live stream and click to start streaming. At this point, the live broadcast is successfully started!
Note: All sounds played on the computer will be broadcast live. It is best to close any other video or audio playing webpages or software, except for the digital avatar live window, unless you specifically need to play background music other than the digital avatar's voice.
Part 6 How to Automatically Answer Questions
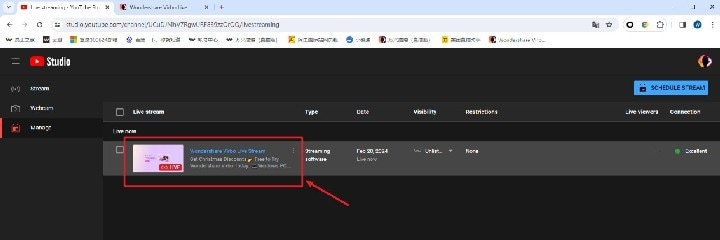
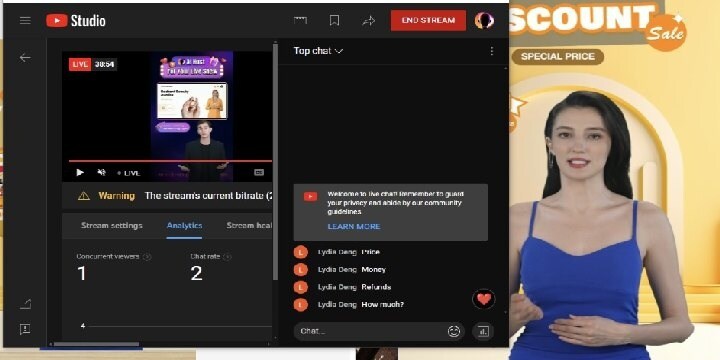
1. Log in to the YouTube website (youtube.com/), click the “+”, and then click "Go Live".

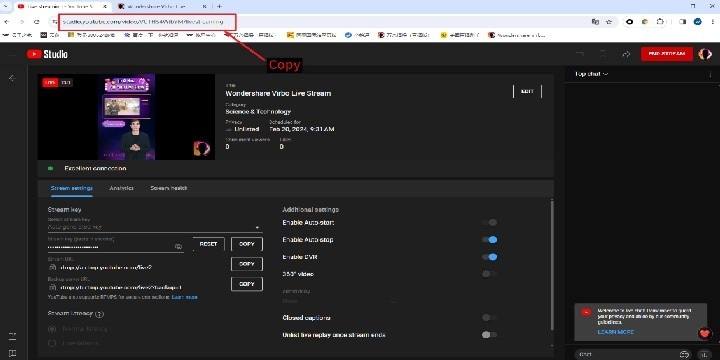
2. Go to the YouTube Control Room webpage for the ongoing live stream, then copy the link and paste it into the input box under Smart Interaction in Wondershare Filmora (Live Version). Click "Start Capturing."
Part 7 Final Check
- The Control Room webpage should remain open.
- The digital avatar's small live window should also remain open.
TikTok
Operational Steps
Part 1 platform features
- Supports capturing camera, window, screen, mobile screen, game process, images and videos, text
- To start a live stream on the TikTok PC client, certain conditions must be met (see: TikTok Creator Center Help). Please ensure that your account meets the conditions and that you have live streaming permissions enabled.
Part 2 Basic Configuration
1. Computer Requirements
A computer with standard configuration; both desktop and laptop computers are acceptable.
2. Network Requirements
- The average internet speed in the computer's network environment should not be lower than 5 Mbps. A poor internet connection can cause the live stream to be unstable.
- It is recommended to use a wired connection as Wi-Fi networks can be unstable.
- It is recommended to use a dedicated network and avoid using public networks.
Part 3 Software Installation
The order of installation for the three software programs is as follows: OBS Studio, TikTok Live Studio, and then the plugins.
1. OBS Studio
Step1 Download and install OBS
Download Links:https://obsproject.com/
Step2:Rename OBS Virtual Camera
- Open OBS and click to start the virtual camera.
- Change the OBS display to portrait mode.
In OBS, go to Settings > Video, and manually change the resolution to "1080x1920."
2.TikTok Live Studio Installation:
Download link: https://www.tiktok.com/studio/download
After downloading, simply complete the installation.
3. Third-party plug-in installation
1. Download and unzip the plugin
Download Links:https://drive.google.com/file/d/1gf6-1UHUZ6tSsIIT5hk3TPQHzHQDvb6A/view?usp=sharing
After the plugin is downloaded, unzip it locally.
2. Updating Chrome to the latest version
Step3 Loading Plug-ins
- Open Chrome browser, go to Settings > Extensions > Manage Extensions, enable Developer Mode, then click 'Load unpacked’.
- Select the local plugin folder that was unpacked in the previous step; the plugin will now be displayed on the page (as shown in the image).
Choose dmHelperV3-0.0.11
Select the local plugin folder
- Click on 'Details' and enable the 'Pin' option. If you plan to use Incognito mode, you also need to enable the 'Allow in Incognito' option.
- Refresh the browser; the plugin is now enabled and the setup is complete!
Step 4 Preparation for Broadcasting - Preparing Live Streaming Materials
1. Live Script:
- Word Count: It is recommended to have at least 5,000 words and a maximum of 50,000 words.
- Framework Reference: Write multiple rounds using the framework of "Interactive Dialogue + Company Introduction + Product Introduction + Promotional Dialogue + Closing Dialogue."
2. Product Images or Videos:
You can upload background images, product images, or product videos. You can use the common materials provided by the products, but using your own materials will result in a better live streaming effect.
3. Greeting Scripts (1-5 lines)
Example, one greeting script:
"Hello, David, you are from the US, right? The US is indeed one of our main markets, and we have special designs for the US market. Could you kindly tell us what products you are looking for?"
4. Q&A Scripts (up to 50 sets)
Example, one Q&A set:
Question Keywords: OEM; ODM; custom; customize; customized
Response 1: "Yes, we support OEM and ODM customization services, and we have done many customization cases. You can send us your design & functions, then we will provide you with a full quotation."
Response 2: "Thank you for your message. We support customized services. Do you have your own design ready? Please tell us your needs."
Response 3: ...
Part5 How to Start Broadcasting?
1. Starting in Wondershare Virbo (Live Version)
- Step 1 Configuring the Q&A Library
On the product homepage, click on "Q&A Library" and then "Add Q&A." A functional pop-up window will appear where you can enter the Q&A scripts you have prepared in advance. Below are explanations for each field to fill out.
- Q&A Rule: Name this rule for easy identification. On the product homepage, you can see multiple live room templates to choose from. You can click on any template to start broadcasting directly, or you can delete some materials from the template and replace them with your own uploads.
- Keywords: If a viewer's question in the live room contains any of the keywords, the rule will be matched, and the digital avatar will respond. You can enter multiple keywords, separated by semicolons.
- Response Content: You can add up to five responses. The response content can include variables such as [Viewer Nickname], [Viewer Country], etc., which will automatically be filled with the viewer's ID and country each time it is triggered.
- For example, if a viewer asks in the live room, "How do I buy this?" and you have set keywords like "buy; sell; purchase; order; book," the digital avatar will match the keyword in the viewer's question and verbally deliver the response you set. If you choose a sequential response mode for the content, the digital avatar will respond with one of the responses in order each time the Q&A is triggered. If you choose a random response mode, the digital avatar will randomly select one response to deliver each time the rule is triggered.
- Video Display: If you upload a video for this rule, the video will be displayed in the specified position on the live screen when this Q&A rule is triggered, until the digital avatar finishes delivering the response. There are three positions available for the video: top third, middle third, and bottom third of the screen.
- The last setting is for anti-spam control. This is used to control the frequency of responses from the digital avatar. The larger the interval time you set, the lower the frequency of responses from the digital avatar. You can adjust this according to the interaction frequency in your live room.
- Step 2. Setting Up a Live Room
Create a new live room by selecting a digital avatar and adding materials on the canvas.
There are two methods to set up a live room:
Method 1: Choosing a Built-in Template
On the product homepage, you can see multiple live room templates to choose from. You can click on any template to start broadcasting directly, or you can delete some materials from the template and replace them with your own uploads.
Method 2: Building a Personalized Live Room
On the product homepage, click "Create Blank Live Room," then you can upload and use your own images or videos to freely design the live room.
- First, click "Background," then "Upload Background," and select an image, such as a company showroom, culture wall, sample room, or factory image (something that reflects the company's strength, culture, or products).
- After uploading, click "My Background" and select the image just uploaded to set it as the background.
- Next, click "AI Avatar" and choose the digital avatar image, then place it in an appropriate position.
- Then, click "Sticker" and select a table from the sticker library, placing it in front of the digital avatar to simulate a real table.
- After that, click "Upload Sticker" to upload product images or short videos.
- Once uploaded, click "My Stickers" and select the product or short video. The product can be placed on the table and the short video at the top. This completes the setup of the personalized live room.
- Step 3 Configuring the Live Script
Copy the pre-prepared "Live Script" into the script input box, and select an appropriate voice tone.
Note: The language of the voice tone you choose must match the language of the script. If your script is written in English, you should select an English voice tone.
- Step 4: Activating the Digital Avatar
Click on "Start Live" in the top right corner. A digital avatar window will pop up, showing "Starting up."
Wait until the digital avatar appears on the screen, then the setup is complete.
Note: If you have a second vertical screen, you can press F11 to go full screen for clearer quality. If you don't have a vertical screen, you can ignore this step.
2. Streaming Live with OBS Studio
- Open OBS Studio, click the + icon, select "Window Capture," choose the digital avatar live window, and click OK.
- Adjust the size and position of the window as needed. You can use Alt + mouse to resize or crop the window to remove the URL bar if necessary.
3. Start Broadcasting on TikTok Live Studio
- Keep your equipment, network, and browser ready
-
- Please check the Device/Network/Browser Requirements for a detailed guide.
-
- Initiate the Live Stream
- Download and open the TikTok Live Studio and tap the "add source" icon (+) at the left of the screen.
 Login
Login- Select Virbo LIVE browser (chrome.exe) from the menu. Once you select Virbo LIVE successfully, you'll be able to see a preview of your video feed.
 Adjust source
- In this part, drag and manipulate the controls to adjust the screen, ensuring a perfect showcase.
 Adjust screen
-
- When you're ready, tap "Go Live" to begin streaming.
Note:
If your screen shows " Tiktok Live studio access, it will soon be available." Stay tuned for updates. This condition means that you still need to meet the requirements for Tiktok Live.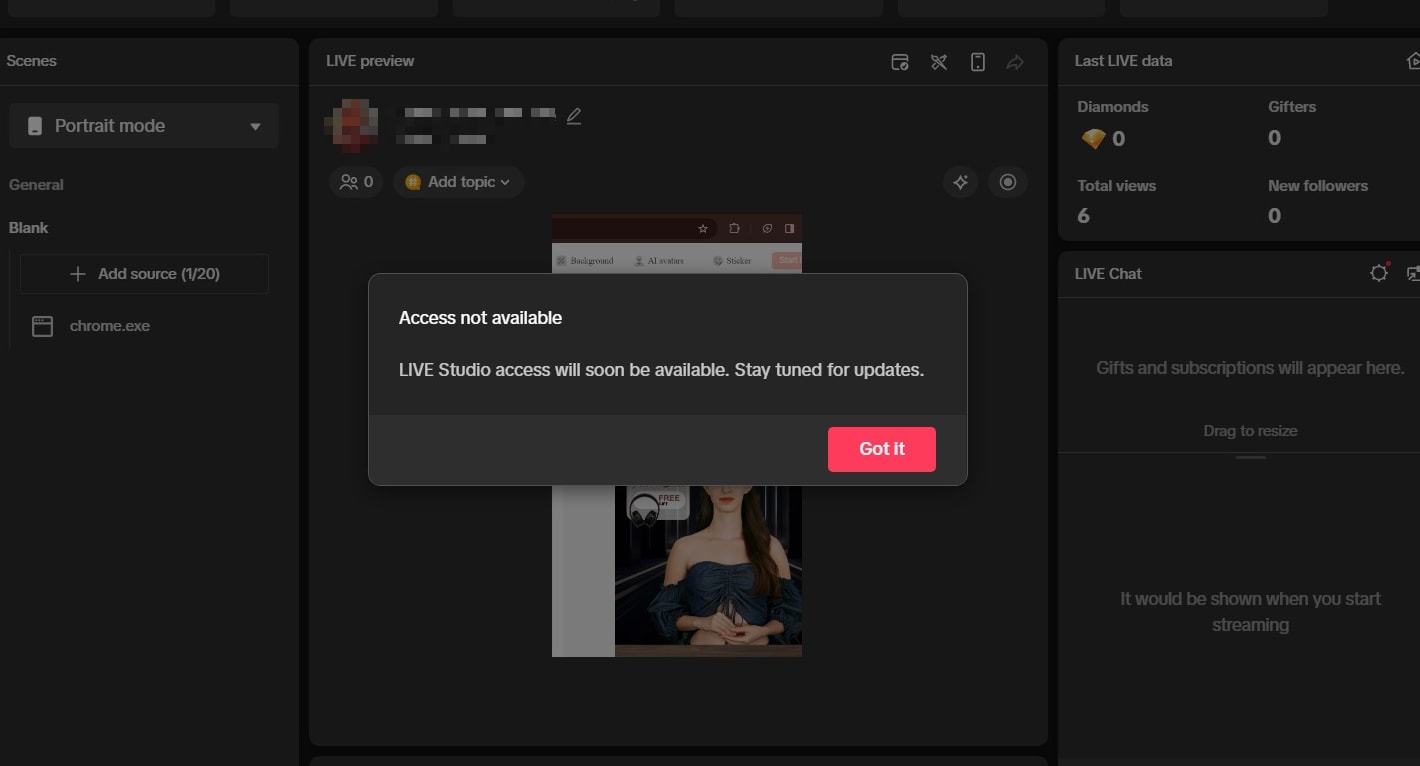
WeChat Video
Operational Steps
- Prepare Equipment, Network, and Browser
- Prepare Materials
- Initiate the Live Stream
- Start Live Streaming on WeChat Video Live Companion
- Log in to the WeChat Video Live Companion client, click the material management "+" sign - Window, select the digital person live window, and click OK.
- Alt + mouse or zoom the window to remove the URL bar. Click "Start Live," and the live stream has started.
Kwai
Operational Steps
- Prepare Equipment, Network, and Browser
- Prepare Materials
- Initiate the Live Stream
- Start Live Streaming on Kuaishou Live Companion
- Log in to the Kuaishou Live Companion client, click the material management "+" sign - Window, select the digital person live window, and click OK.
- Alt + mouse or zoom the window to remove the URL bar. Click "Start Live," and the live stream has started.