Professionals and content creators now use different social media platforms for live streaming. There are many big names on these platforms, such as Instagram. Instagram is one of the most-used networks, with over 2 billion monthly active users. Using this live-stream platform is always a plus for companies and individuals.
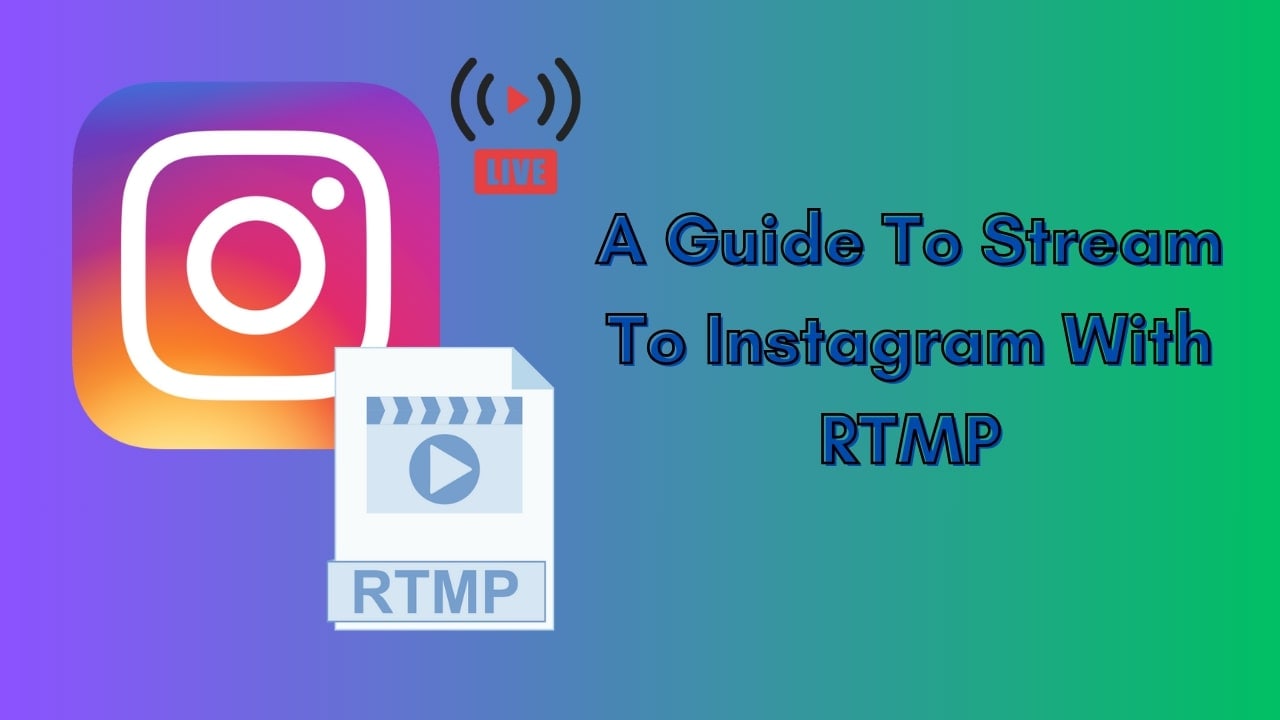
However, the discussion is about how to stream to Instagram with an RTMP. This detailed guide helps you in using RTMP Instagram for live streaming. Furthermore, you will also learn about a recommended tool that offers AI-powered features for broadcasting.
In this article
Part 1. Some Rules and Requirements To Understand Before Live Streaming on Instagram
Like every platform, Instagram has some protocols for broadcasting content to global audiences. Therefore, learning the rules and requirements before going live on Instagram is necessary. First, your account should be at least 30 days old; otherwise, they can restrict your stream.
There is a rule that you can go live for 4 hours per stream without retakes. This length was increased from 60 minutes in the recent update. Also, you can repost a live video on your profile if it is more than 15 minutes long. Instagram allows you to schedule a stream from 1 hour to 90 days in advance.
The initial requirement of Instagram Live RTMP is that your content be respectful and updated. Additionally, you need to set your stream to 1920x1080 resolution on a vertical camera. Meanwhile, Instagram gives leverage on the number of followers so that you can start with minimum viewers. Also, there is no need to have a business account for live streaming.
Part 2. How To Live Stream to Instagram With an RTMP?
Setting high-quality live streams encourages people to tune into your broadcast. For this purpose, you need a seamless encoder like OBS. Unfortunately, Instagram doesn't officially support third-party encoders. To solve this query, you need an effective solution.
Therefore, the following steps guide streaming on Instagram with an RTMP (Real-Time Messaging Protocol). You will also learn how to set the required parameters in this comprehensive guide:
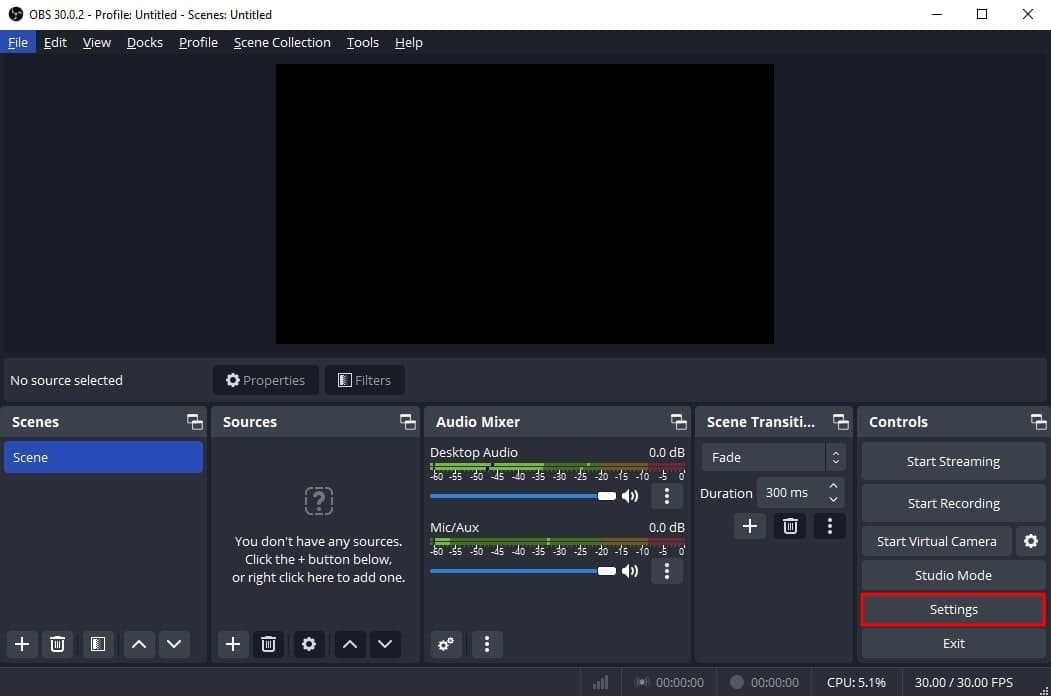
- Step 1. Start with downloading and launching OBS Studio on your PC. The first thing to do is set up vertical camera dimensions for RTMP Instagram live streaming. To access the settings window, hit the “Settings” option in the “Controls” panel.
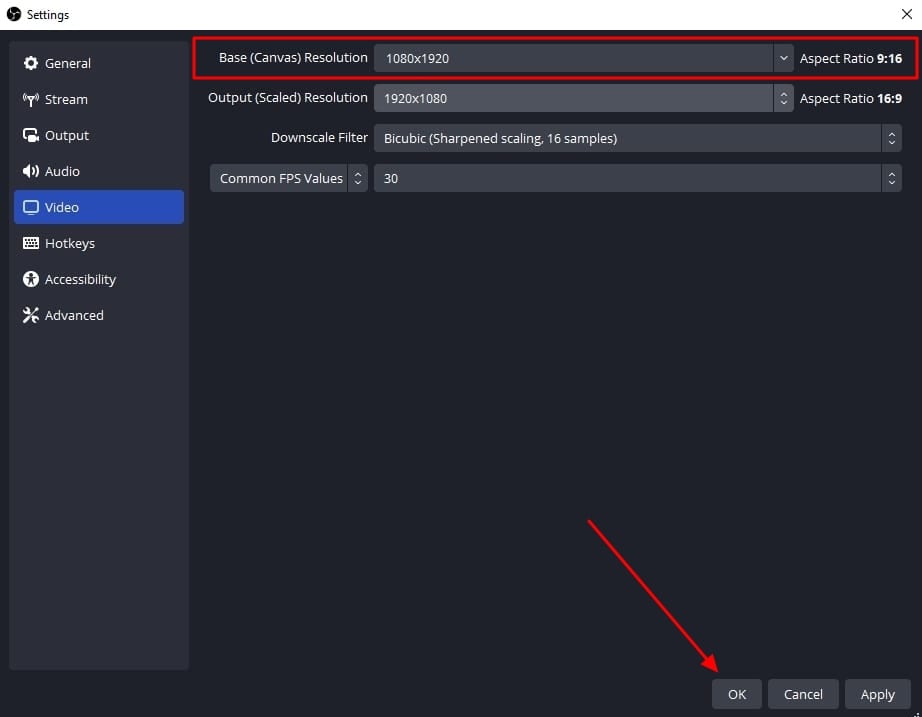
- Step 2. Look for the “Video” tab in the “Settings” window that opens. After that, enter “1080x1920” in the “Base (Canvas) Resolution” bar. Similarly, add a “1080x1920” value in the “Output (Scaled) Resolution” bar to set a 9:16 aspect ratio for vertical display. Then, hit the “OK” button to apply these changes to your Instagram streams.
- Step 3. After that, you need to add external sources to the scene. Click on the “+” icon in the “Scenes” panel or rename the scene. Once the scene is created, hit the “+” icon of the “Sources” panel. Then, select the “Video Capture Device” option from the menu and rename the device to your liking. After that, choose the video capture device from the “Device” dropdown and hit the “OK” option. Similarly, you can select the “Audio Input Capture” option to introduce an audio device.

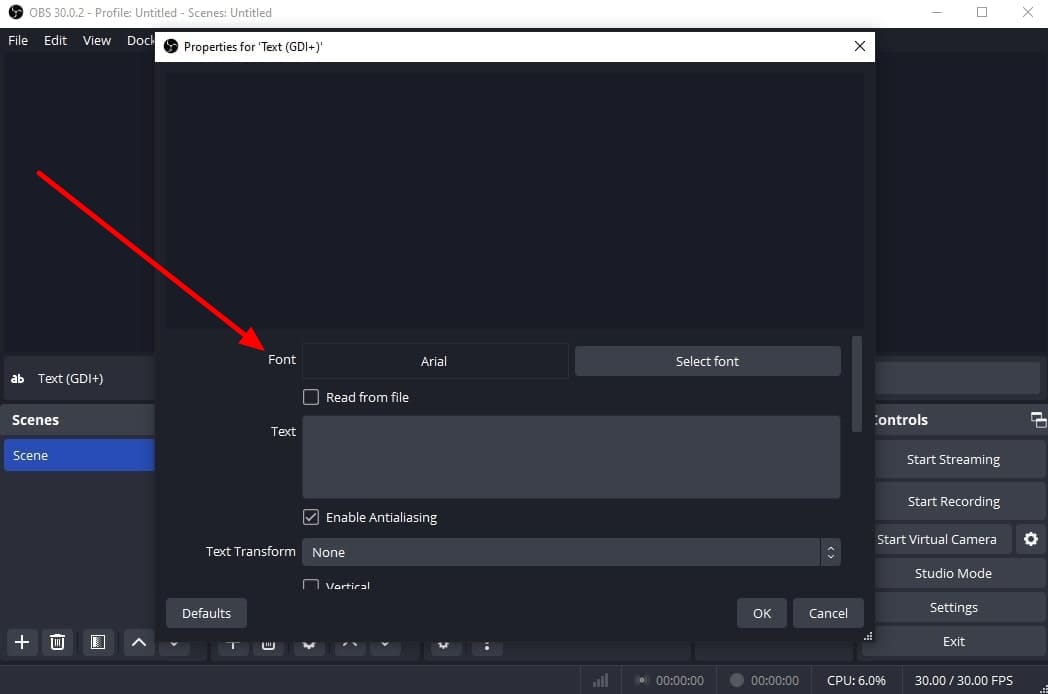
- Step 4. To add text overlays on your stream, hit the “+” icon again in the “Sources” panel. Choose the “Text (GDI+)” option and rename your overlay. On the next window, insert your text in the “Text” box. Then, click the “Select Font” button and choose your required font style and size. Additionally, you can change font color, opacity, alignment, background, and more. After customizing the text, hit the “OK” button to save the overlay in the sources section.
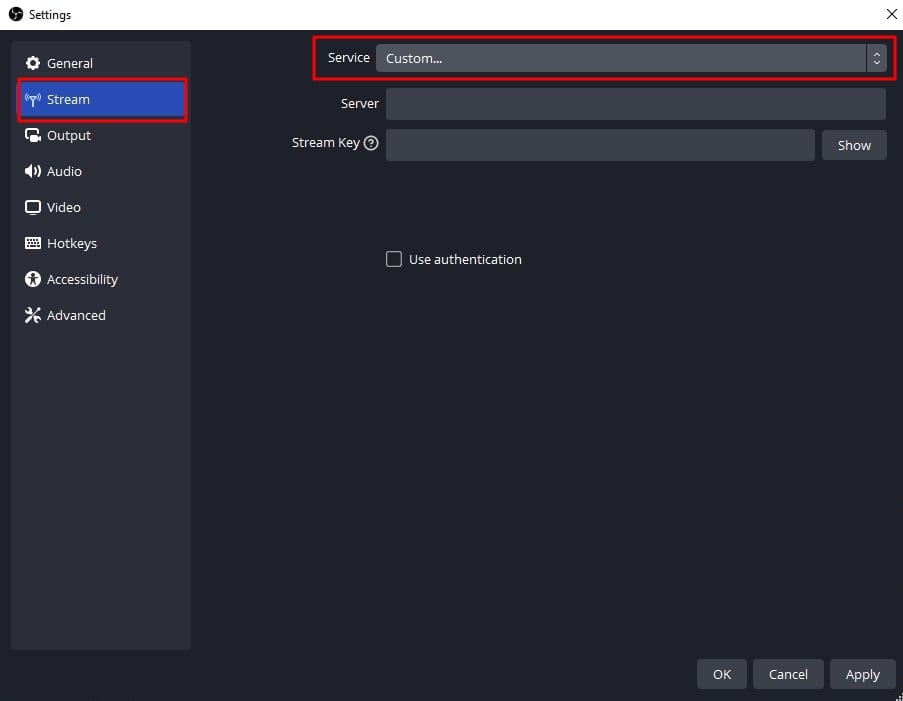
- Step 5. Afterward, select the “Stream” option in the settings window of OBS Studio. Set the “Service” to “Custom” from the dropdown. Then, you need to enter the server and stream key to proceed.
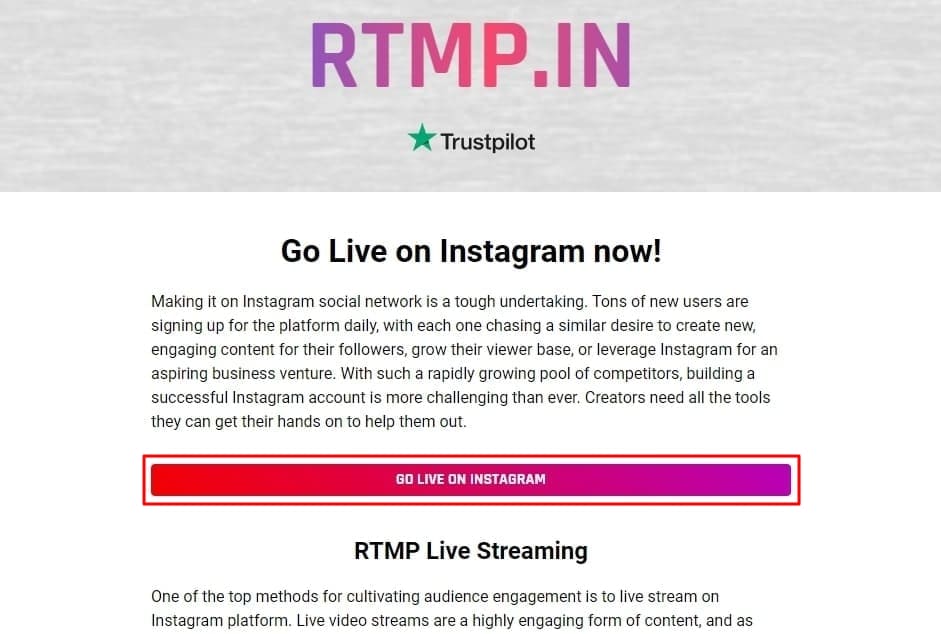
- Step 6. To get the server and stream key, visit rtmp.in on your browser. On the main interface of this Instagram RTMP, hit the “GO LIVE ON INSTAGRAM” widget. Then, it asks you to log in to your Instagram account.
- Step 7. Once you're logged in, it gives you a stream server URL and Stream key. First, copy the Server link and return to the OBS Studio software. Then, paste the link in the "Server" bar. After that, open the RTMP site again and hit the "Create New Broadcast" option.
You can also give a name to your broadcast in the "Broadcast Title" bar. After creating the broadcast, it shows the "Stream Key," which you can copy. Then, move again to the OBS Stream setting panel and paste the key in the "Stream Key" bar. Lastly, hit the "Apply" option to save all these settings for your stream.

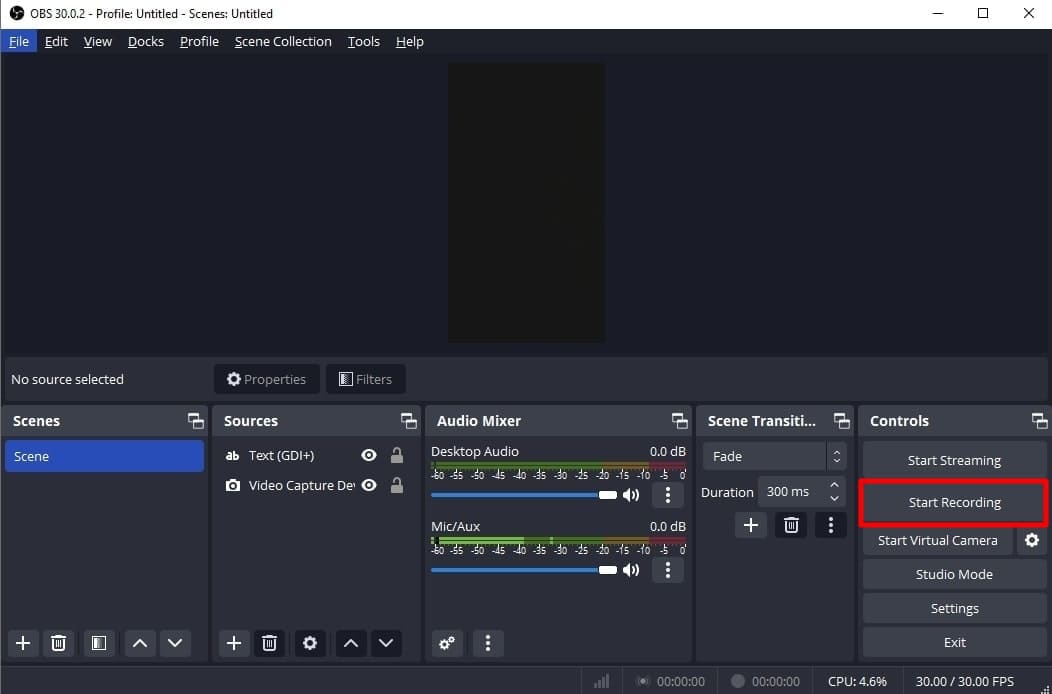
- Step 8. After getting ready, choose the "Start Streaming" option from the "Controls" panel. It starts your stream with selected parameters. To stop the stream, you can select the "Stop Streaming" option.
Part 3. How To Attract a Better Audience During Live Streaming on Instagram?
OBS Studio is an efficient software but offers limited functionality when it comes to engaging streams. Thus, you need an advanced solution that can help you reach global audiences through live streaming. For this purpose, Wondershare Virbo Live becomes an unsung hero for you. It provides AI-powered functions that help to start creative streams and generate more leads.
Moreover, the handy controls of Wondershare Virbo Live allow you to customize live streams to your requirements. Therefore, you can start streaming for different purposes, such as marketing, brand awareness, and more. Additionally, it allows you to set automatic responses and create a Q&A database to keep your audience engaged. Plus, it allows you to select creative AI avatars with different poses and outfits.
Key Features of Virbo Live
- You can choose different templates and backgrounds for a stunning streaming appearance.
- Users can write or generate scripts manually using the AI Smart Script feature. For this, they need to add prompts according to the script's purpose.
- This tool helps to translate scripts into multiple languages and accents. Also, you can get dubbed audio in different AI voices.
Simple Guide To Start Live Streaming Using Wondershare Virbo Live
Many live streaming tools exist, but Wondershare Virbo Live provides more controls. Now, the thing is how to create a live stream room with this tool. For this, follow the given steps one by one to start live streaming with Virbo Live:
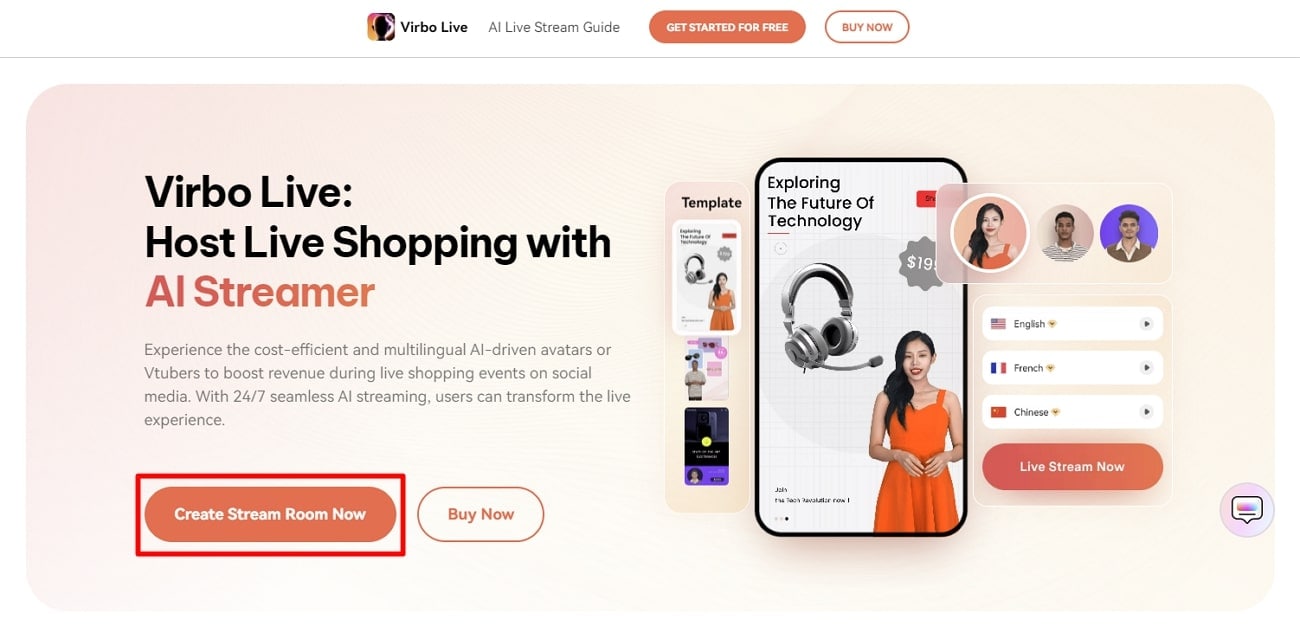
- Step 1. Visit the Official Site To Create a Stream Room
First,open theofficial website of Wondershare Virbo Live tool on your device. Navigate to the window and hit the “Create Stream Room Now” button. Upon doing that, it takes you inside the main interface of the tool.
- Step 2. Advance To Create a Blank Livestream Room
Once you get to the tool's home screen, select the “Create a Blank Livestream Room” option. Then, you can try different customization features to make your livestream room look stunning.

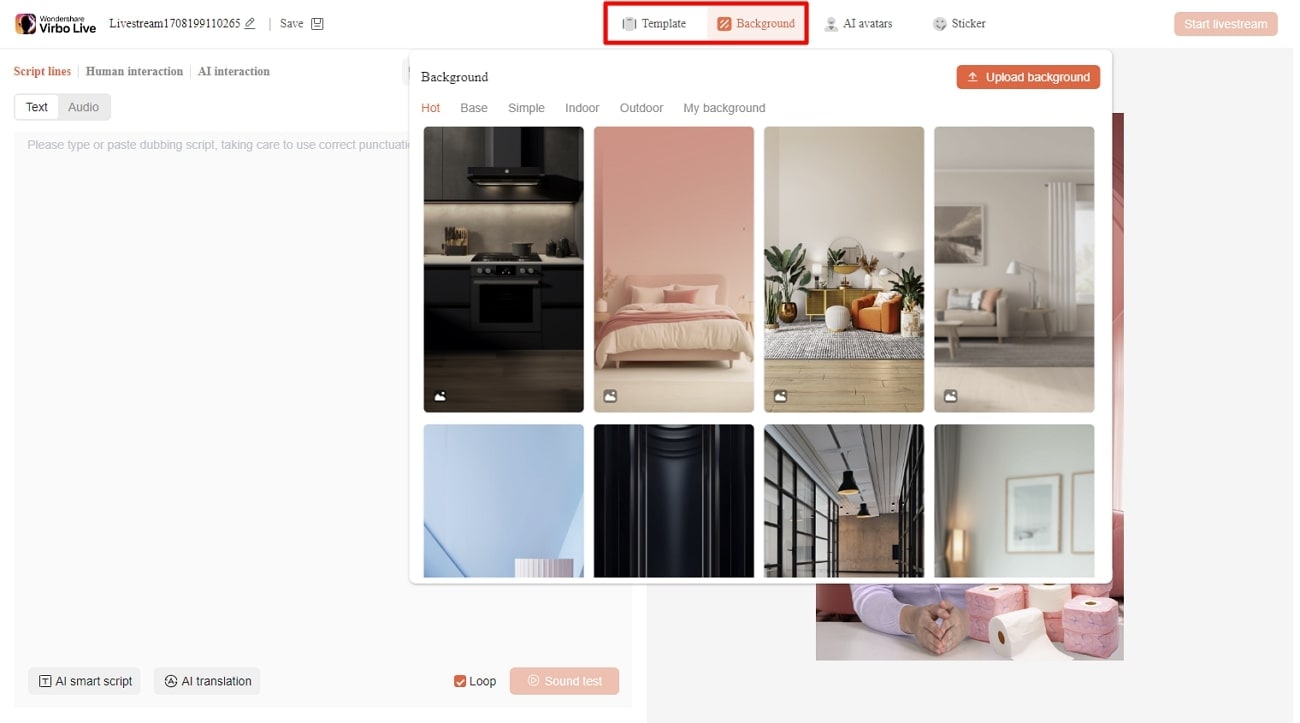
- Step 3. Customize Your Livestream Template and Background
After that, click on the “Template” tab to explore different templates. Choose a template that suits live streaming needs. Furthermore, open the “Background” tab from the same window to check exciting background options. You can select different backgrounds from variating categories in the same window.
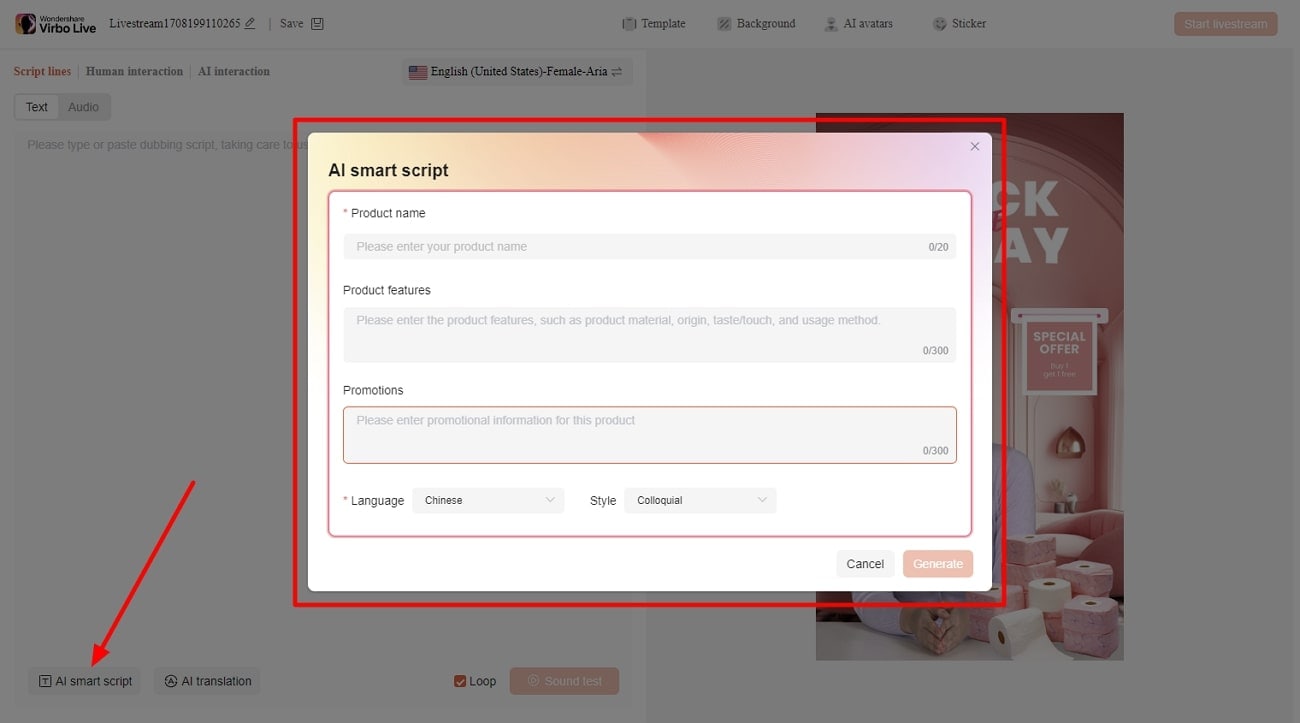
- Step 4. Add Script or Use AI Script Generator
Then, you need to provide the script for translation or dubbing. Select the “Text” given in the left side section for this. It provides a text box to type or paste your script text. Choose the “AI Smart Script” option from the bottom left corner if you don't have a script. Add prompts there, and it will generate your scripts instantly.
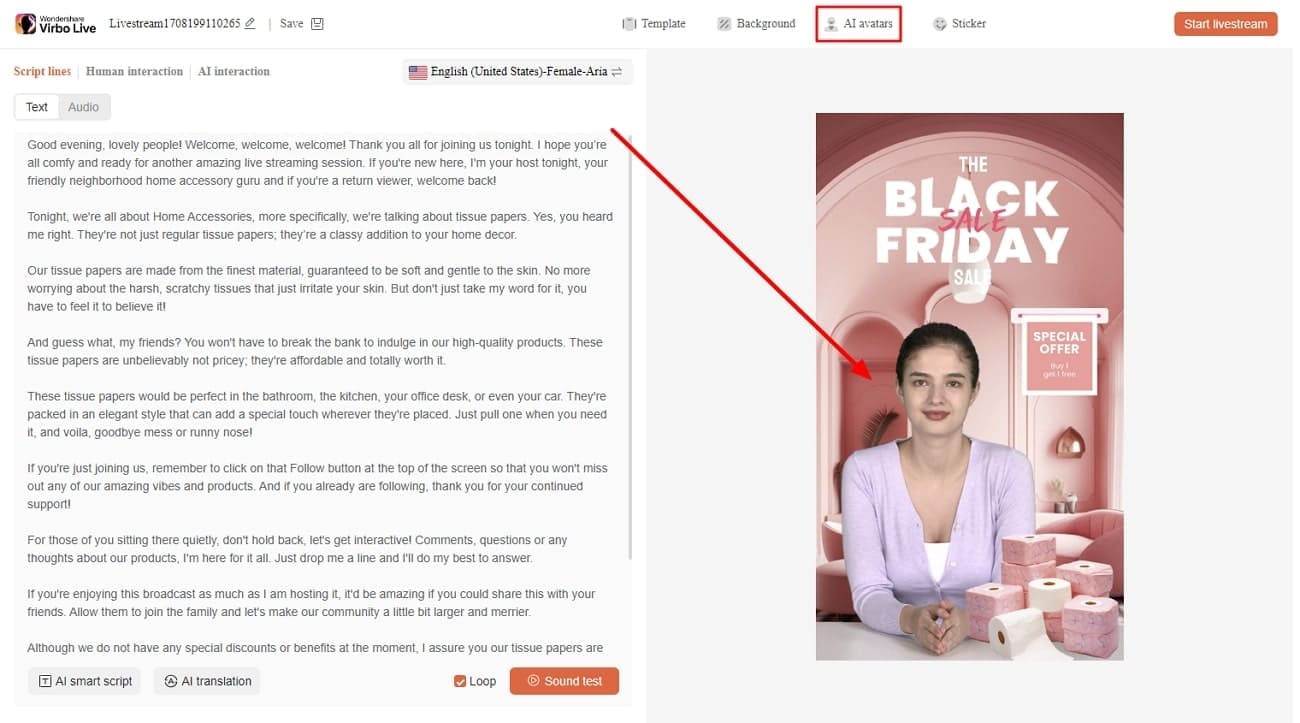
- Step 5. Select Creative AI Avatars According to Requirement
Select the “AI avatars” tab to unveil creative avatars. There is also a whole range of AI avatars to choose from. After selecting the one that suits your motive, you can preview your selected AI avatar before launching the stream.
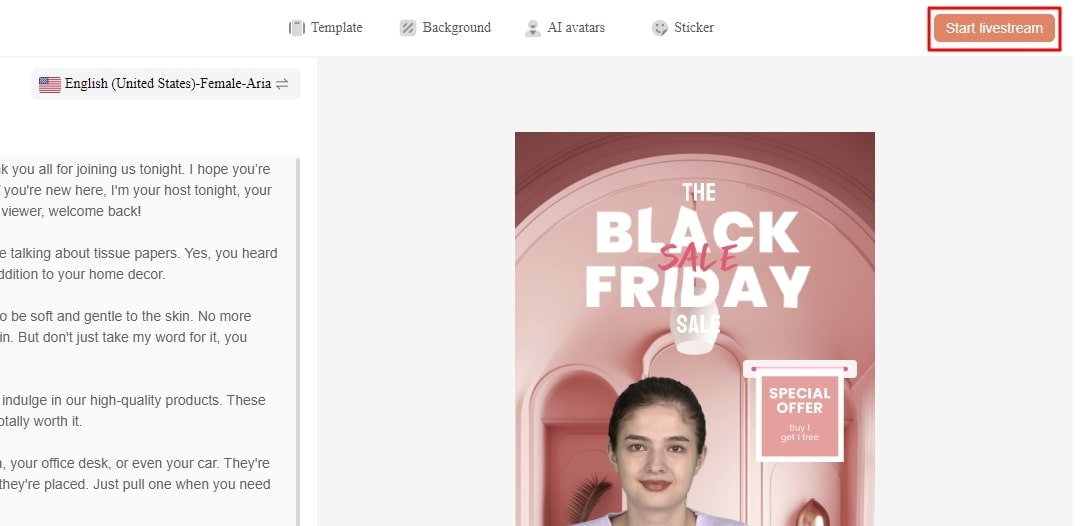
- Step 6. Start Your Livestream With All Selections
After finalizing all the options, you canproceed to start your stream. Select the “Start livestream” option from the top right corner in the same window.
Conclusion
Conclusively, this article intends to provide information about rules and requirements for live streaming on Instagram. You also learned how to live stream to Instagram with an RTMP like OBS Studio. Tools like Wondershare Virbo Live simplify your live streams with AI integration. Also, you can make your broadcast exciting for viewers by using different interactive elements.