Virbo User Guide for Mobile

AI Photo Generator- AI Image
Virbo's AI image feature offers an intuitive new way to bring your creative visions to life. With just a few taps, you can create AI images and take your creativity to new horizons. Specific steps are as follows:
Step 1.Enter Prompt
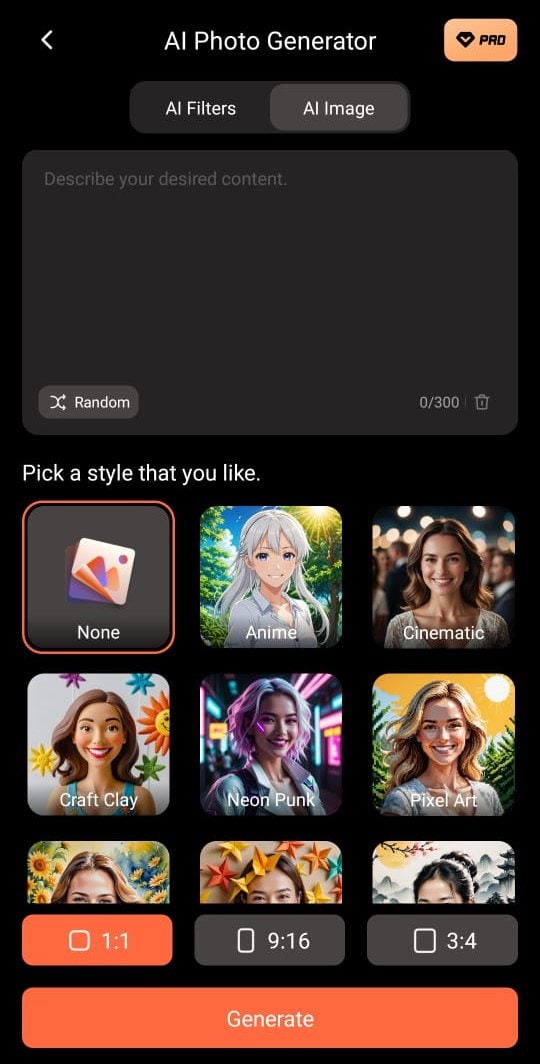
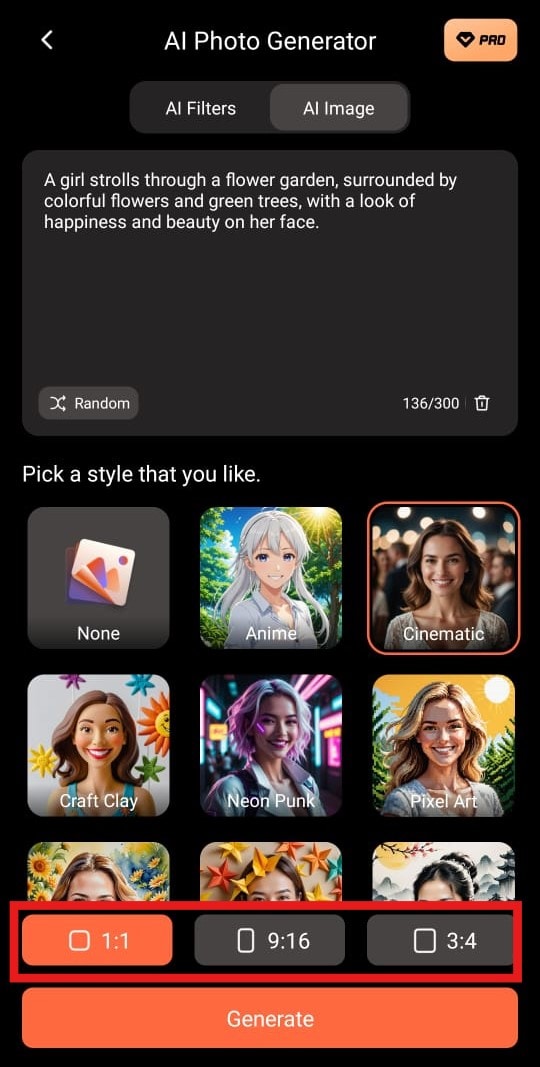
To use the AI Photo Generator feature in the Virbo app, go to the AI Image section, as shown in the screenshot below. You can enter a prompt (up to 300 characters) detailing what you want to create. If you're unsure what to type, tap the "Random" button next to it to generate a sample prompt. With 300 characters, you have more than enough space to describe an image.
Step 2.Select Style
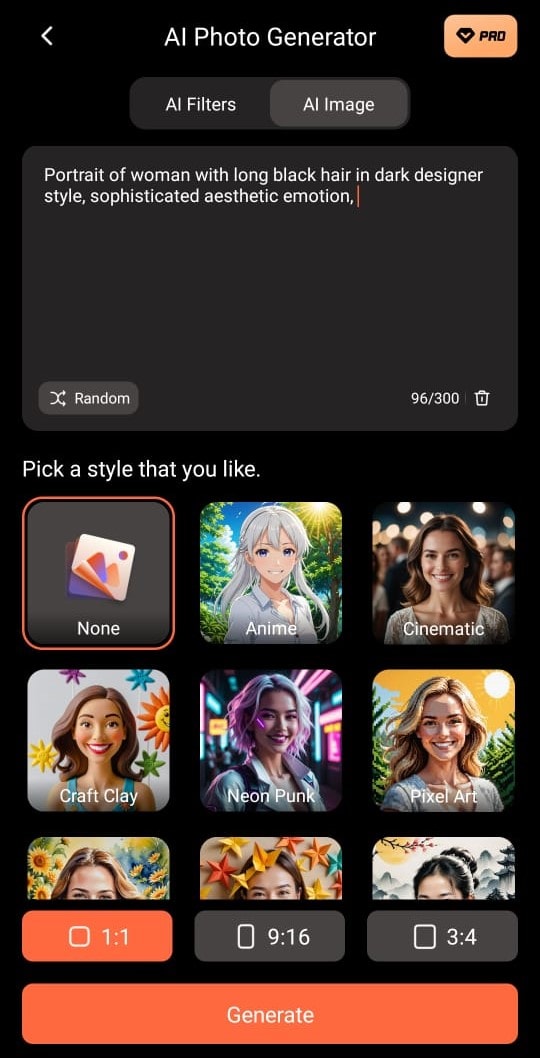
Next you can pick a style for generating your AI image. Virbo comes with 8 different styles for you to pick from. Alternatively, you can select “None” if you don’t want to. Here, you can also select the aspect ratio of the image to suit your project. Virbo supports 1:1, 9:16 and 3:4 aspect ratios.
Step 3.Generate AI Image
Tap the orange Generate button to begin the AI generation process. This can take a while, and generation cannot be canceled during this period
Step 4.Display the Results
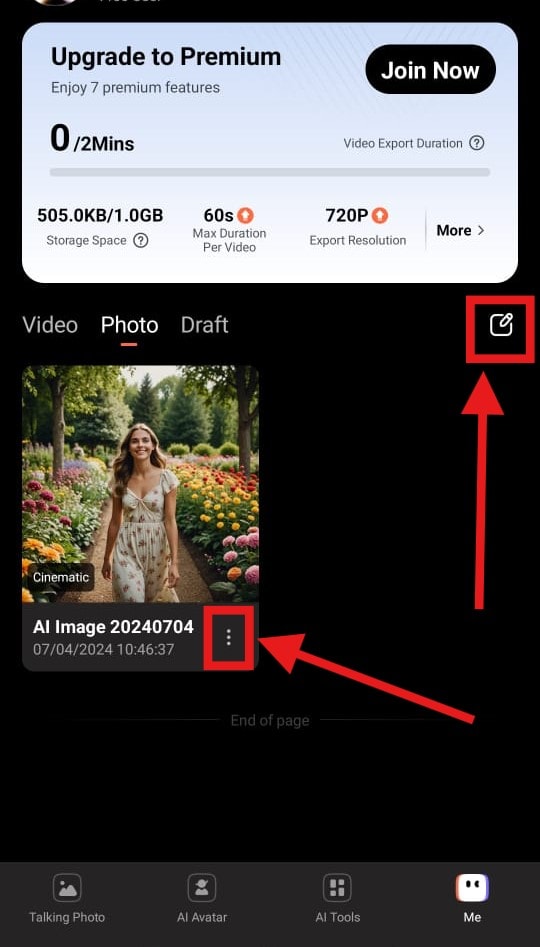
When the generation process is complete, you can find the new AI image in the “Me” section of the app. This section supports:
- Renaming and deleting picture tasks
- Supports batch management
- Generate Again if you don’t like the result
Step 5.Download Your Image
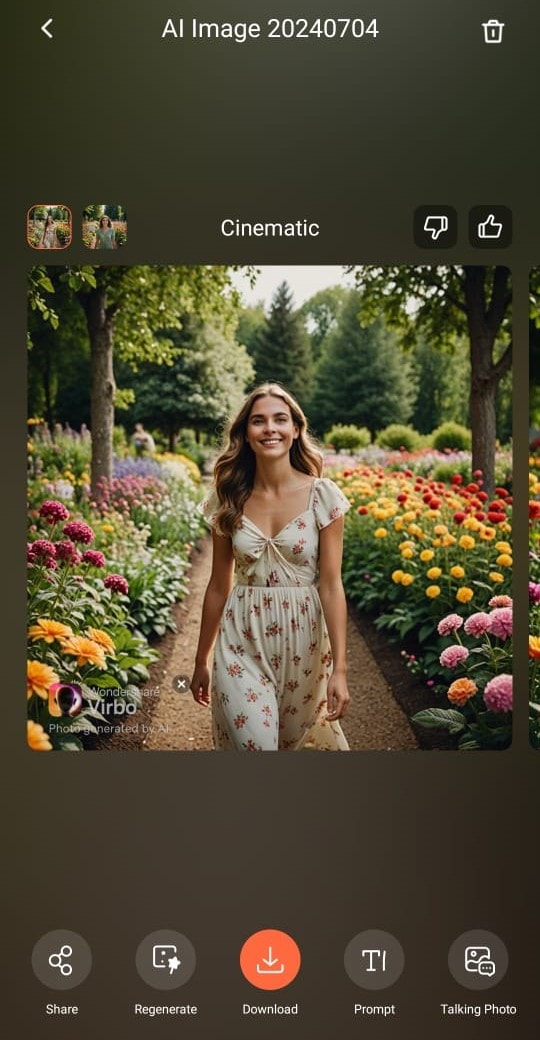
The single task display generates 2 pictures at a time. As seen in the screenshot below, you can download any of these two AI images as you please. It also supports:
- Supports sharing and downloading
- Supports likes and dislikes for single pictures
- Supports using generated pictures for talking photo video generation
- Support regenerating
- Lets you review your initial prompt
Note:
If the image generation process is taking too long, you can leave the page. Virbo will notify you once the process is complete.
