Dear Creators,
Thank you for your trust and support of Virbo.
Due to business strategy adjustments, Virbo officially discontinued operations at 00:00 (UTC) on June 30, 2025.
Users with an active purchase can continue to use the service at https://virbo.wondershare.com/app/. For users without a purchase, we recommend Media.io's Talking Avatar as an alternative tool.
The Virbo operation team has the final right of interpretation within the scope of the law.
Once again, we sincerely appreciate your support and understanding.
Virbo User Guide | Online
Step-by-Step Instructions and Guidelines for Creating Realistic AI Avatar Videos with Precision.
URL to Video (Online Version)
Creating promotional videos has never been easier with Virbo’s URL to Video feature.
In this guide, we’ll walk you through the process step-by-step—from pasting your URL to exporting your final video. With just a few clicks, you can turn product details into engaging, shareable content.
Index
Step 1. Access URL to Video
- Begin by openning the Virbo online dashboard . Then in the "More AI Tools" category, click on "URL to Video" to start the process.
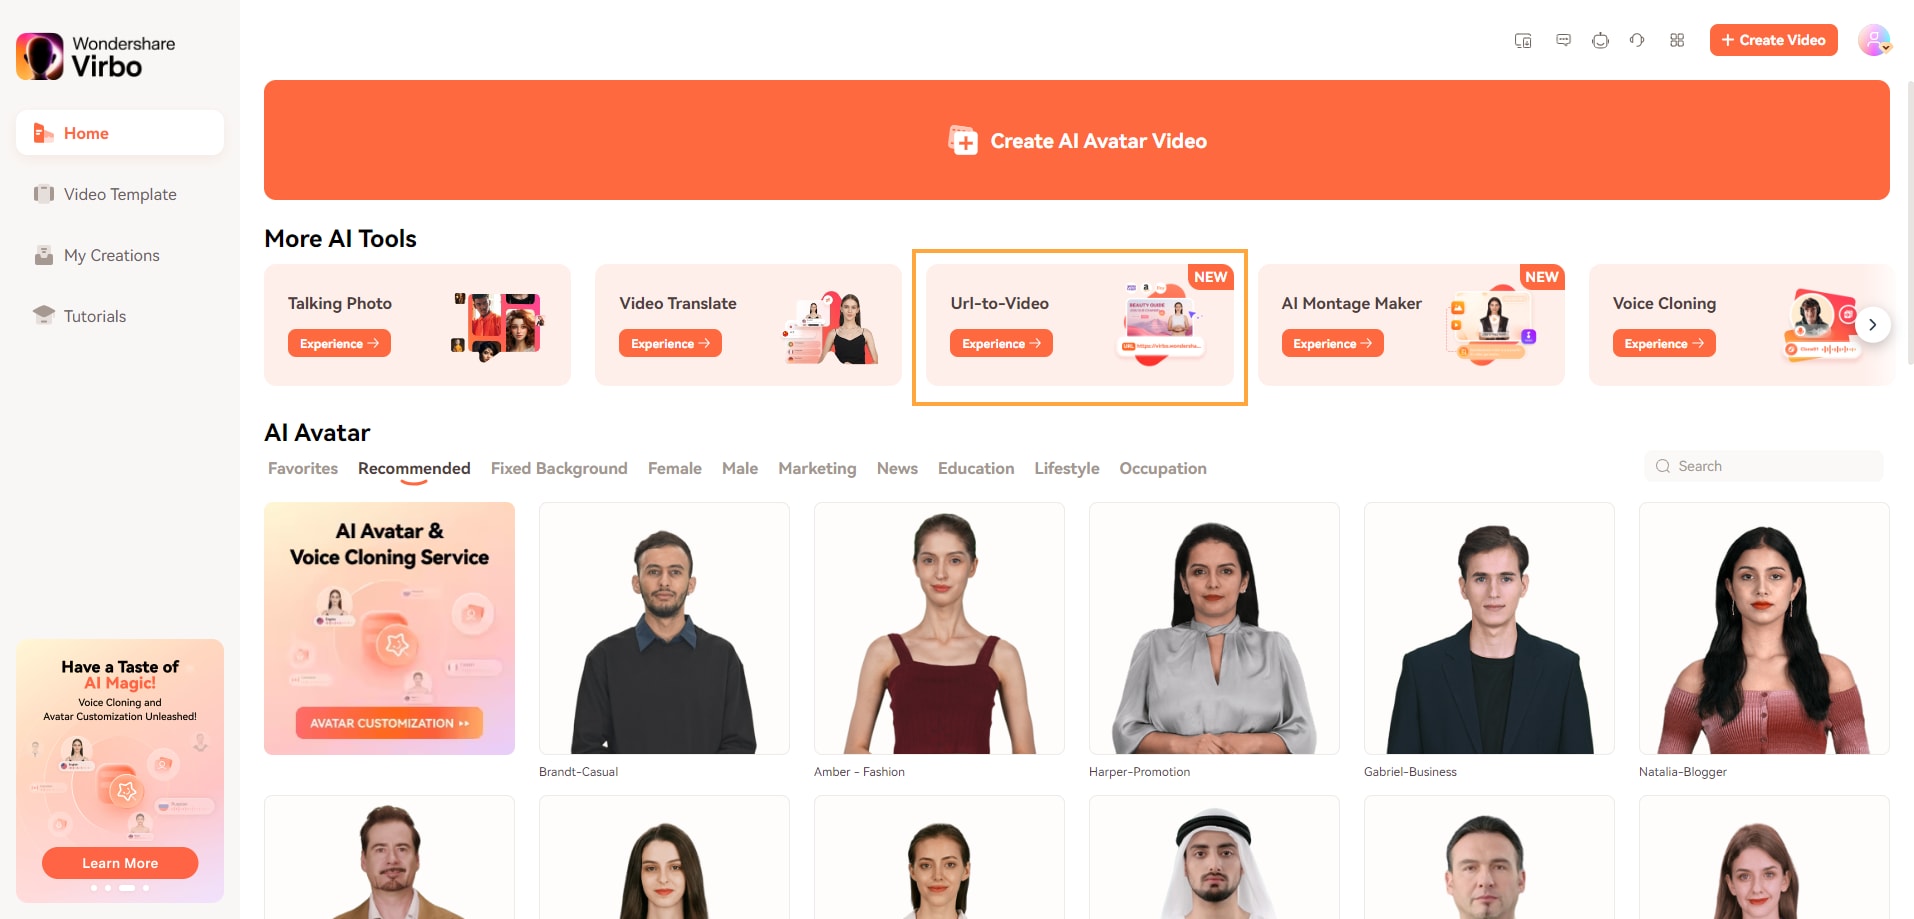
Access URL to Video
Step 2. Paste the URL
- Copy the product detail page URL from your e-commerce platform.
- Paste the URL into the input box on the URL to Video page.
- Click the "Analyze URL" button to start the analysis process.
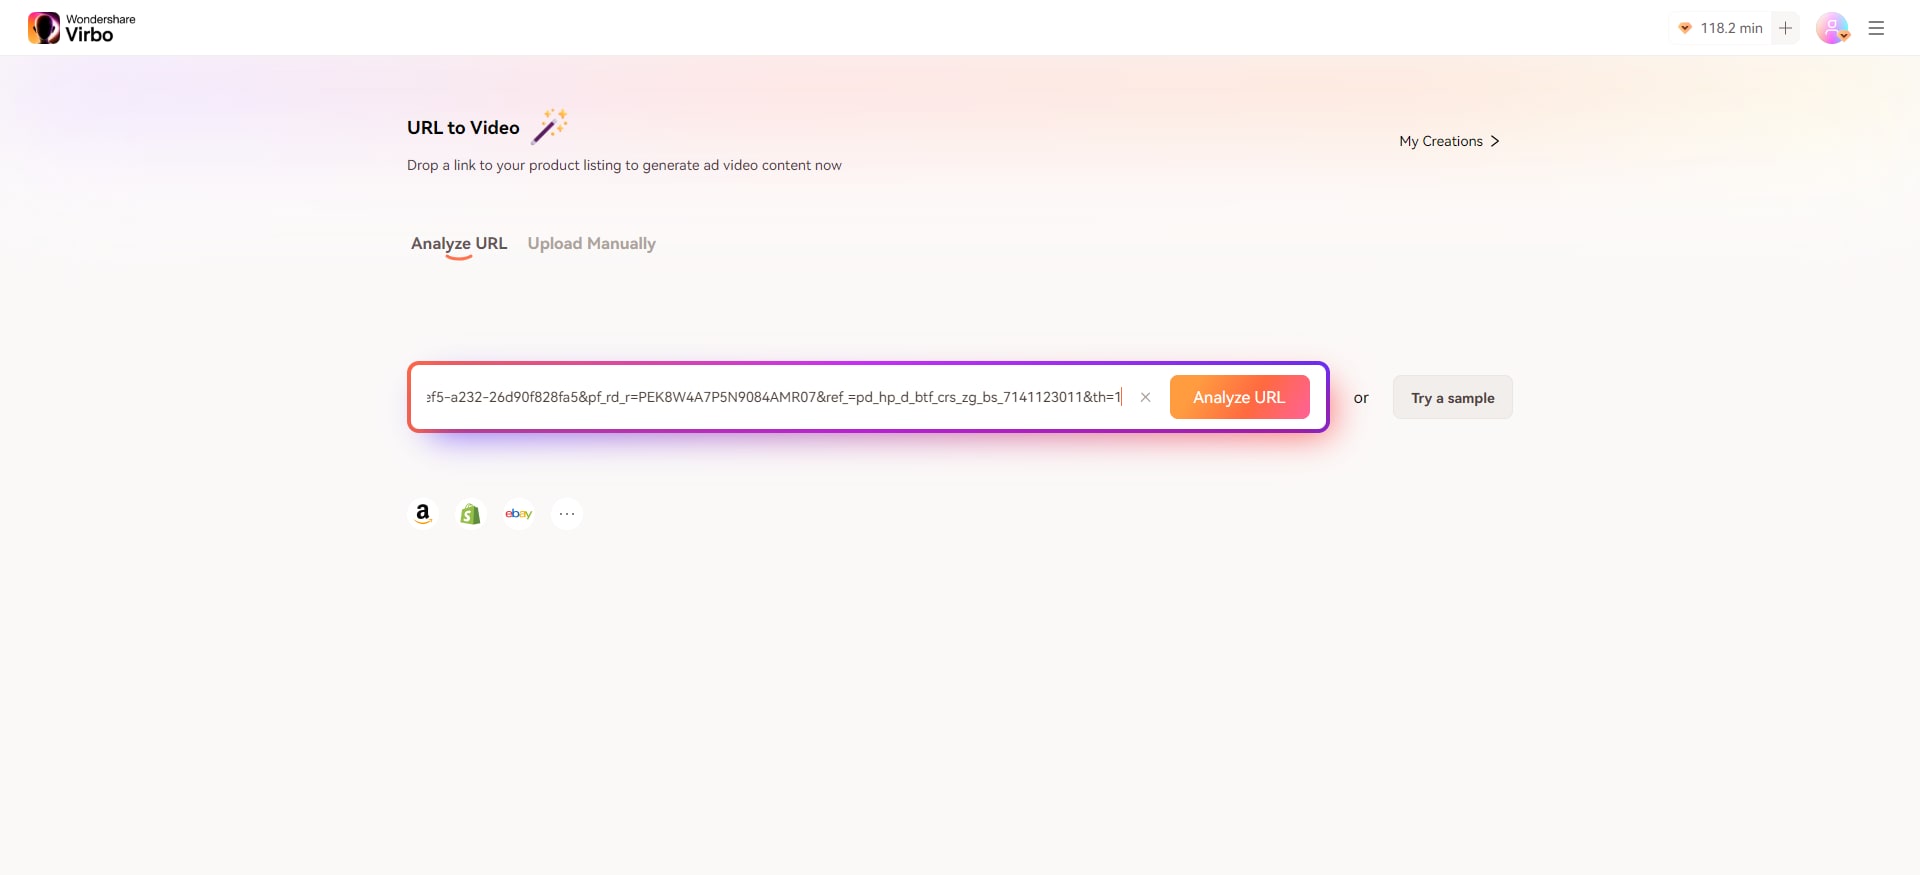
Paste the URL
Note:
Currently, Virbo supports URL parsing from Amazon, Shopify, and eBay. More platforms will be added soon.Step 3. Adjust Video Information
- Wait about 2 minutes for the images and information to be analyzed and generated.
- Add more media by clicking on the "Add Media" button.
- Generate a video script by clicking "Create a Prompt" based on: Social media platform, Topic of video, Product advantages, and Target audience.
 Create a Prompt
 - Modify the video settings such as: Video Ratio, Duration, Language, and Video Type.
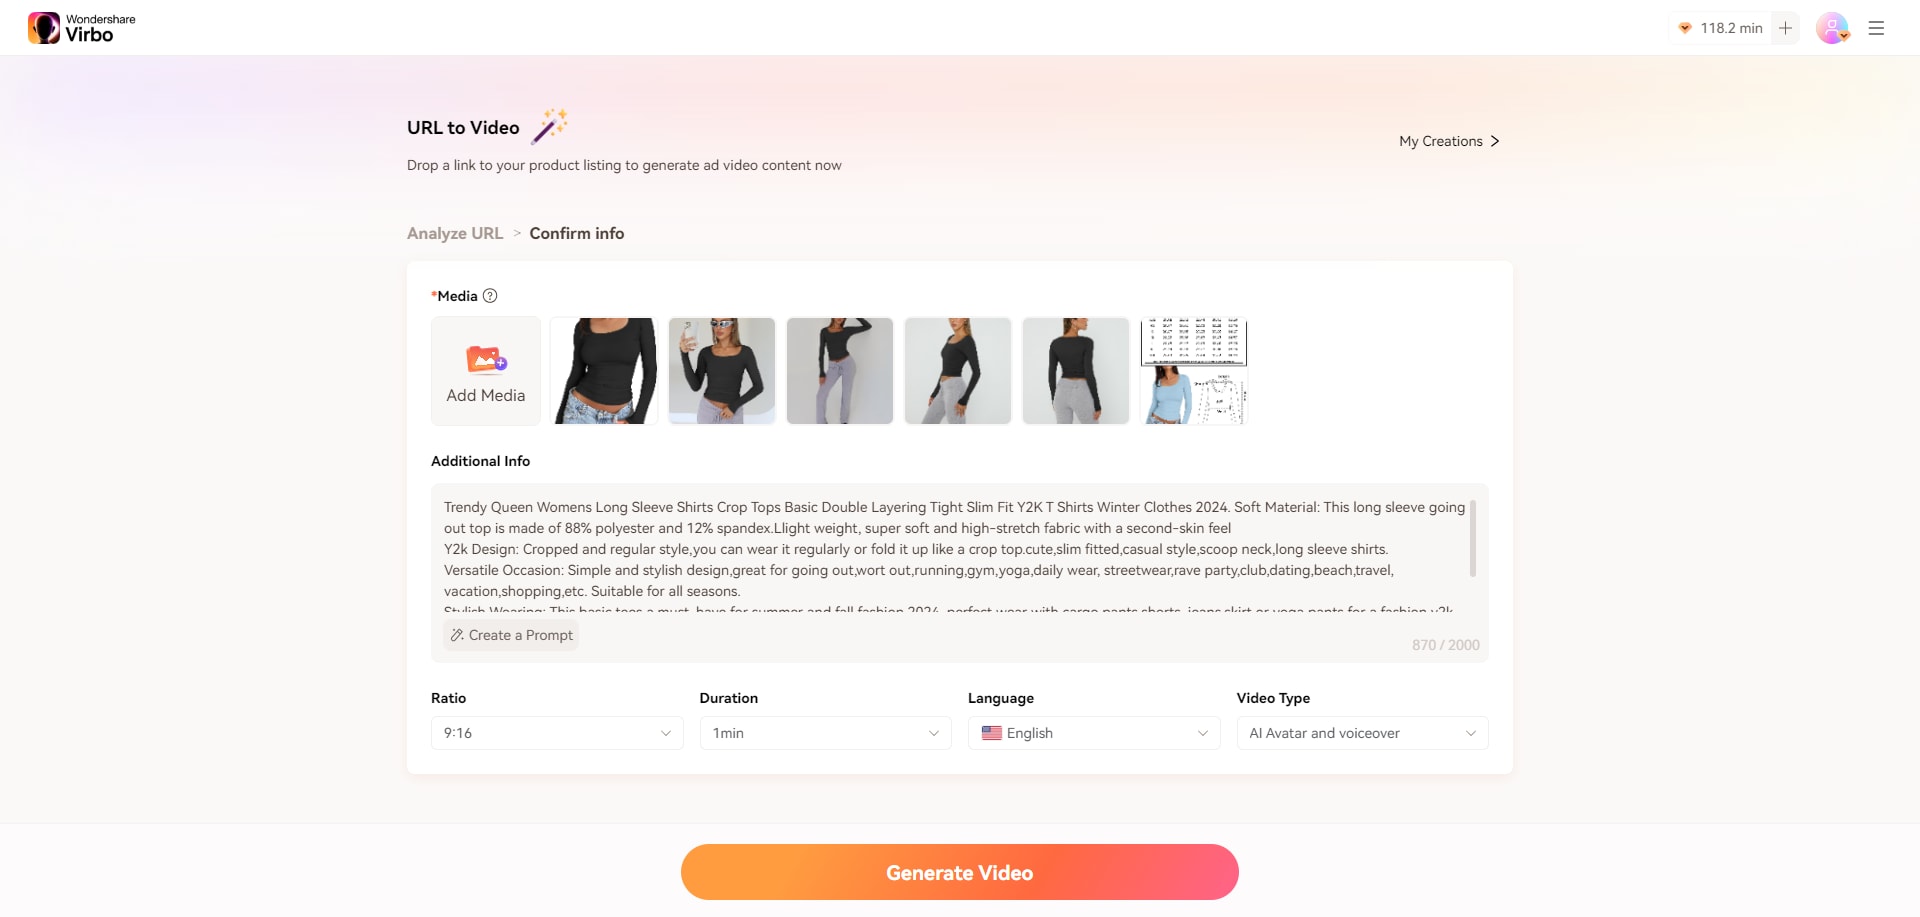
Adjust Video Information
Step 4. Generate and Edit Video
- Click "Generate Video" to create the video.
- Choose from 3 generated videos.
- Customize the selected video by changing the avatar, modifying the voiceover, adding or changing background music, inserting new scenes, replacing images, refining the video script, and add subtitles.
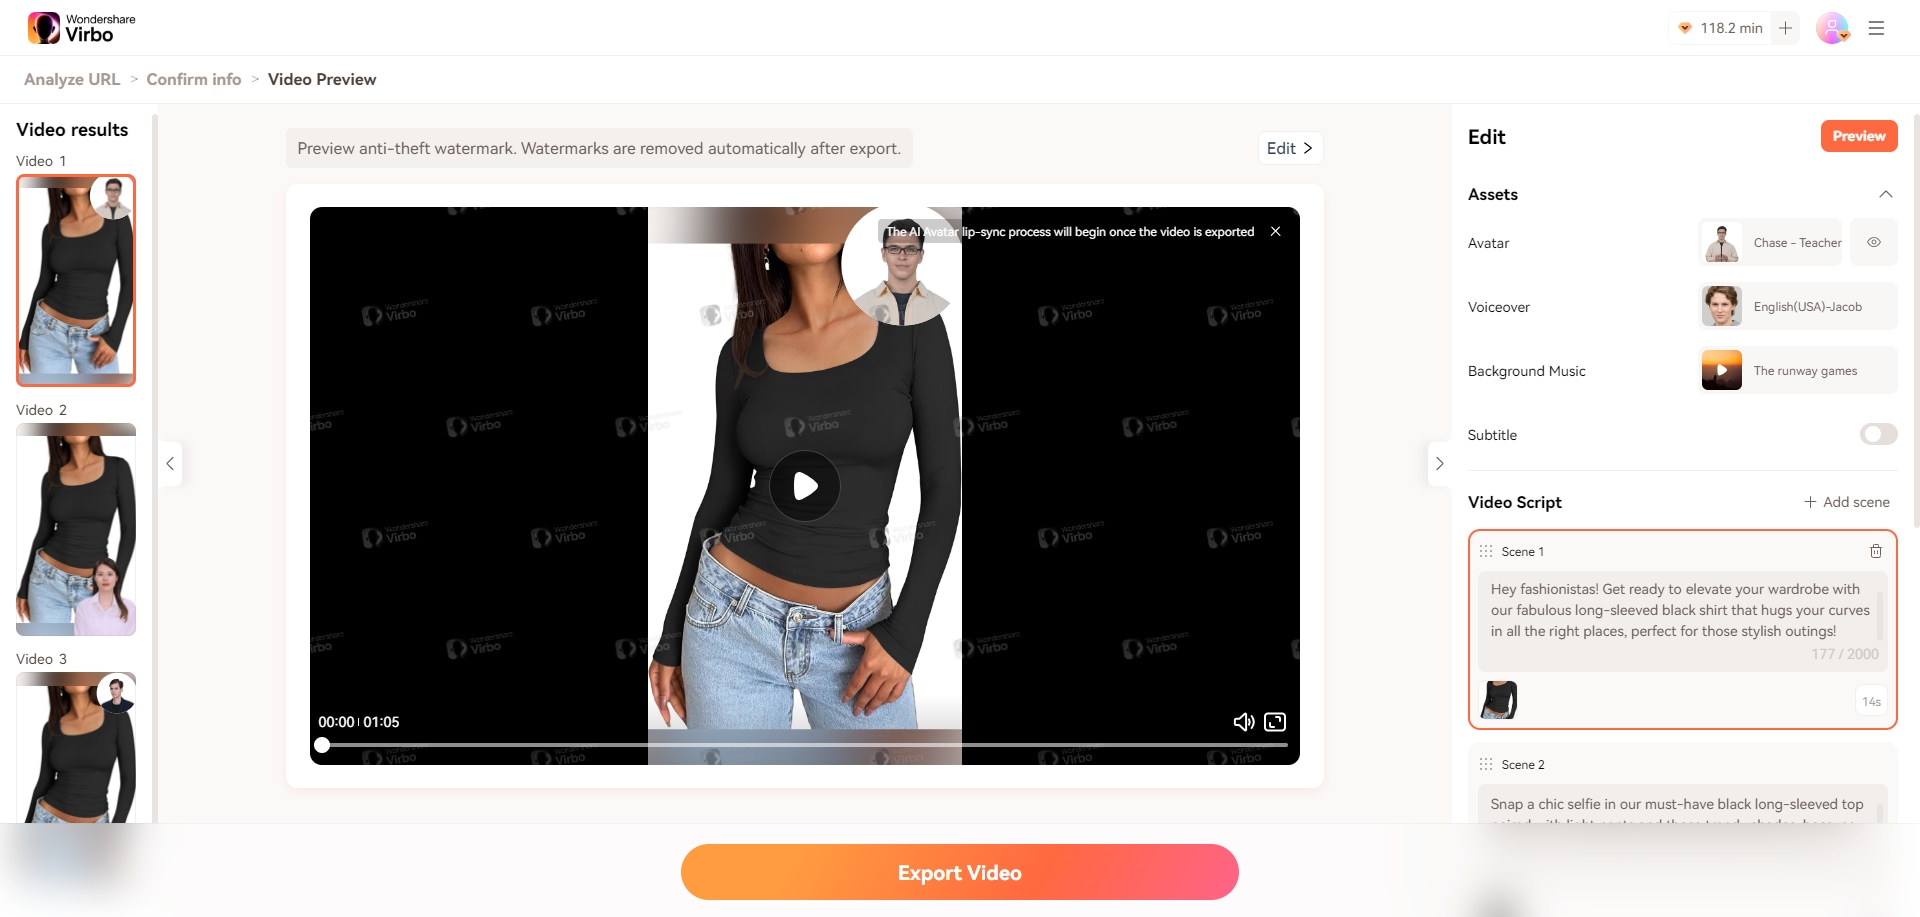
Generate and Edit Video
Step 5. Export Video
Once editing is complete, click "Export Video" to save your creation. The exported video can be found in the URL to Video dashboard or in the "My Creations" section on the main dashboard. You can rename, review, and download the video to your local device.
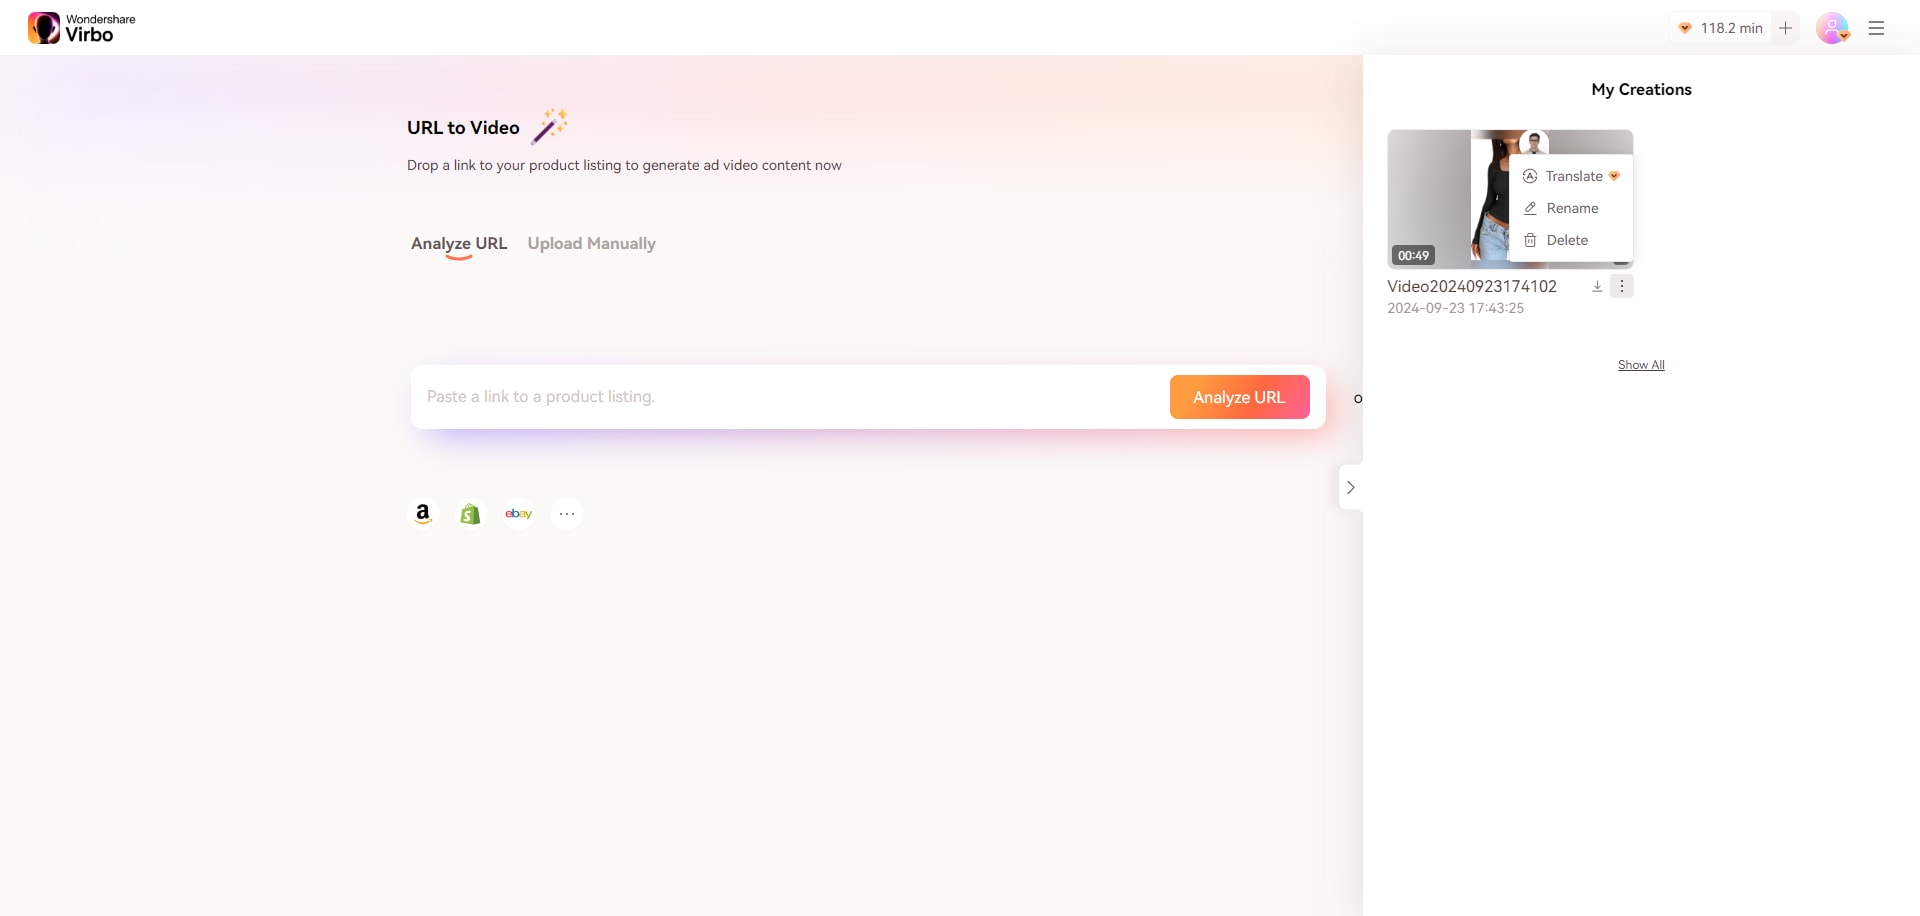
Export Video
