Virbo User Guide for Windows
Create Videos with PPT
Wondershare Virbo is a comprehensive video-making facility offering a wide set of possibilities to its users. It has recently extended its productivity by providing the option of creating videos from PPT. With such diverse options to convert PowerPoint to video, you can develop the best visuals for your audience from the available content. Following is a comprehensive step-by-step guide to converting PPT to video with Virbo.
Index
Step 1. Start By Importing Your PPT File
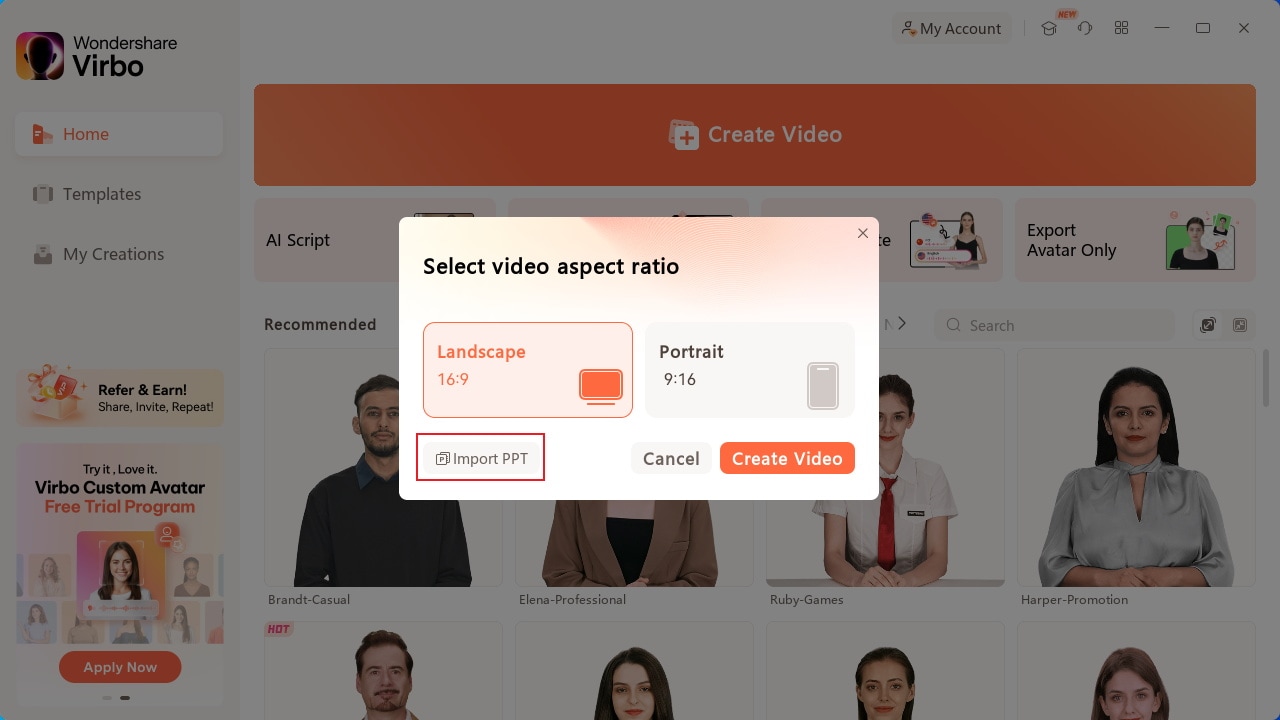
After launching Wondershare Virbo on your desktop, continue to select the "Create Video" button. As this opens a pop-up, select the "Import PPT" option on the bottom-left to add your PowerPoint file.
Step 2. Add Avatars and Voiceover To the PPT Video
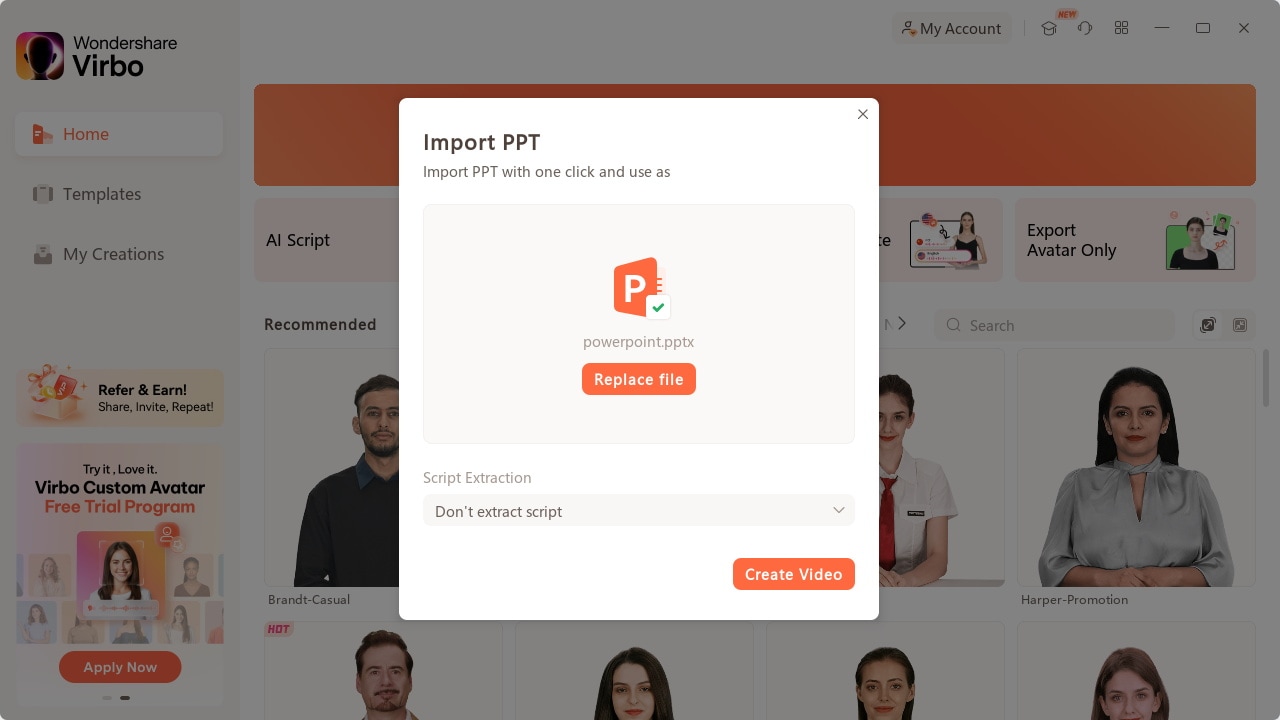
As you’ve imported your PPT file successfully, define whether you want to extract your script from the file or not. Click "Create Video" to redirect to the next window, which outlines the PowerPoint file as a video.
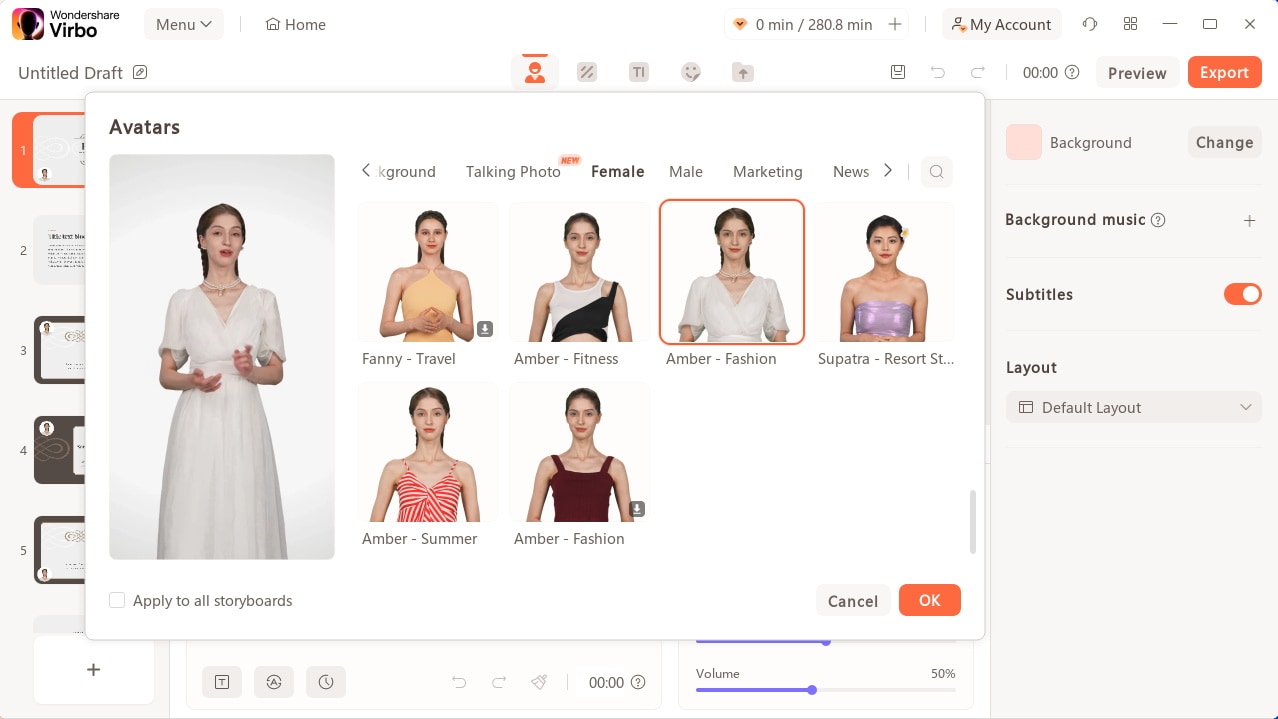
Here, you need to define a proper avatar according to your video, which can be done using the "Avatars" button on the top toolbar.
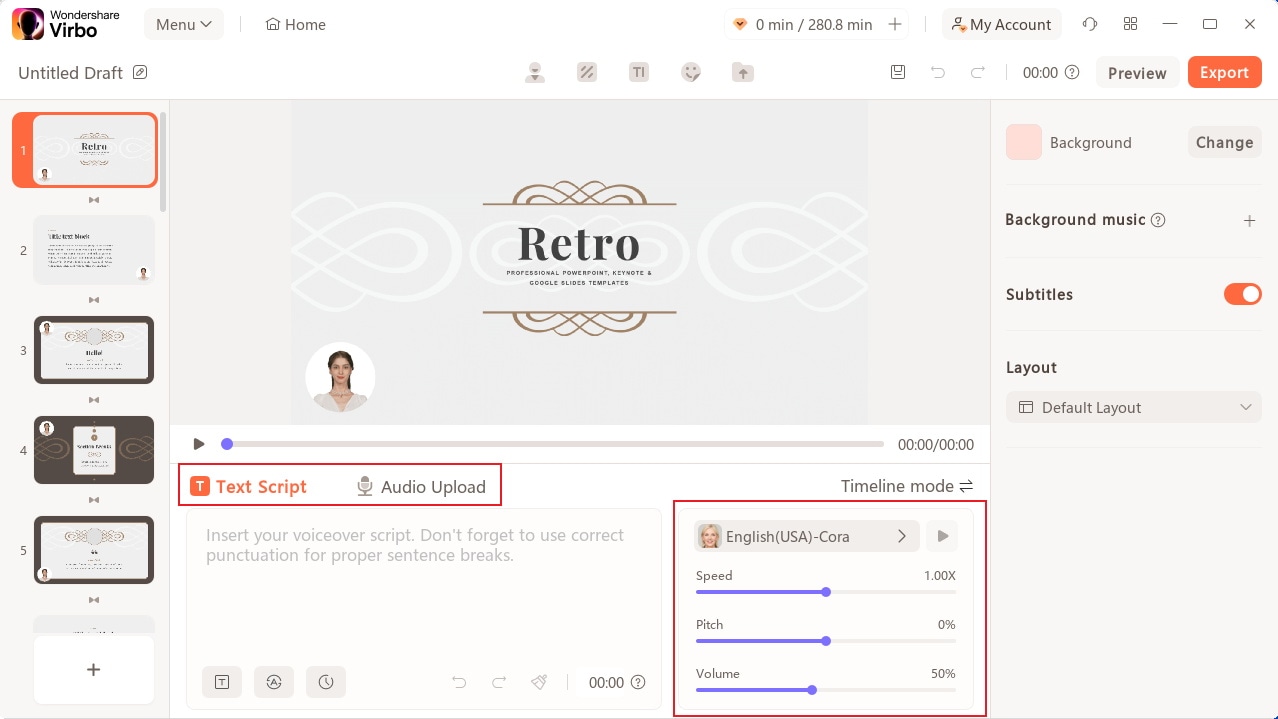
Consequently, you need to add a proper voiceover that will assist you in explaining the PowerPoint file within the video. For that, lead to the "Text Script" or "Audio Upload" section to add the appropriate voiceover. Define your voice from the available list and set its parameters, or upload your pre-recorded voice to add along with the avatar.
Step 3. Perform Other Edits to Video
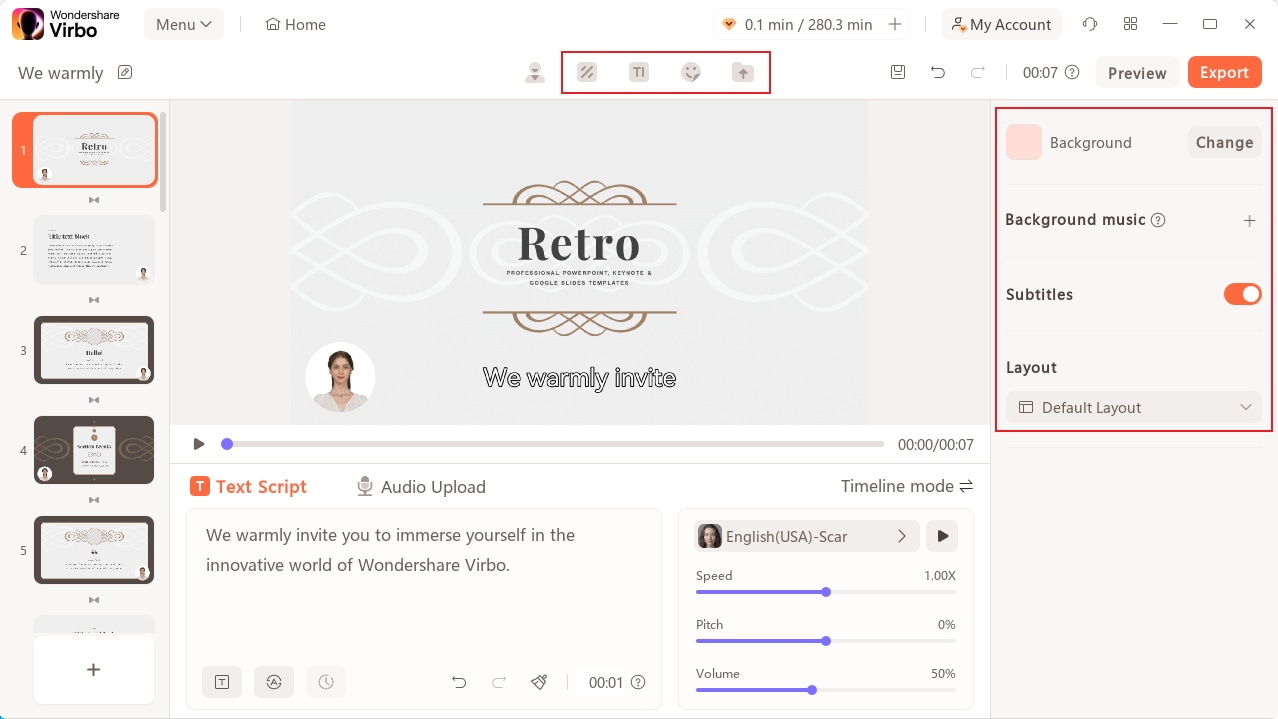
After selecting the avatar and voiceover for the video, you can perform other edits as well. Change the background of the video or add music in the background according to your choice. If you want to display the subtitles across the video, enable the "Subtitle" option. Furthermore, for more advanced settings in your video, you can define a proper "Layout" or add stickers and edit text style on the top toolbar.
Step 4. Preview And Export Final PPT Video From Virbo
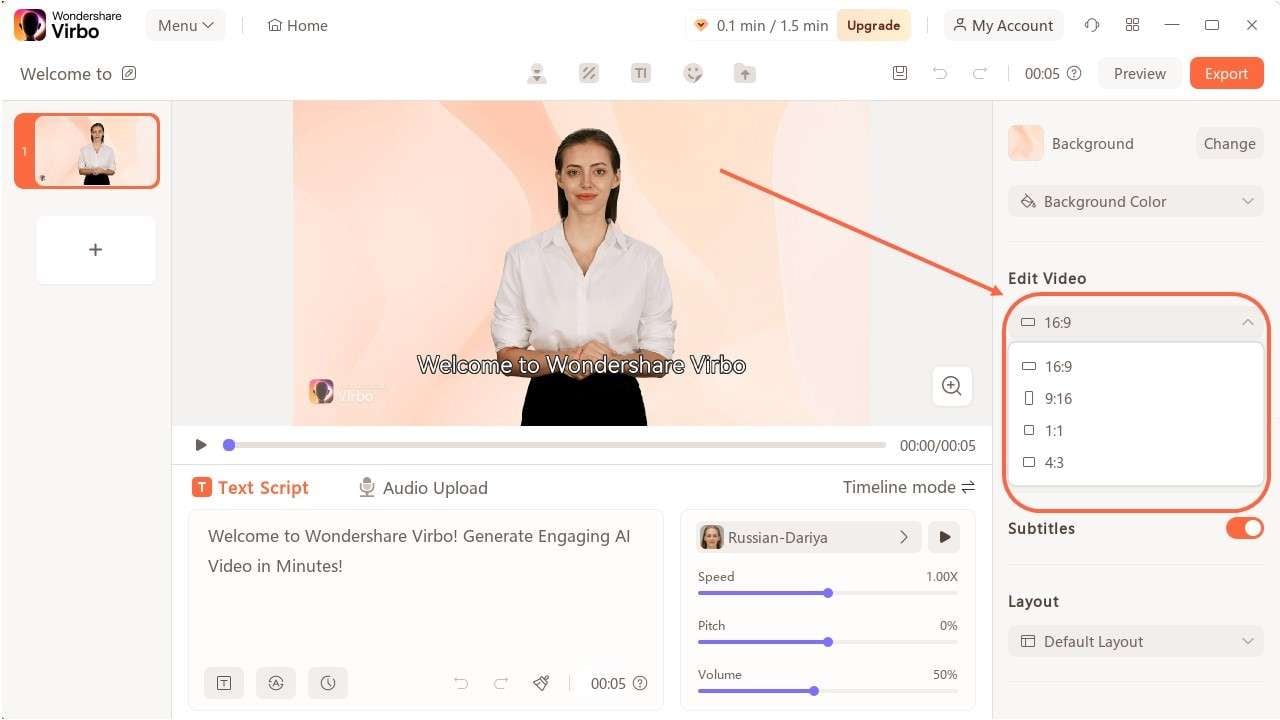
To change your video's aspect ratio before exporting, click on the “16:9” under "Edit Video" to open the dropdown menu. Choose from 16:9, 9:16, 1:1, or 4:3, and your video will automatically adjust to the selected ratio.
Once you finish all the edits, click the "Preview" button on the top right corner to preview the video.
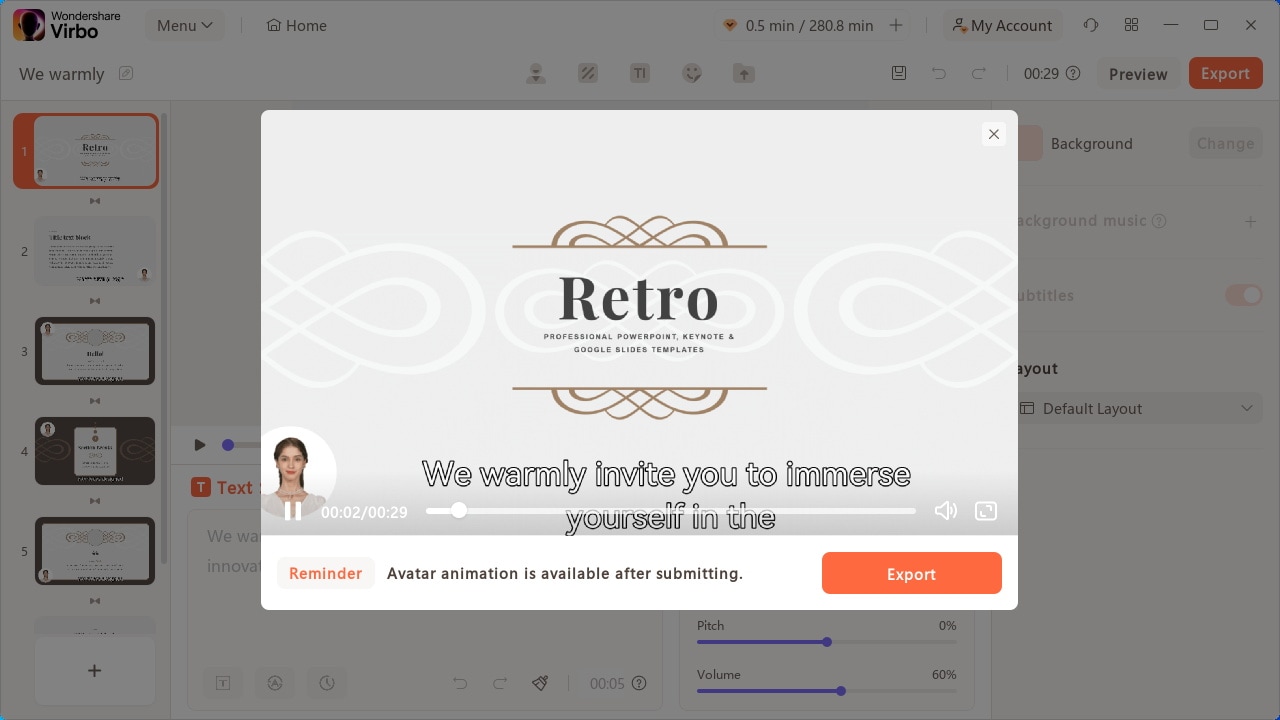
If you are satisfied with the video after previewing, click the "Export" button to save this video.
