If you are an iPhone user, you must have been familiar with Live Photo. But if you are new or just heard about it, let me give you a quick rundown.
Live Photo brings your still pictures to life by capturing moments with motion and sound. It's a feature that not only saves the visual snapshot but also captures the dynamic atmosphere around the scene.
In this article, we will explore Live Photos on iPhone in more detail. We will discuss what Live Photos are, how to use them effectively, and how they can make your photography experience more enjoyable.
In this article
Part 1. Is Live Photo Available on All iPhone Models?
Live Photo feature is not available on all iPhone models. iPhone Live Photo captures what happens 1.5 seconds before and after you take a picture. This feature is supported on iPhone models starting from the iPhone 6s and later. Live Photos are also compatible with certain iPad models, including the iPad (5th generation) and later, iPad Air (3rd generation) and later, iPad mini (5th generation) and later, as well as iPad Pro models from 2016 onwards.
Part 2: How Do Live Photos Work on iPhone?
Live Photos on iPhone work by capturing a short video clip along with a still photo when you press the shutter button to take a picture. Here's how Live Photos work in more detail:
1. Capture Process: When you take a Live Photo on your iPhone, the camera starts recording a short video clip along with the still image. This recording includes about 1.5 seconds of footage before and after you press the shutter button.
2. Playback: To view a Live Photo, simply tap and hold on the photo within the Photos app or any other compatible app. This action triggers the playback of the video clip associated with the Live Photo.
3. Ambient Audio: Live Photos also capture ambient audio along with the video clip. This feature preserves the sounds that were happening at the moment the photo was taken.
4. Editing: Live Photos can be edited just like regular photos on your iPhone. You can apply filters, adjust brightness, crop, and make other edits. You can also choose a different key photo within the Live Photo to set as the still image.
5. Sharing: Live Photos can be shared with other iPhone users through iMessage, AirDrop, or email. When shared with non-iPhone users or posted on social media, Live Photos will appear as regular still images without the motion and sound effects.
Part 3. How to Set and Take Live Photos on iPhone?
Here is a step-by-step guide on how to set up and take Live Photos on an iPhone.
1. Open Camera App
Launch the Camera app on your iPhone.
2. Enable Live Photos
Search for the Live Photos icon that looks like three circles inside each other at the top. Tap on this icon to activate Live Photos. When Live Photos are on, the icon will change to yellow.
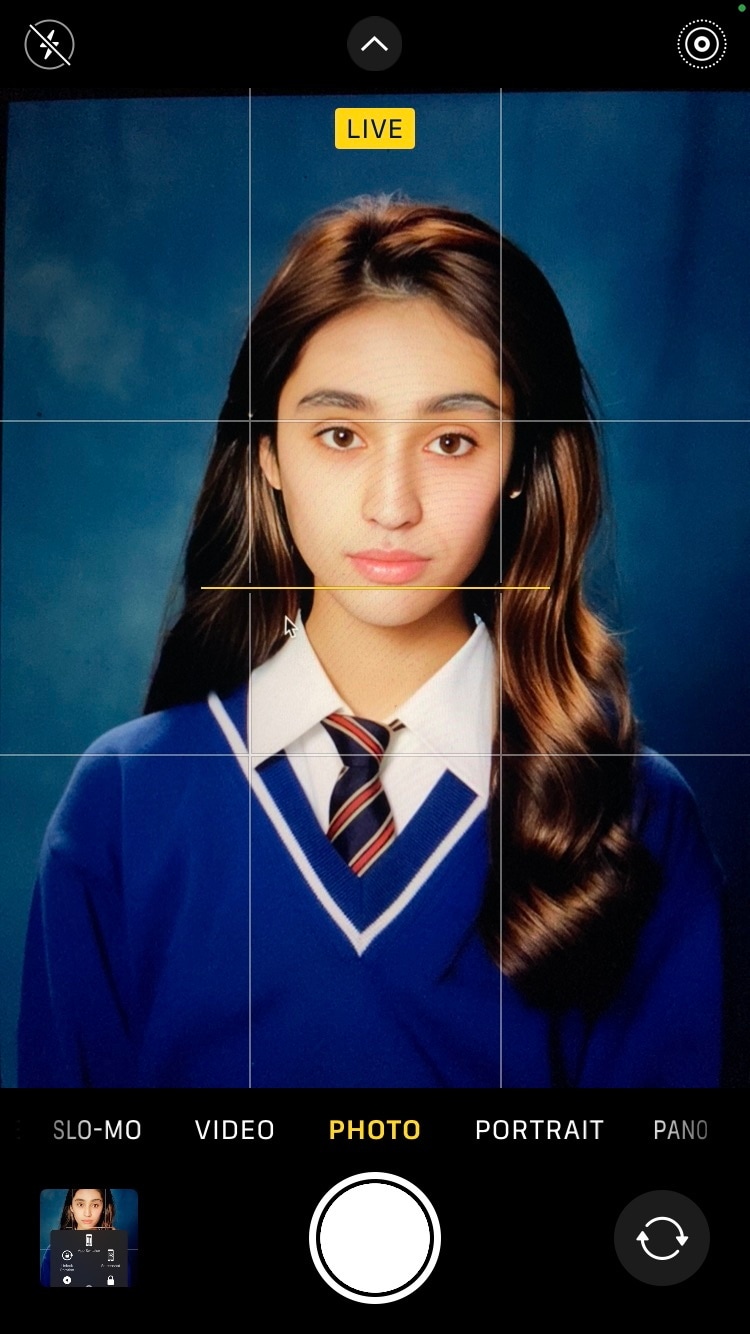
3. Frame Your Shot
Find your subject and frame your shot within the Camera app.
4. Capture the Photo
Press the shutter button to take the Live Photo. Ensure that you hold the iPhone steady for a moment after taking the photo to capture the additional video footage.
Part 4: How to Find and View Live Photos on iPhone?
Finding and viewing Live Photos on your iPhone is easy and can be done directly within the Photos app.
4.1 How to Find Live Photos on iPhone
1. Open the Photos App
Find and open the Photos app on your iPhone's home screen.
2. Navigate to Live Photos
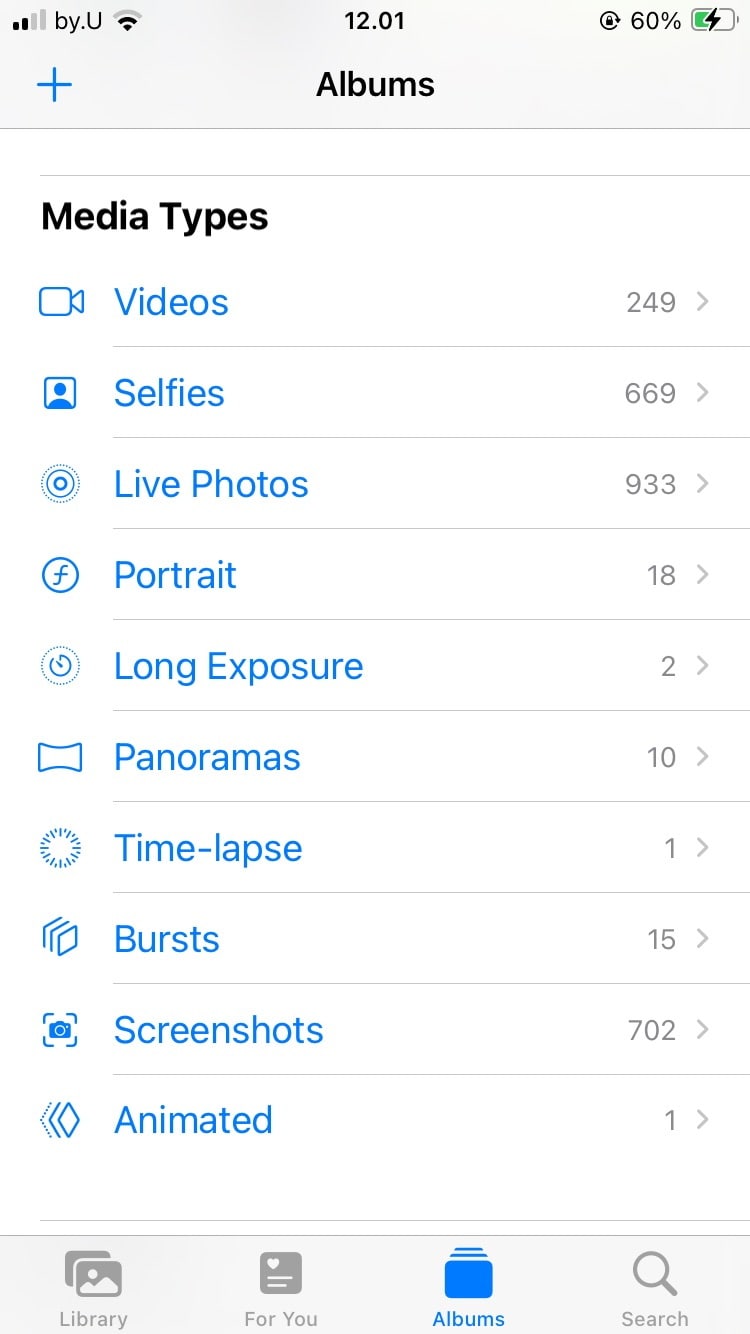
Tap on the "Albums" tab at the bottom of the screen.
3. Select "Live Photos" Album
Scroll down and look for the "Media Types" section. Tap on "Live Photos" to view all your Live Photos in one place.
4.2 How to View Live Photos on iPhone
1. Select a Live Photo
Tap on the Live Photo you want to view. It has a small "LIVE" badge at the top left corner of the photo thumbnail.
2. Play the Live Photo
Once you open a Live Photo, press and hold on the image. You'll see the Live Photo come to life with motion and sound.
3. Navigate through Frames
When watching a Live Photo, move your finger left or right to go through different parts of the Live Photo sequence. This helps you pick the best frame or moment to use as the main photo.
4. Share or Edit
From the Live Photo view, you can tap on the share icon or share the Live Photo with others. You can also tap on "Edit" to make adjustments, apply filters, or set a different key frame.
Keep reading to know more detailed steps!
Part 5. How to Change Live Photo Effects
Changing Live Photo effects on your iPhone allows you to customize the visual and audio components of your Live Photos. Here's how you can change Live Photo effects:
1. Select Live Photo
Navigate to the Live Photo you want to edit and tap on it to open.
2. Edit Live Photo
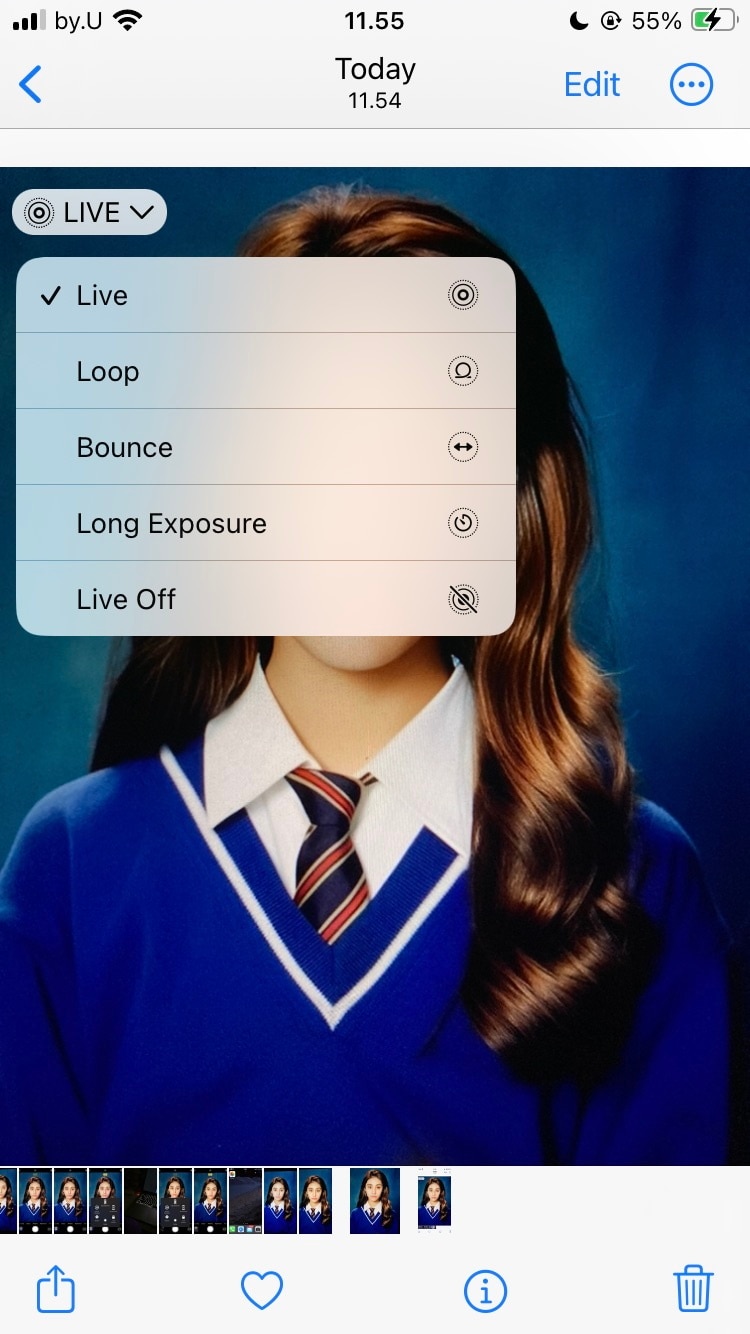
Tap on the ‘Live Photos’ button around the top of the screen.

3. Select Live Photo Effects
You will see a series of effects icons. The available effects include:
- Live: This is the default Live Photo effect that plays the motion and sound captured with the photo.
- Loop: Creates a continuous looping animation of the Live Photo.
- Bounce: Plays the Live Photo forward and backward in a bouncing motion.
- Long Exposure: Blurs moving elements in the Live Photo to create a long exposure effect.
Part 6: How to Edit Live Photos on iPhone?
Besides selecting the effect, you can also edit your Live Photo on iPhone. You can follow this guide to edit your Live Photo.
1. Select Live Photo
Choose the Live Photo you want to edit and tap on it to open.
2. Enter Edit Mode
Tap on "Edit" in the top right corner of the screen. You'll now see editing tools at the bottom of the screen.
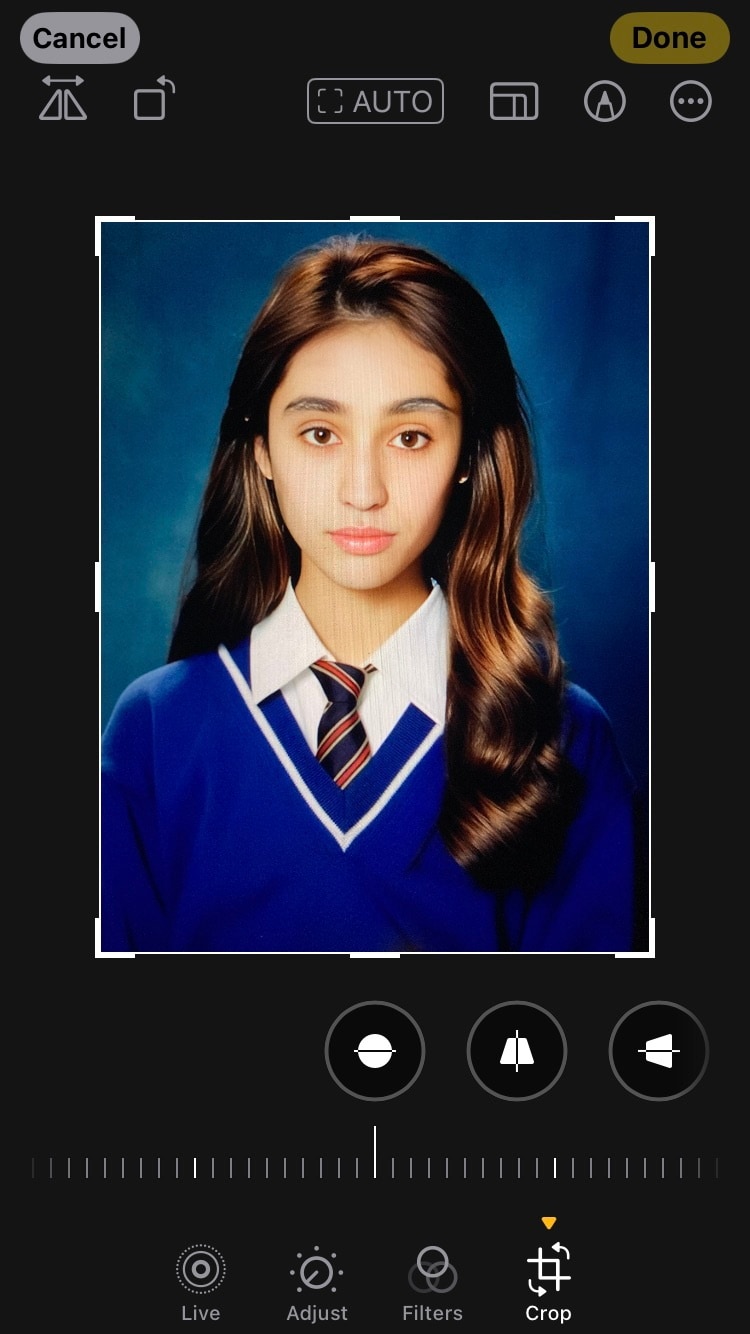
3. Adjust Crop and Aspect Ratio
To adjust your Live Photo's composition, tap the crop icon (a square with arrows) and drag the corners of the frame to change the crop or aspect ratio.
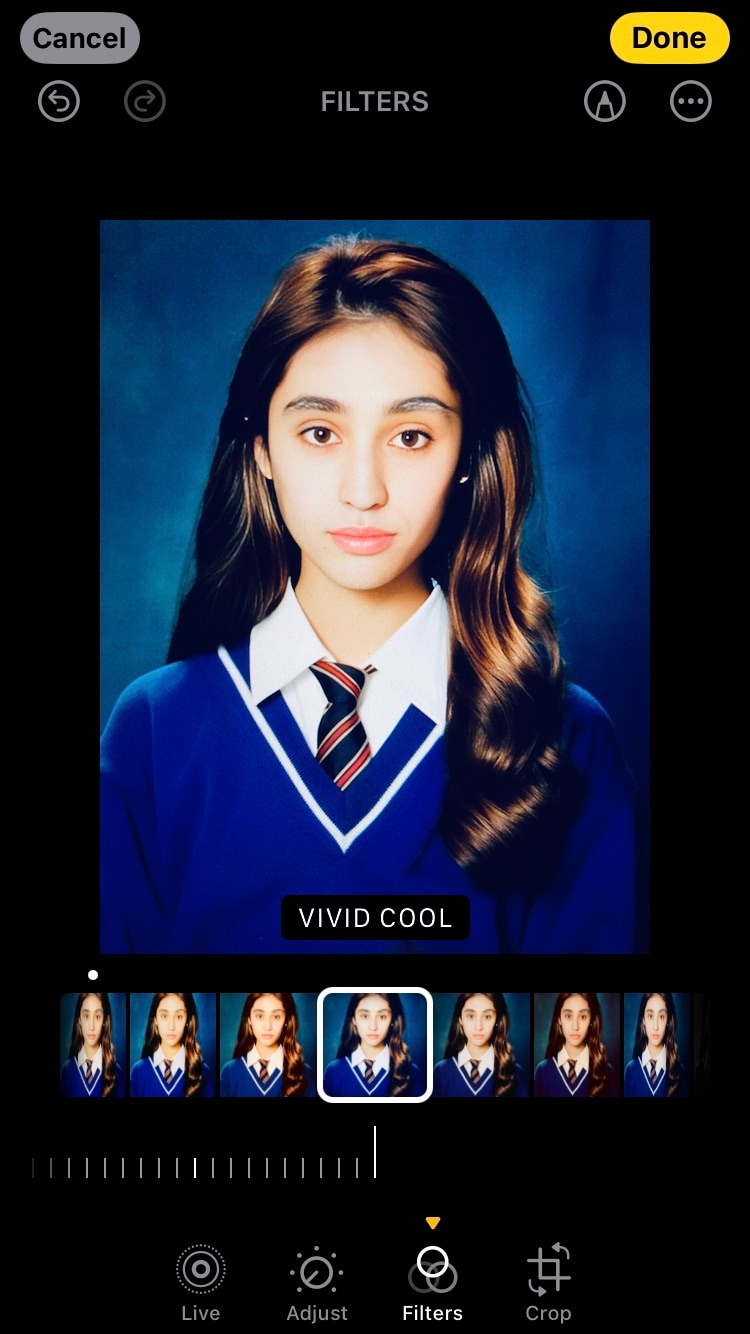
4. Apply Filters
Tap on the filter icon (three overlapping circles) to apply filters to your Live Photo. Swipe left or right to preview different filters and tap on one to apply it.
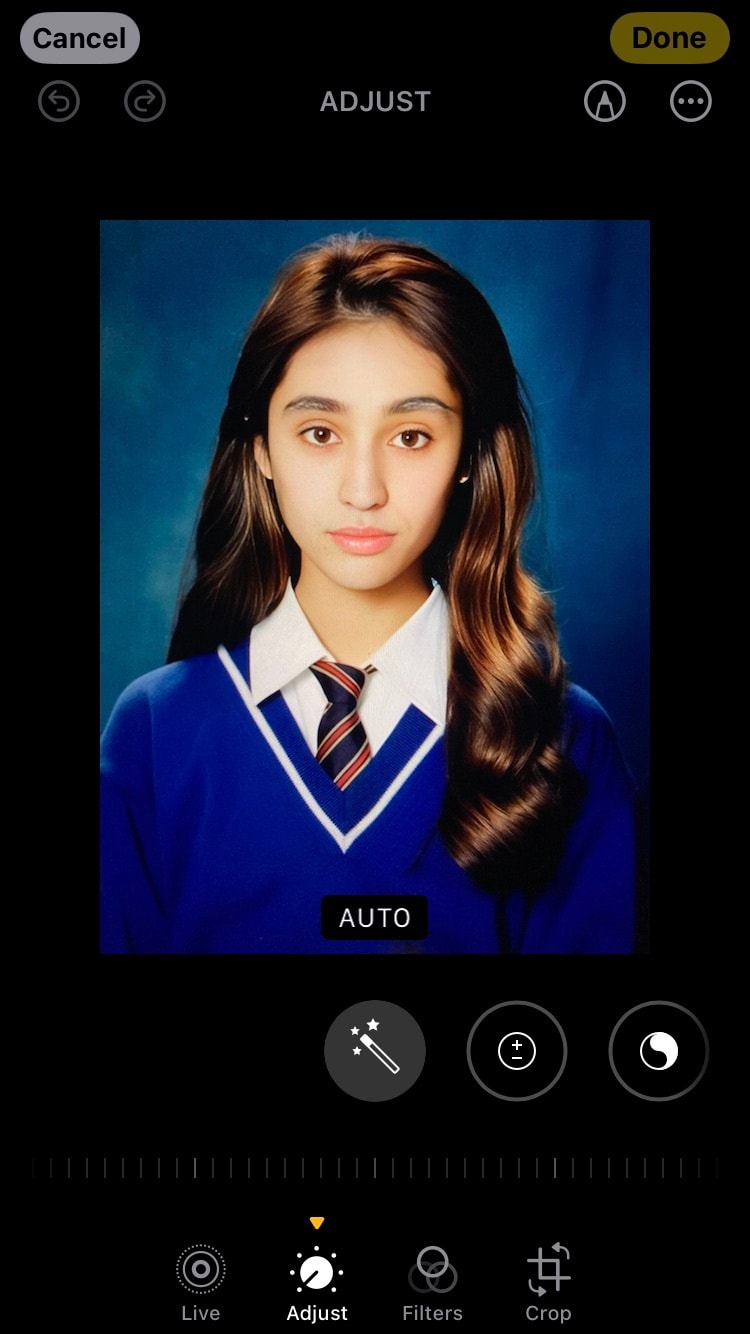
5. Make Adjustments
Tap on the adjustment icon (dial with dots) to adjust parameters such as exposure, brightness, contrast, saturation, and more.
Part 7: How to Change a Live Photo Key Photo on iPhone
You can also change the key photo on your iPhone Live Photo. Try to follow this step-by-step guide.
1. Open Live Photo
Open the Live Photo which you want to change the key photo.
2. Tap Edit
Tap on "Edit" in the top right corner of the screen. You'll now see editing tools at the bottom of the screen.
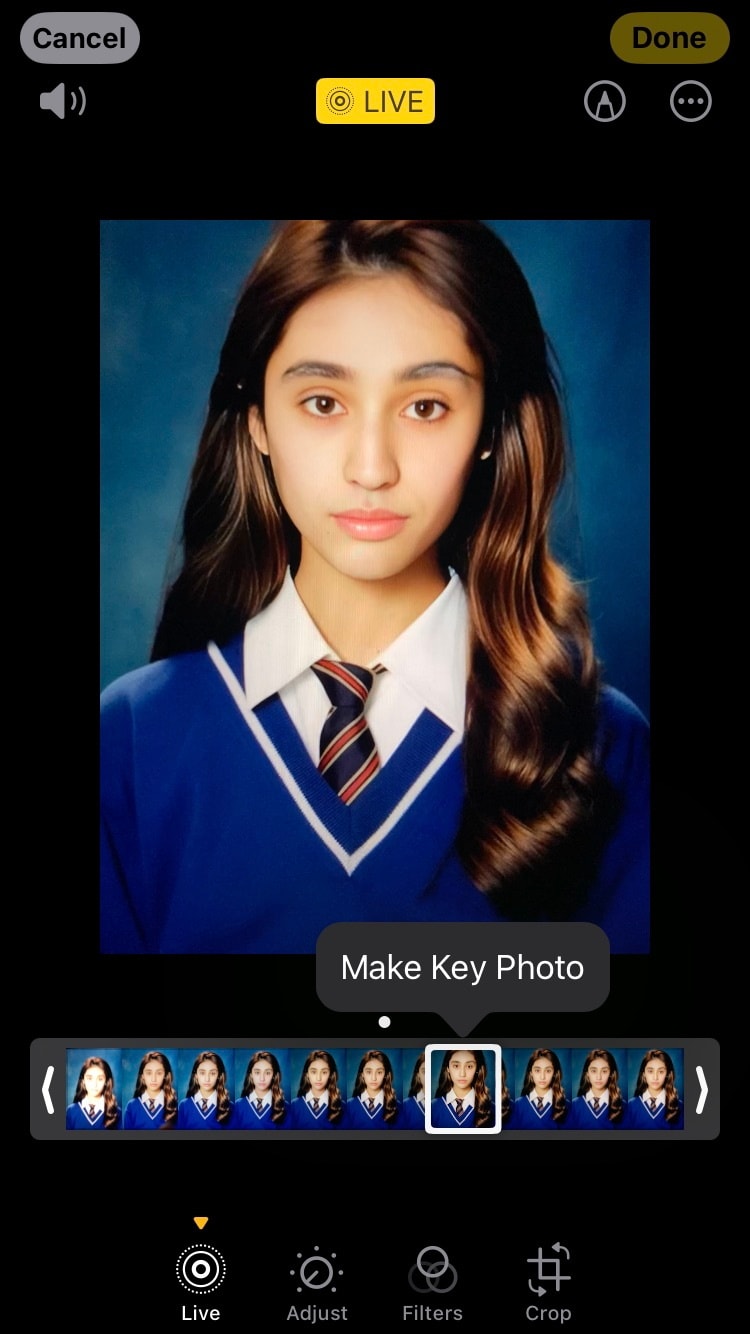
3. Scrub Through the Timeline
Below the Live Photo, you'll see a timeline of frames captured during the Live Photo recording. Drag your finger left or right along the timeline to preview different frames.
4. Select New Key Photo
Pause on the frame you want to set as the new key photo. Once you've found the desired frame, tap on the "Make Key Photo" button.
5. Preview Changes
After setting the new key photo, tap and hold on the Live Photo to see how the changes affect the appearance of the Live Photo.
6. Save Edits
If you're satisfied with the new key photo, tap "Done" in the bottom right corner of the screen to save the changes.
Part 8: Can You Turn Live Photo into A Photo?
Not only turning a still photo to Live Photo, you can also do otherwise. Here is how you can turn a Live Photo into a still photo on your iPhone.
1. Open Live Photo
Navigate to the Live Photo that you want to convert into a still photo and tap on it to open.
2. Go To Edit Mode
Tap on "Edit" in the top right corner of the screen.
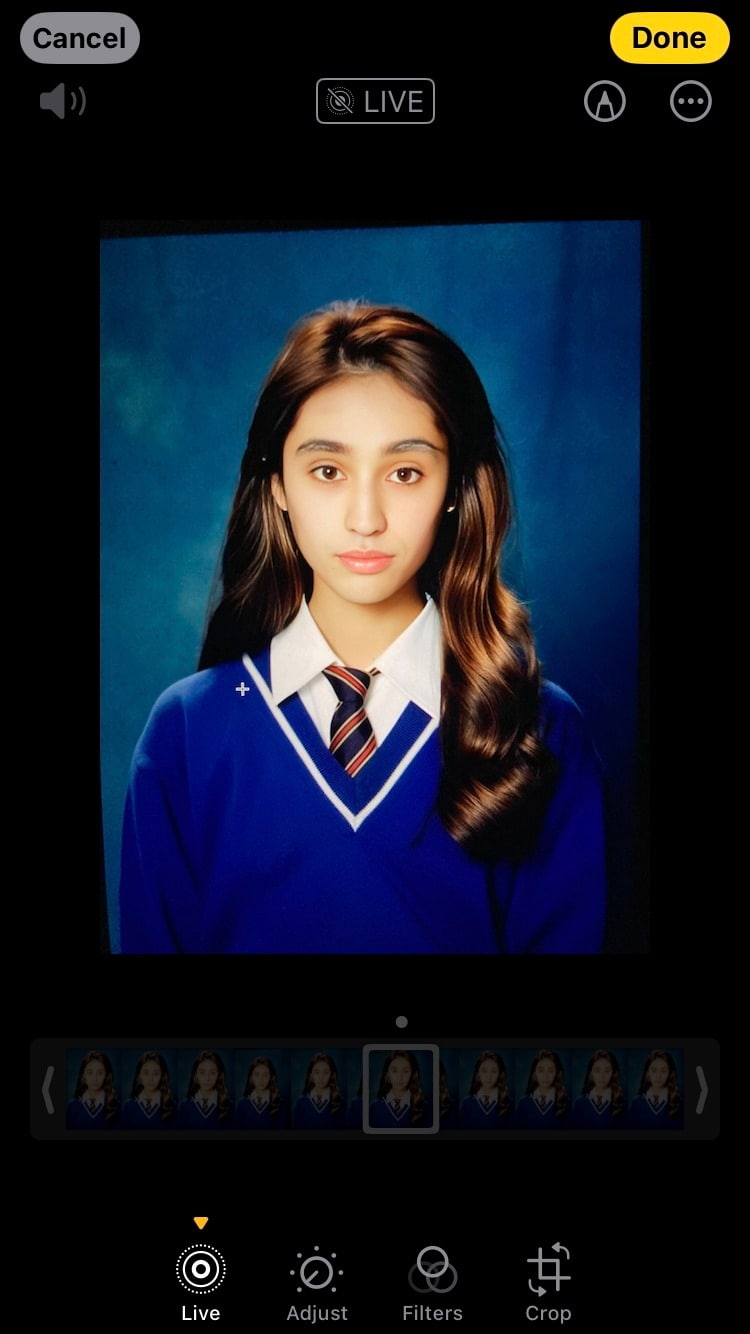
3. Disable Live Feature
In the editing toolbar at the bottom of the screen, look for the "Live" icon. Tap on this icon to disable the Live feature. The icon will turn from yellow (Live Photo) to white (still photo).
4. Save Changes
Tap "Done" in the bottom right corner of the screen to save the changes and convert the Live Photo into a still photo.
Bonus: Live Photo Alternative - Turn Your Photo Move and Talk with Wondershare Virbo
Looking to enhance your photos with motion and audio effects beyond what Live Photo offers on iPhone? You can consider using Wondershare Virbo, a versatile tool available on iOS, Android, desktop, and online platforms.
Virbo has a Photo Talking AI tool that offers powerful features to enhance your photo storytelling. You can convert text to speech effortlessly, add personalized background music, and enjoy seamless video creation and editing.
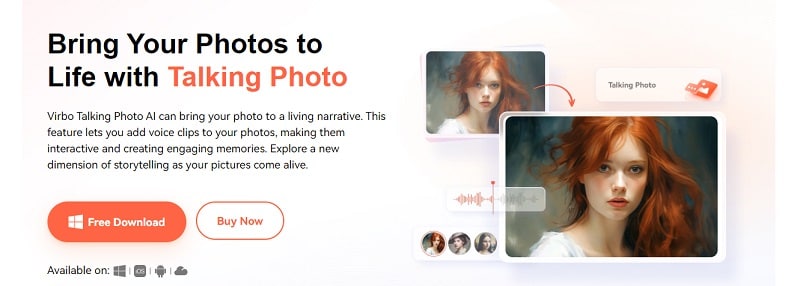
Virbo’s Photo Talking tool delivers clear audio using AI avatars and allows customization with your own voice recordings. It also supports diverse accents and languages to help you create engaging narratives for a global audience.
Here's how to use the Virbo Photo Talking feature:
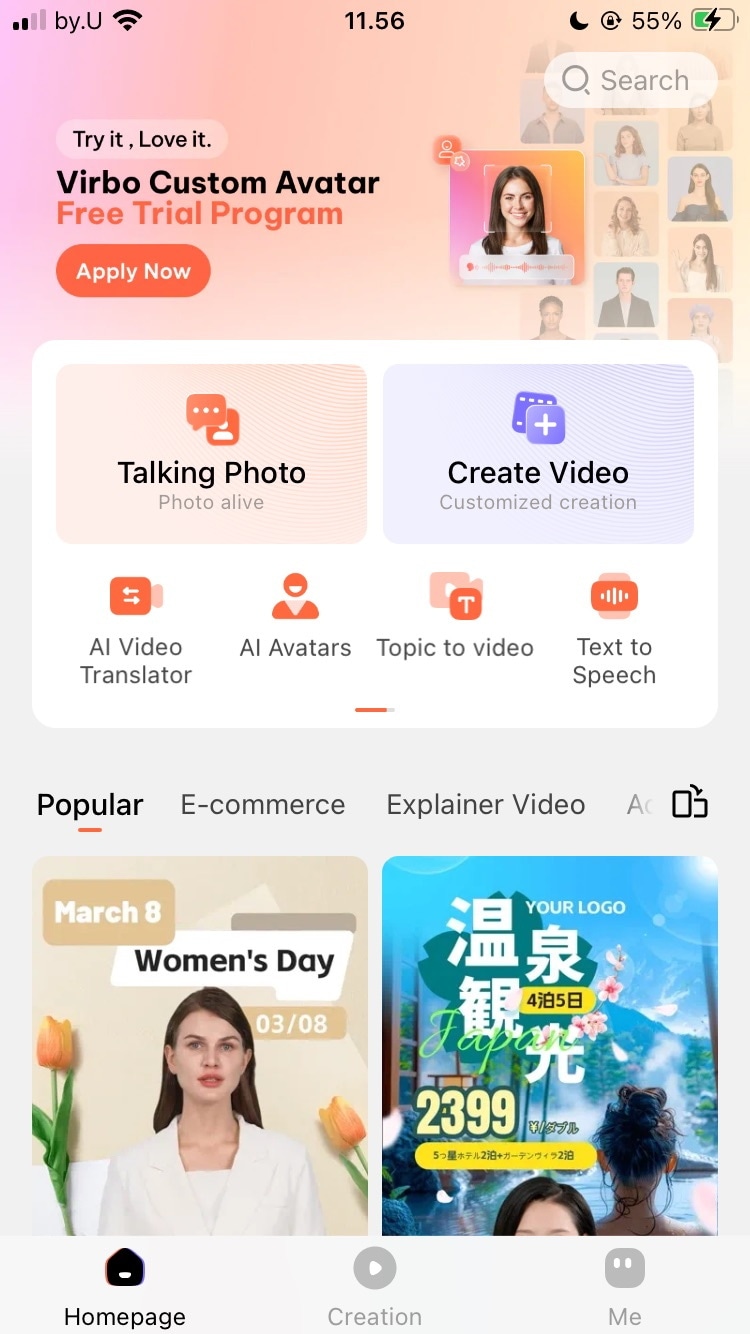
Step 1. Open Wondershare Virbo App
Launch the Wondershare Virbo app on your mobile device, then select the 'Talking Photo' option.
Generate Talking Photo Online Try in App Free
Step 2. Upload Your Photo
Choose and upload the photo you want to animate, ensuring it's clear and suitable for the talking effect.

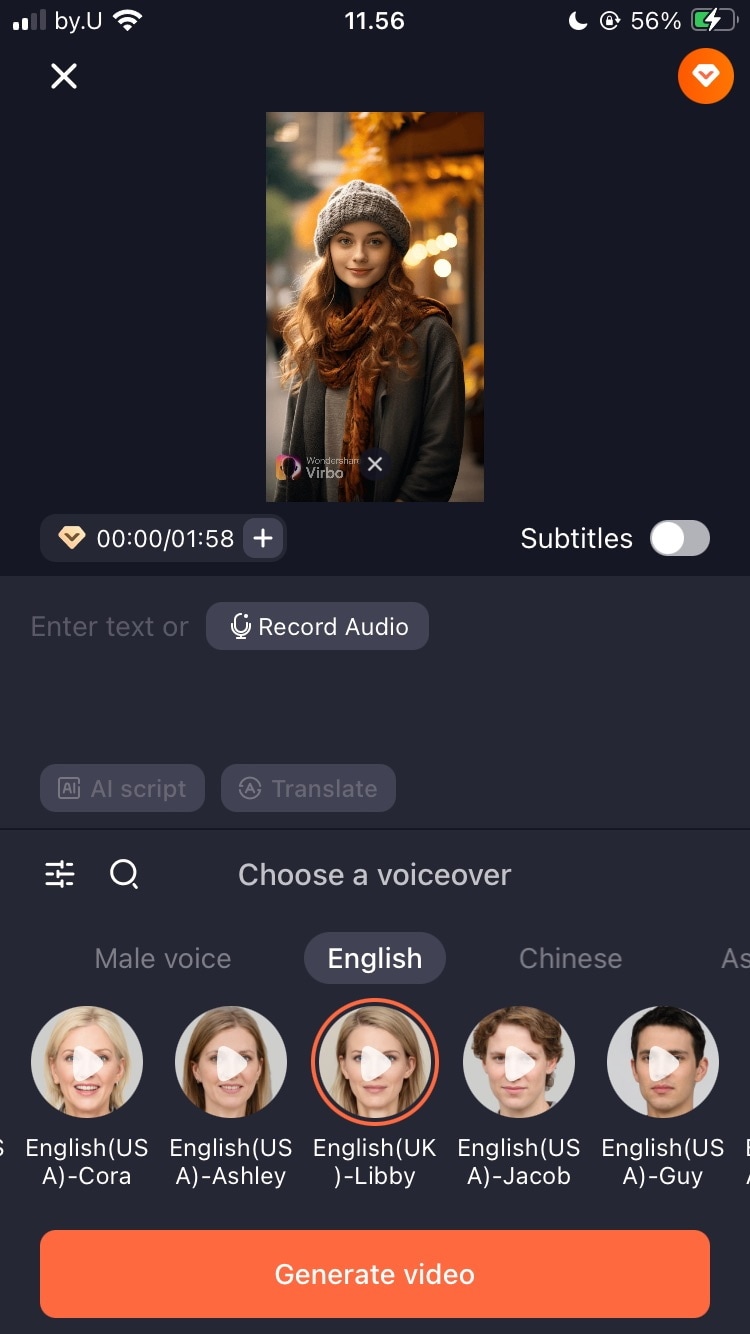
Step 3. Enter Text or Record Audio
You can enter text or record audio to accompany your talking photo.
Step 4. Choose a Voiceover
Select a voiceover that matches the desired tone and language for your photo.
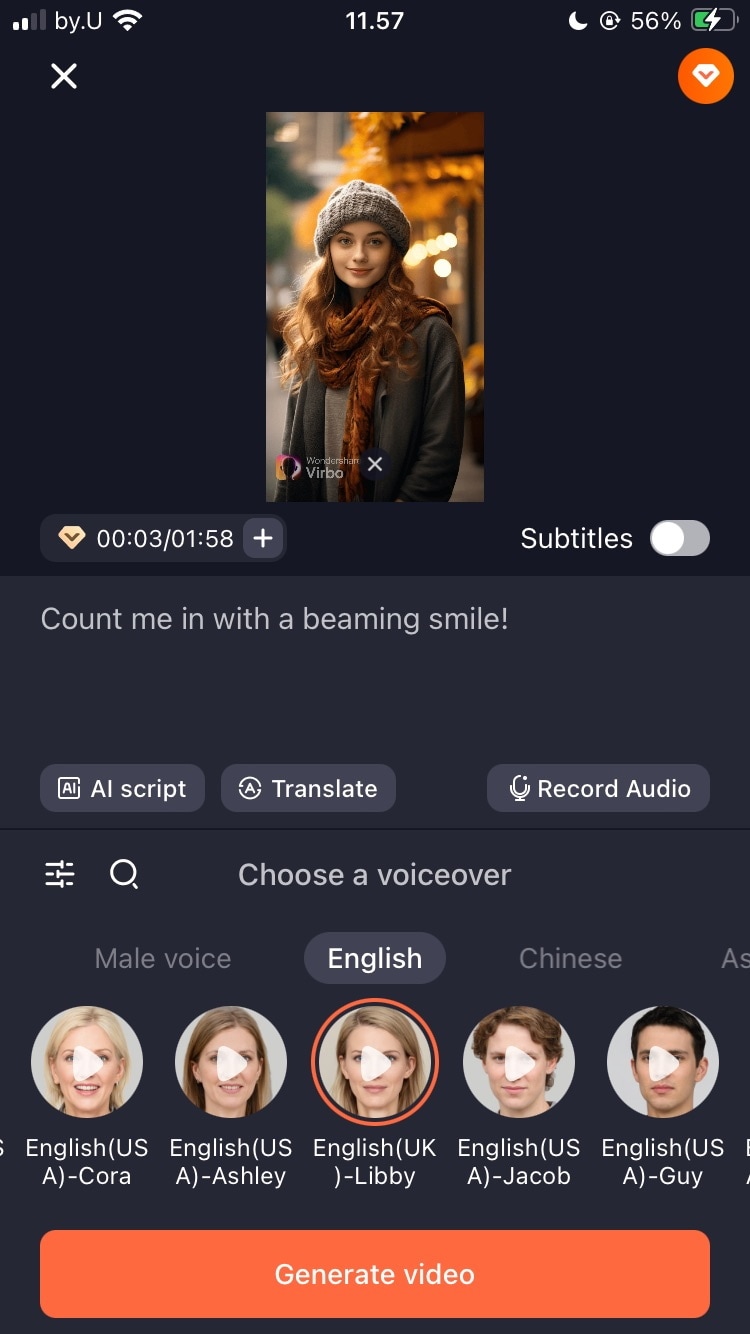
Step 5. Generate Video
Click on 'Generate Video' to transform your photo into a talking video.
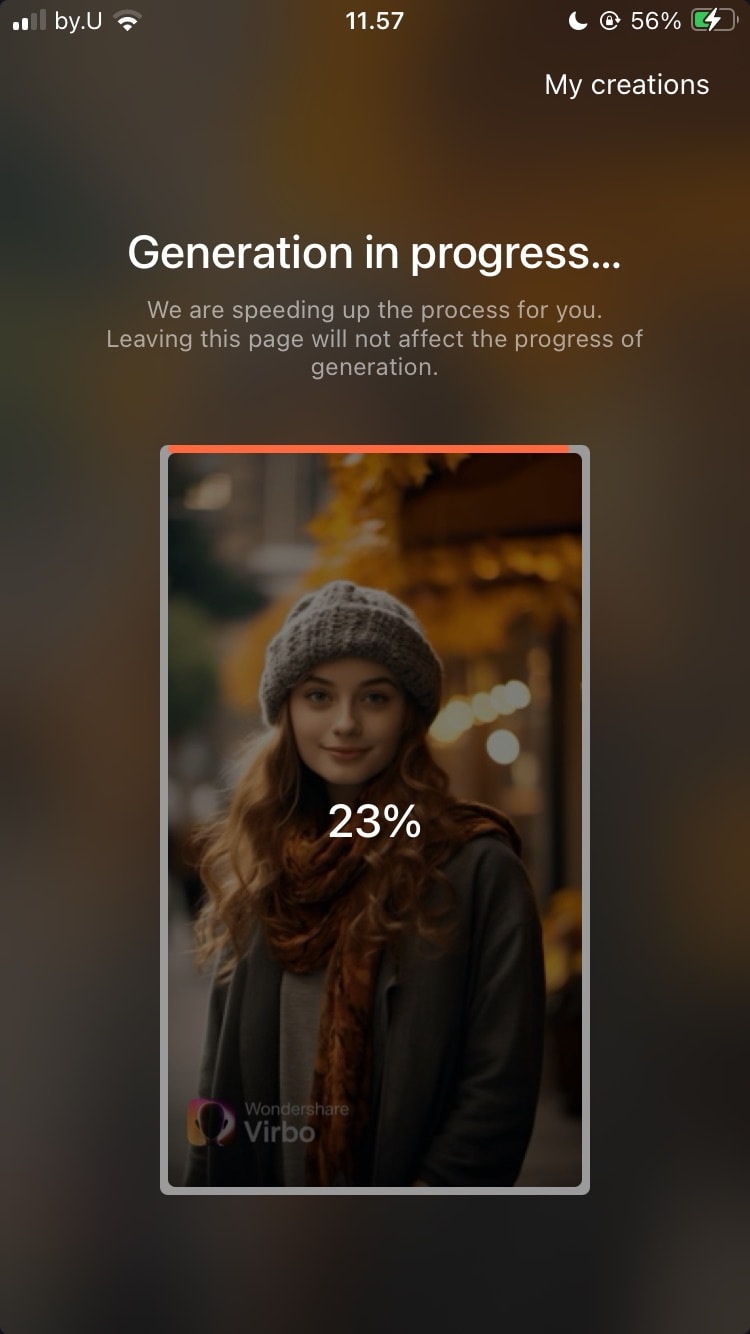
Step 6. Preview and Download
Preview the generated video and download it to your gallery or share it directly on your preferred platform if you're satisfied with the result.

With Virbo Photo Talking, you can transform static photos into dynamic narrators by adding voice clips and animations. This brings your photos to life with movement and sound, creating engaging and interactive visual experiences.
Generate Talking Photo Online Try in App Free
Conclusion
Live Photos on iPhone make photos more lively by combining motion and sound, adding depth to your memories. They capture not just the still image but also the atmosphere of the moment. Setting up and using Live Photos is easy and enhances your photography.
If you have an interest in creating more interactive visual stories, you can try Wondershare Virbo TalkingPhoto AI. With Virbo, you can turn static photos into dynamic narratives with voice clips, animations, and personal touches. This tool can convert text to speech, add background music, and customize voices and accents. Whether you use an iPhone or other devices, Virbo lets you transform your photos into captivating talking images.


