

Adding video content to your PowerPoint presentation is a smart way to make it more engaging. But what if you want to remove some unwanted parts of your video clip in PowerPoint? Does this mean you need to install a dedicated video editing app and start the process all over?
Well, the good news is PowerPoint provides a built-in tool to easily trim videos right within your presentation. In this article, we'll walk through the step-by-step process of trimming a video in PowerPoint on a Windows or Mac computer, so you can create a professional presentation that suits your needs.
In this article
Part 1: How to Trim and Crop a Video on PowerPoint
You can use the Microsoft PowerPoint tool to do more than just create presentations. In this part, we will teach you how to use the tool’s built-in video tools to trim and cut your videos on Mac or Windows computer.
Trim and Crop a Video Step-by-step guide on Windows Computer
Step 1: First, click the “Slide” containing a media placeholder in your PowerPoint Presentation and click on “Insert Video from File”.
- Select “From a File” in the window that appears on your screen and upload the “Video” you’d like to trim.
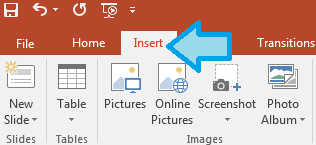
- Alternatively, if your PowerPoint Presentation does not have a media placeholder, find the insert tab and click on “Video on My PC” to be able to upload the video file from your computer.
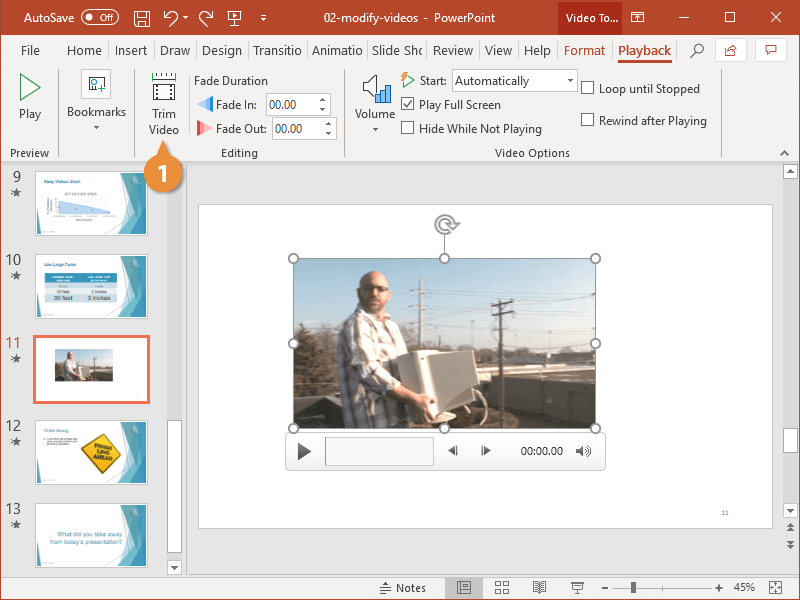
Step 2: Select the video and click on the “Playback Tab”.
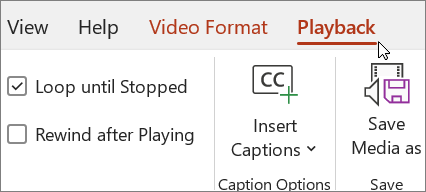
- Click on “Trim Video” button from the editing section of the tab.
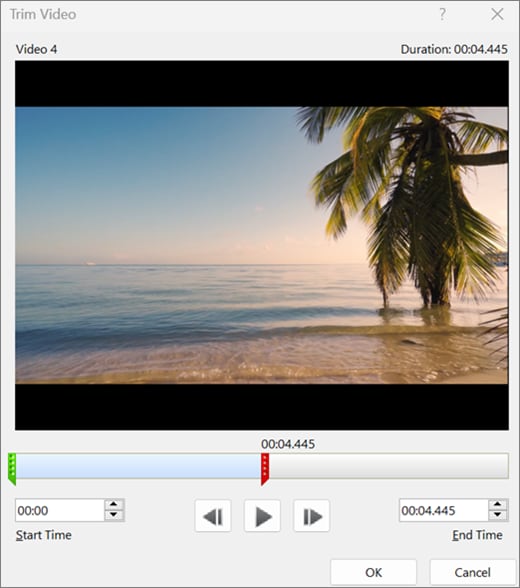
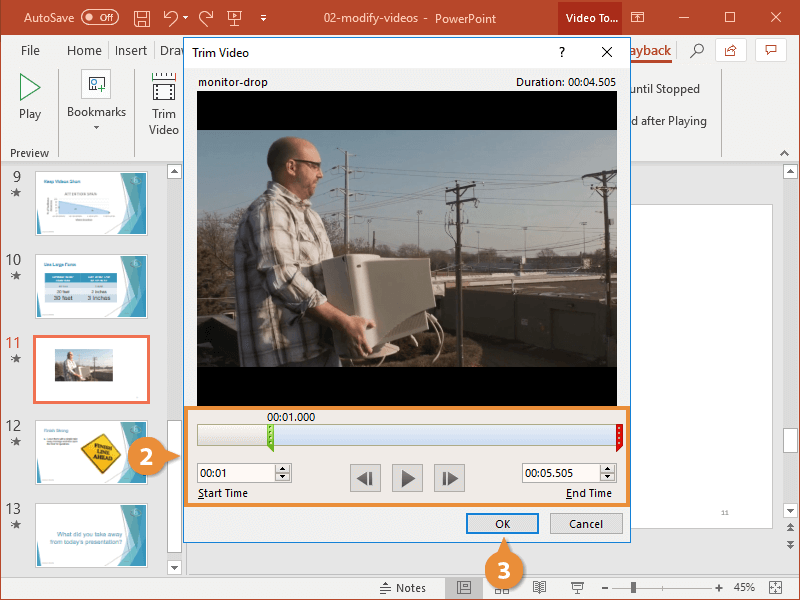
Step 3: A trim window where you can do the following will appear on your screen.
- Manually enter the start and end times for the trimmed section.
- Use the green and red markers to drag and select the start and end points.
- Preview the trimmed video by clicking the Play button.
Step 4: Trim the desired section of your video according to your needs and click “Ok” once you’re done to apply the changes.

Step 5: Now, the trimmed video will be saved in your “PowerPoint Presentation”. If you need to further adjust the trim, you can select the video again and repeat the trim process.
Step 6: You can also save the trimmed video directly to your computer by right-clicking the “Video” from the presentation. Then, select “Save Media As” to upload it to your computer.
Steps on Mac Computer
For Mac users, the only way you can trim video on PowerPoint is when you’re a Microsoft 365 subscriber. Check the steps on how to go about it below;
Step 1: Access the “PowerPoint app” and upload the “Video” want to trim use the same procedure in “STEP 1 (Used in Windows methods above).
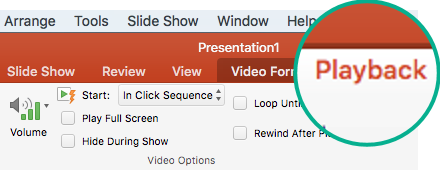
Step 2: Click on the “Playback” tab at the top-right corner and choose “Trim Video” from the toolbar.
Step 3: Click on the “Play button” in the “Trim Video” dialogue box. Then, once it reaches the part you’d like to cut, click on “Pause” and use the “Nudge forward” and “Nudge backward” buttons to adjust the location of the marker.
Step 4: Once you adjust the beginning and end of the trim, click the “OK” button to apply the changes.
Part 2: How to Trim a YouTube Video for PowerPoint
Besides trimming video clips via video files, PowerPoint also allows you to trim YouTube videos by embedding them into your presentation. However, this can only be done on Microsoft PowerPoint 2016 or earlier. The 2019 version does not support the trimming of online videos.
We’ve explained how to trim a YouTube video in PowerPoint in the steps below;
Step 1: Open YouTube in your web browser and find the YouTube video you want to trim in PowerPoint. Click the “Share” icon in the YouTube video and select the “EMBED” tab. Then, click on “Show More” to reveal more settings option.
Step 2: Uncheck the checkbox next to “Show suggested videos when the video finishes”. Then, tick the “Check box” next to “Show player controls” and “Show video title and player actions”. After that, highlight the entire “EMBED code” by pressing Ctrl + A on Windows/Command + A on a Mac computer, and copy it.
Step 3: Now, open your PowerPoint app and click on the “Slide” where you’d like to embed the YouTube video. Then, navigate to the “Insert” tab and click on “Video” under “Media Category” in the ribbon.
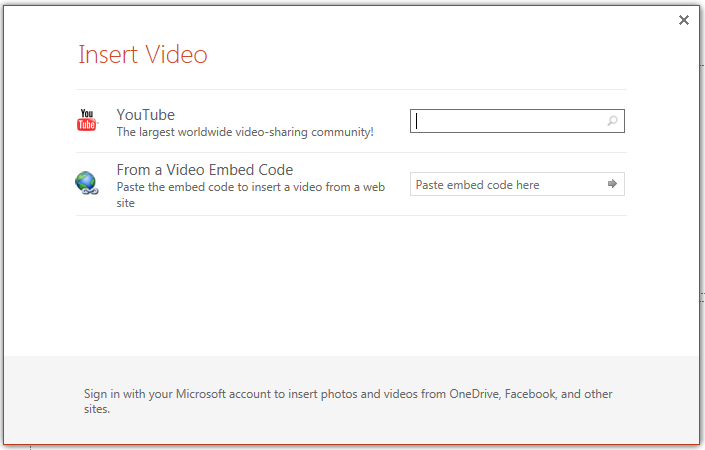
- Choose “Online Video”, then, paste the “EMBED” video code you copied into the box next to “From a video Embed Code”. Then, add “;start=< seconds>;end=< seconds>;” (without quotes) right after where the code says “rel=0” (without quotes). The “Seconds” in the code should be replaced with the time (in seconds) where you want to start and end the video.
Step 4: After that, click “Insert” and choose “GO” for the settings to take effect. Then, click the “Save” icon at the upper left corner of the “Quick Access Toolbar” to save the changes.
Part 3. Why Can’t I Trim A Video In PowerPoint?
As mentioned earlier, the 2019 and latest versions of Microsoft PowerPoint no longer allow users to trim YouTube videos. So, if you’re trying to trim a YouTube video on a computer running Microsoft PowerPoint 2019 or later, chances are you’ll be unable to operate.
Part 4: How to Add a Trimmed Video to a PowerPoint Presentation
If you have a video you’ve already trimmed and you’re wondering how to add it to your PowerPoint presentation, the process is pretty easy. We’ve shared the step-by-step procedure below to help you out;
Step 1: Open your “PowerPoint Presentation” and click on the “Insert” ribbon.

- Select “Video” under “Media” .
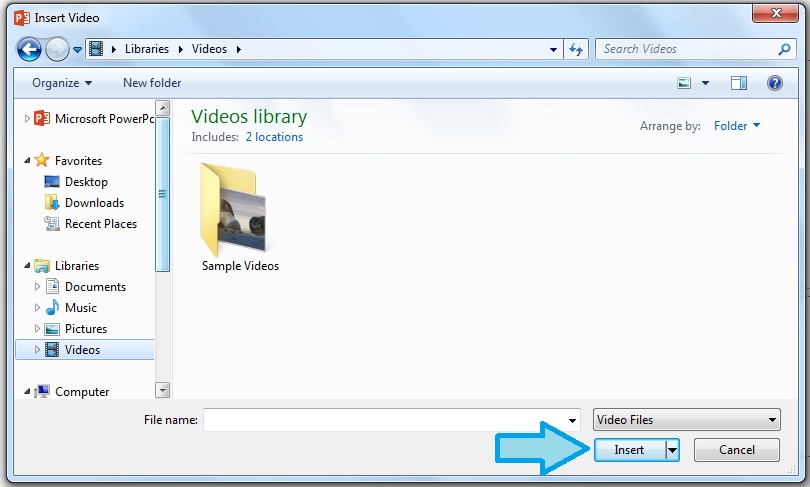
Step 2: Select “Video on My PC” from the drop-down menu. Then, in the pop-up window, select the trimmed video you want to add to your presentation and click “Insert”.
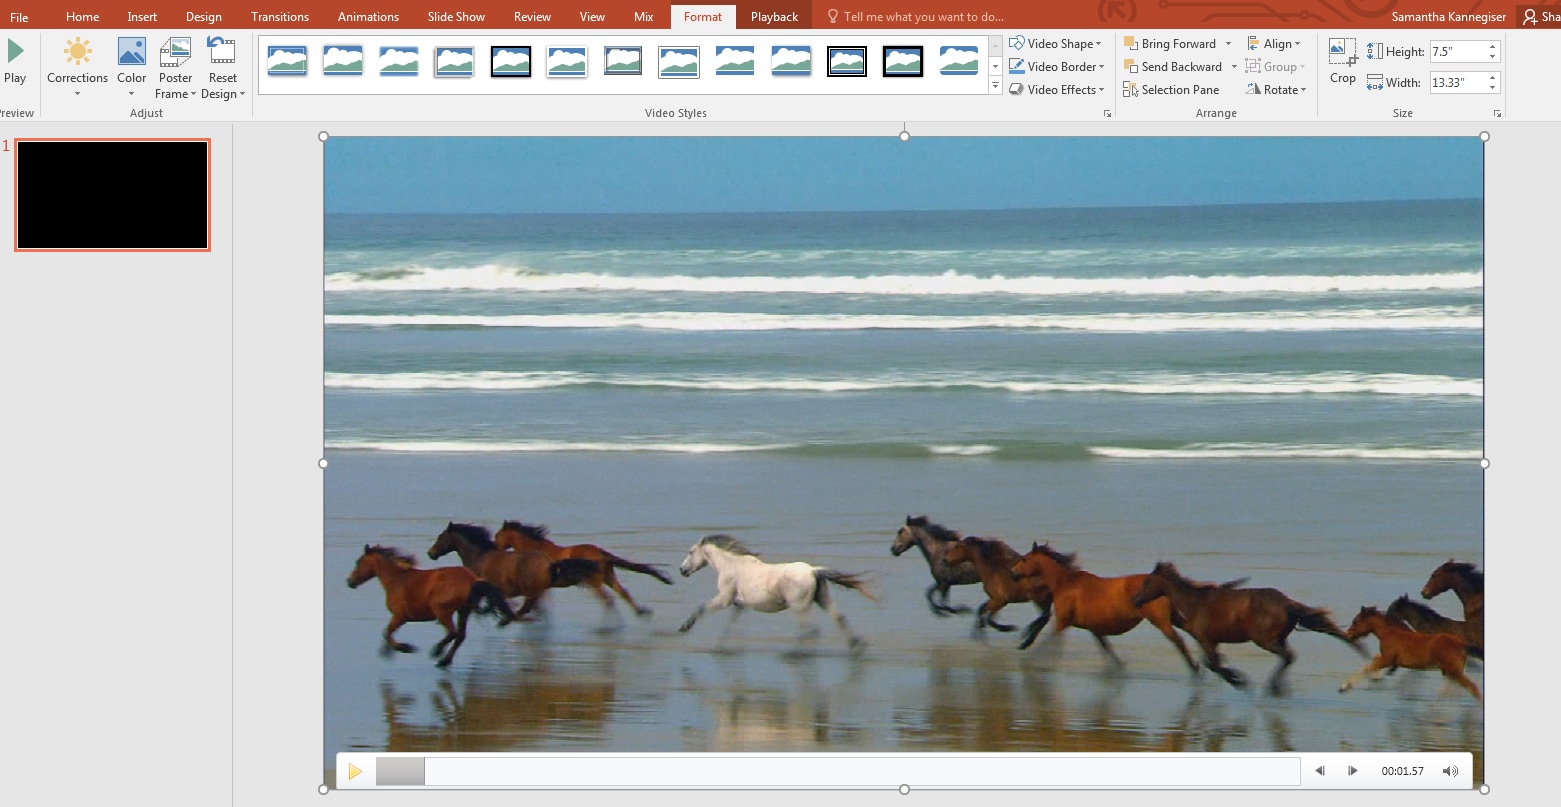
Step 3: Once the video is on your slide, adjust it using the “Video Tools” ribbon. Then, click “Save” to complete the operation.
Bonus tip: How to Trim Audio in PowerPoint
Besides videos, PowerPoint also allows users to trim audio clips without requiring any third-party app. So, if you have an audio clip that needs to be added to your presentation, follow these steps to to trim it in PowerPoint;
Step 1: Access the “PowerPoint presentation” and click on the “Audio clip” that you want to trim.
Step 2: Click on “Playback tab” from the top-left corner of the toolbar. Then, choose “Trim Audio” under “Audio Tool”.
Step 3: In the “Trim Audio” box that appears on your screen, click the “Play” button. Then, once the audio clip reaches the point you’d like to cut, click the “Pause” button.
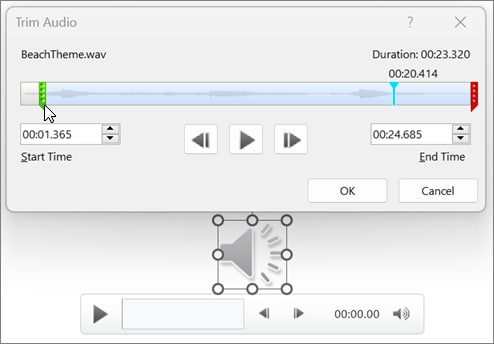
Step 4; Finally, adjust the “Marker” in the audio clip timeline and click “OK” to finish.
FAQs on How To Cut a Video on Powerpoint
How to Adjust the Start and End Time of a Video in PowerPoint?
You can use the “Trim Video” feature in PowerPoint to adjust the start and end time of a video. See how it's done below;
Step 1: Select your “Video” from the “PowerPoint Presentation slide” and click on the “Trim Video” feature from the toolbar.
Step 2: Enter the values for “Start time” and “End time” into the relevant fields, as shown in the image below.
Step 3: Click “OK” to finish.
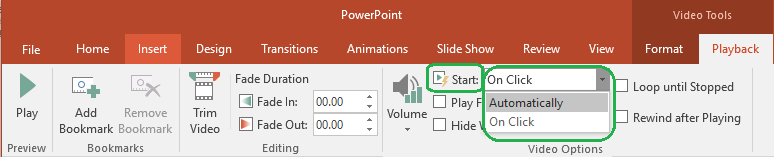
Where are Video Tools In PowerPoint?
You can find the “Video tools” in the “View” or “Insert” tab in your PowerPoint toolbar. The image below shows where it's displayed.
How to Save a Trimmed Video in PowerPoint?
To save a trimmed video in PowerPoint, you need to do the following;
Step 1: Click on “File” at the top-left corner of your screen and select “Info”.
Step 2: Click “Compress Media” and select the preferred level of compression you want.
Step 3: After the compression, choose “On-slide media that you trimmed. Then, right-click if and select “Save Media as”.
Step 4: Enter the name of the file and choose a preferred storage location. Then, click “Save” to finish.
Conclusion
Ultimately, you don't need any technical skill to be able to trim your audio clip in PowerPoint. You just need to follow the steps outlined in the above article, you can easily get the job done efficiently. Also, if you're looking to trim an audio clip in PowerPoint, we've shared the steps too.