Do you want to make your PowerPoint presentations more professional? A voiceover PowerPoint presentation is an excellent approach to achieving this goal.
Adding voiceover to PowerPoint presentations is a fantastic idea. Whether you are creating educational content or business presentations, a voiceover is always an improvement.
But how do you effectively add a voiceover to your PowerPoint presentation? Well, you have landed at the right place for an answer to this question.
This blog will walk you through the complete process of adding a voice-over to your PPT. So, let's not waste more time and cut right to the chase.
In this article
Why Should You Do a VoiceOver PowerPoint Presentation?
Here are a few reasons why you should create a voice-over PowerPoint presentation:
-
Accessibility
Adding a voiceover to your PowerPoint presentation helps enhance accessibility. People with sight-related issues can easily access your presentations if they have a narration. This can ensure more people can benefit from your presentations.
-
Enhanced Communication
With a voiceover PowerPoint presentation, you can enhance communication with your target audience. Audio can help the audience understand your tone, emphasis, and passion, which can enhance engagement.
-
Personal Connection
Using voiceover narration can help build a more personal connection with your audience. Audio narrations humanize your content, which can enhance your audience's experience.
-
Conciseness
Adding a voiceover to your presentation makes it concise. You can provide additional content while elaborating on bullet points inside the presentation. This helps you communicate more details without populating your slides with more text.
-
Easier to Digest
Audio content is easier to digest than written content. Adding a voiceover to your PPTs can make the information easier for the audience to consume, improving their experience with your presentations.
How to do Voice Over for PowerPoint Presentation on Windows
Wondershare Virbo is an excellent way to add a voice-over to your PowerPoint presentation. The PowerPoint-to-video feature of Virbo makes this easy. It helps you quickly turn your PowerPoint presentation into a video, add a voiceover, and do a lot more with the power of AI.
The best part is that you don't need to appear on camera. You can also record a voice-over simultaneously without any additional recording operations. Once you are done, just export your PPT as a video!
All these fantastic features make Virbo an excellent choice for the job. So, let's go ahead and look at the steps for creating a voice-over PowerPoint presentation on Windows.
Step 1: Download the Virbo Windows Application
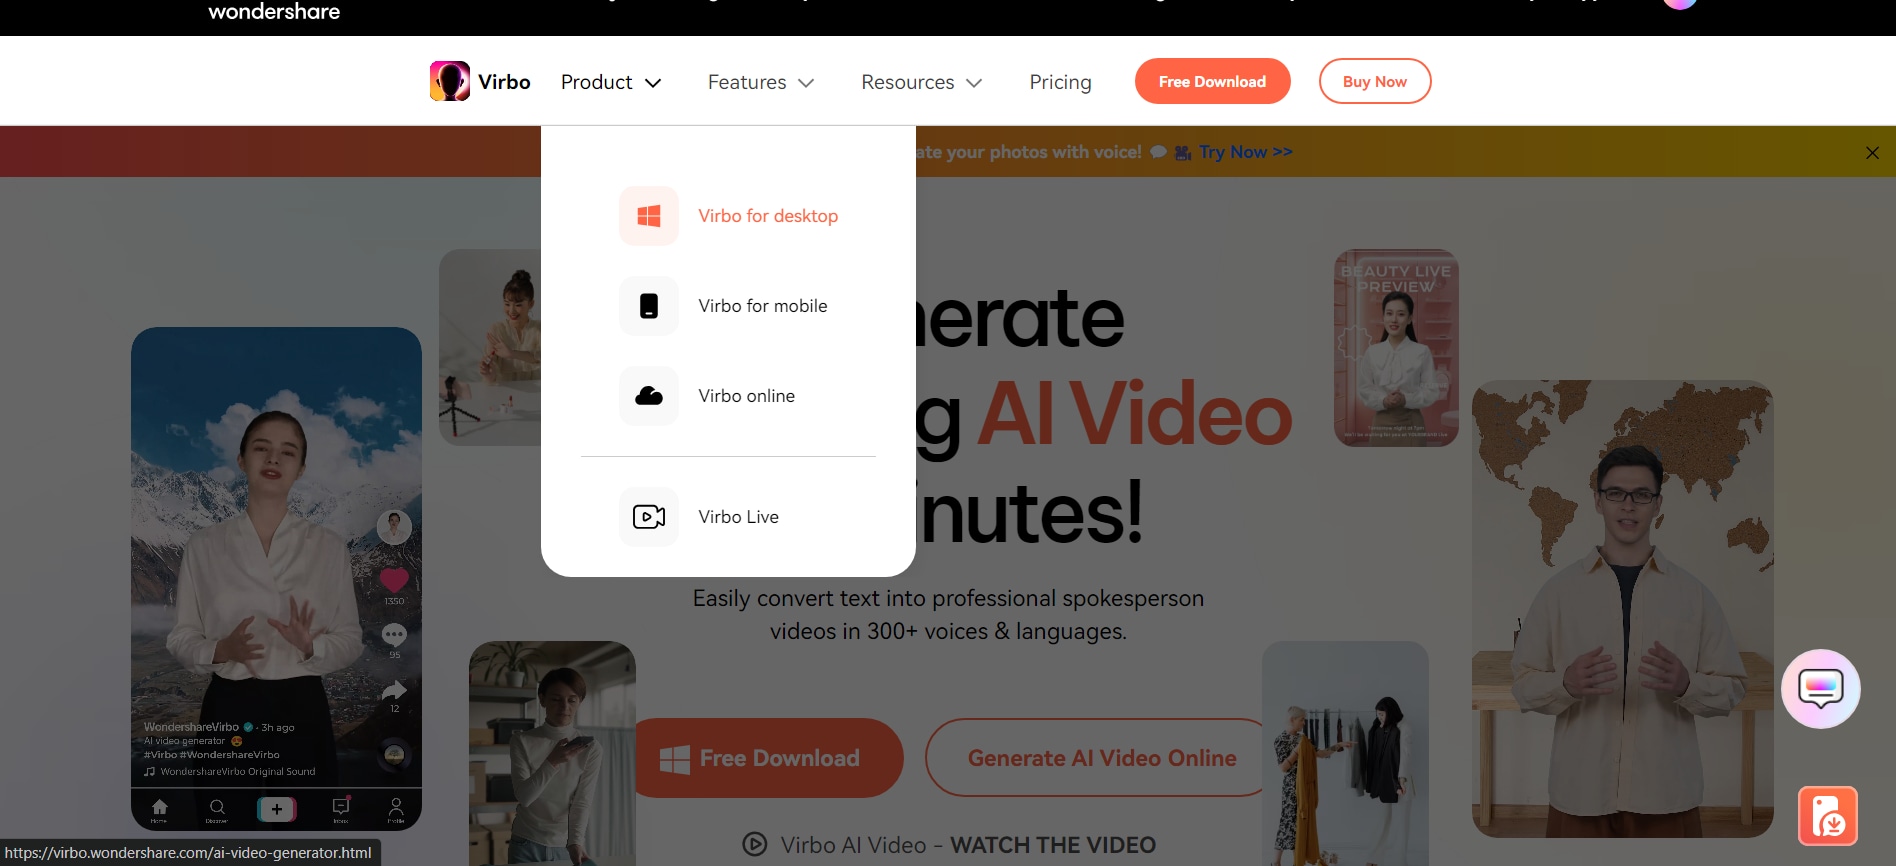
For this tutorial, you will need the Virbo Windows application. So, the first step is to download the application. To do so, go to the Wondershare Virbo website, and under the "Product" navigation option, click Virbo for Desktop.
Or, You can directly click the button below to get Virbo on your desktop.
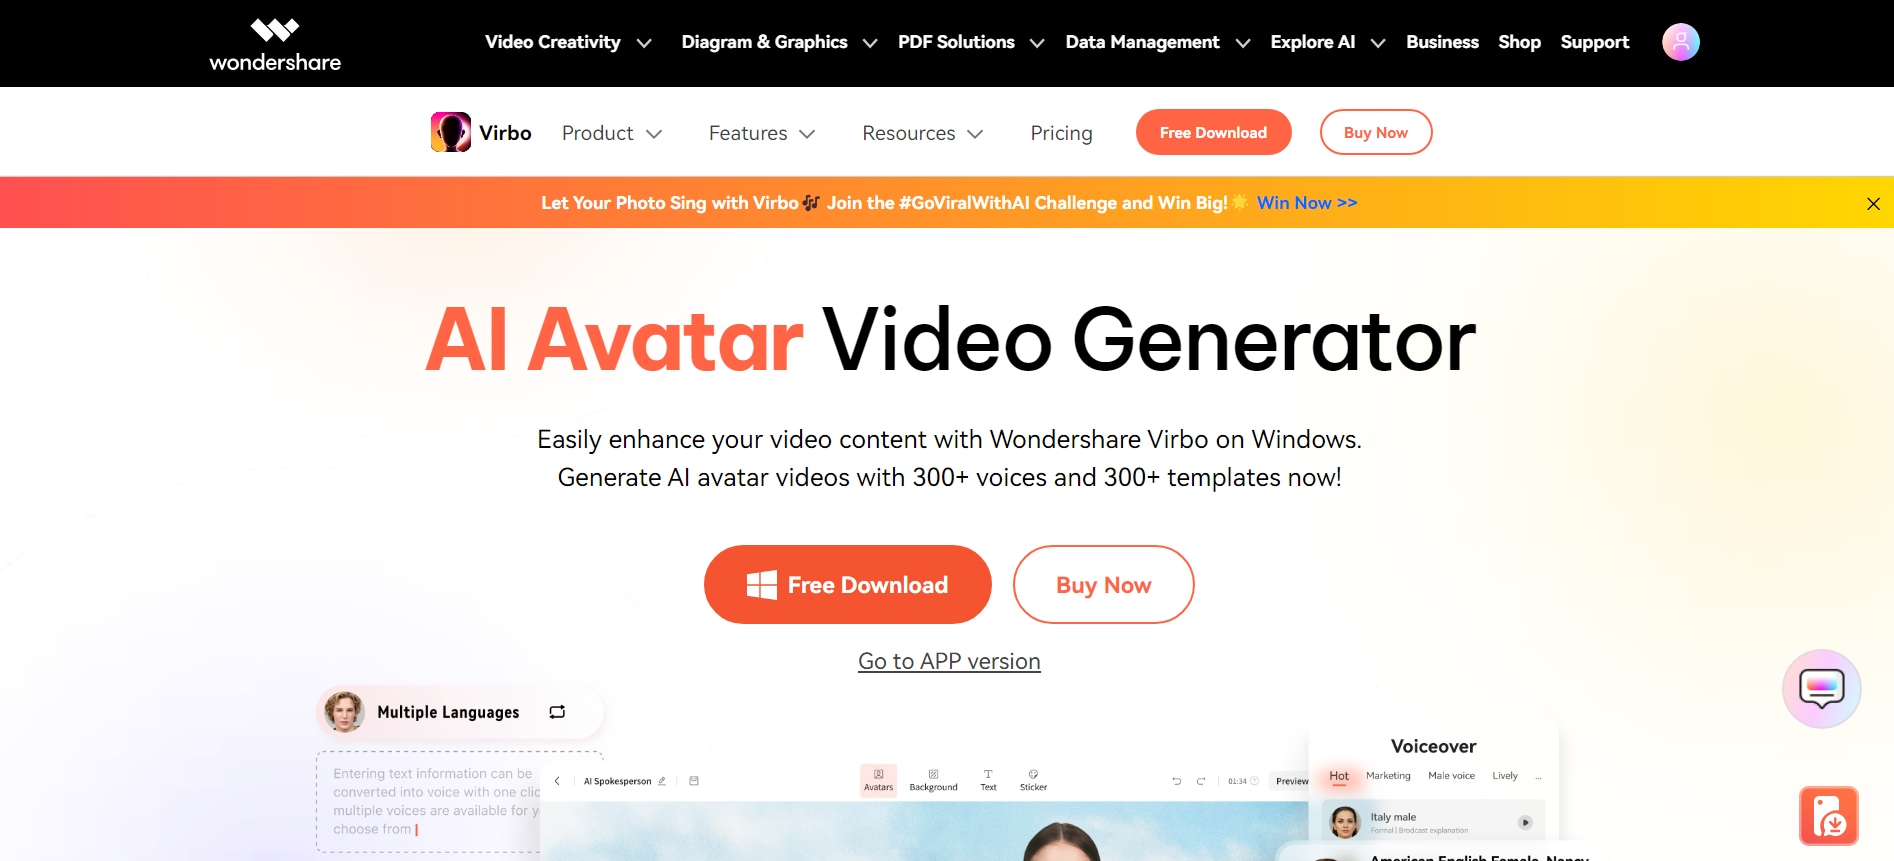
Once you have downloaded Virbo, install it on your PC. This tutorial provides instructions on installing Wondershare Virbo on Windows.
Step 2: Import a PPT File
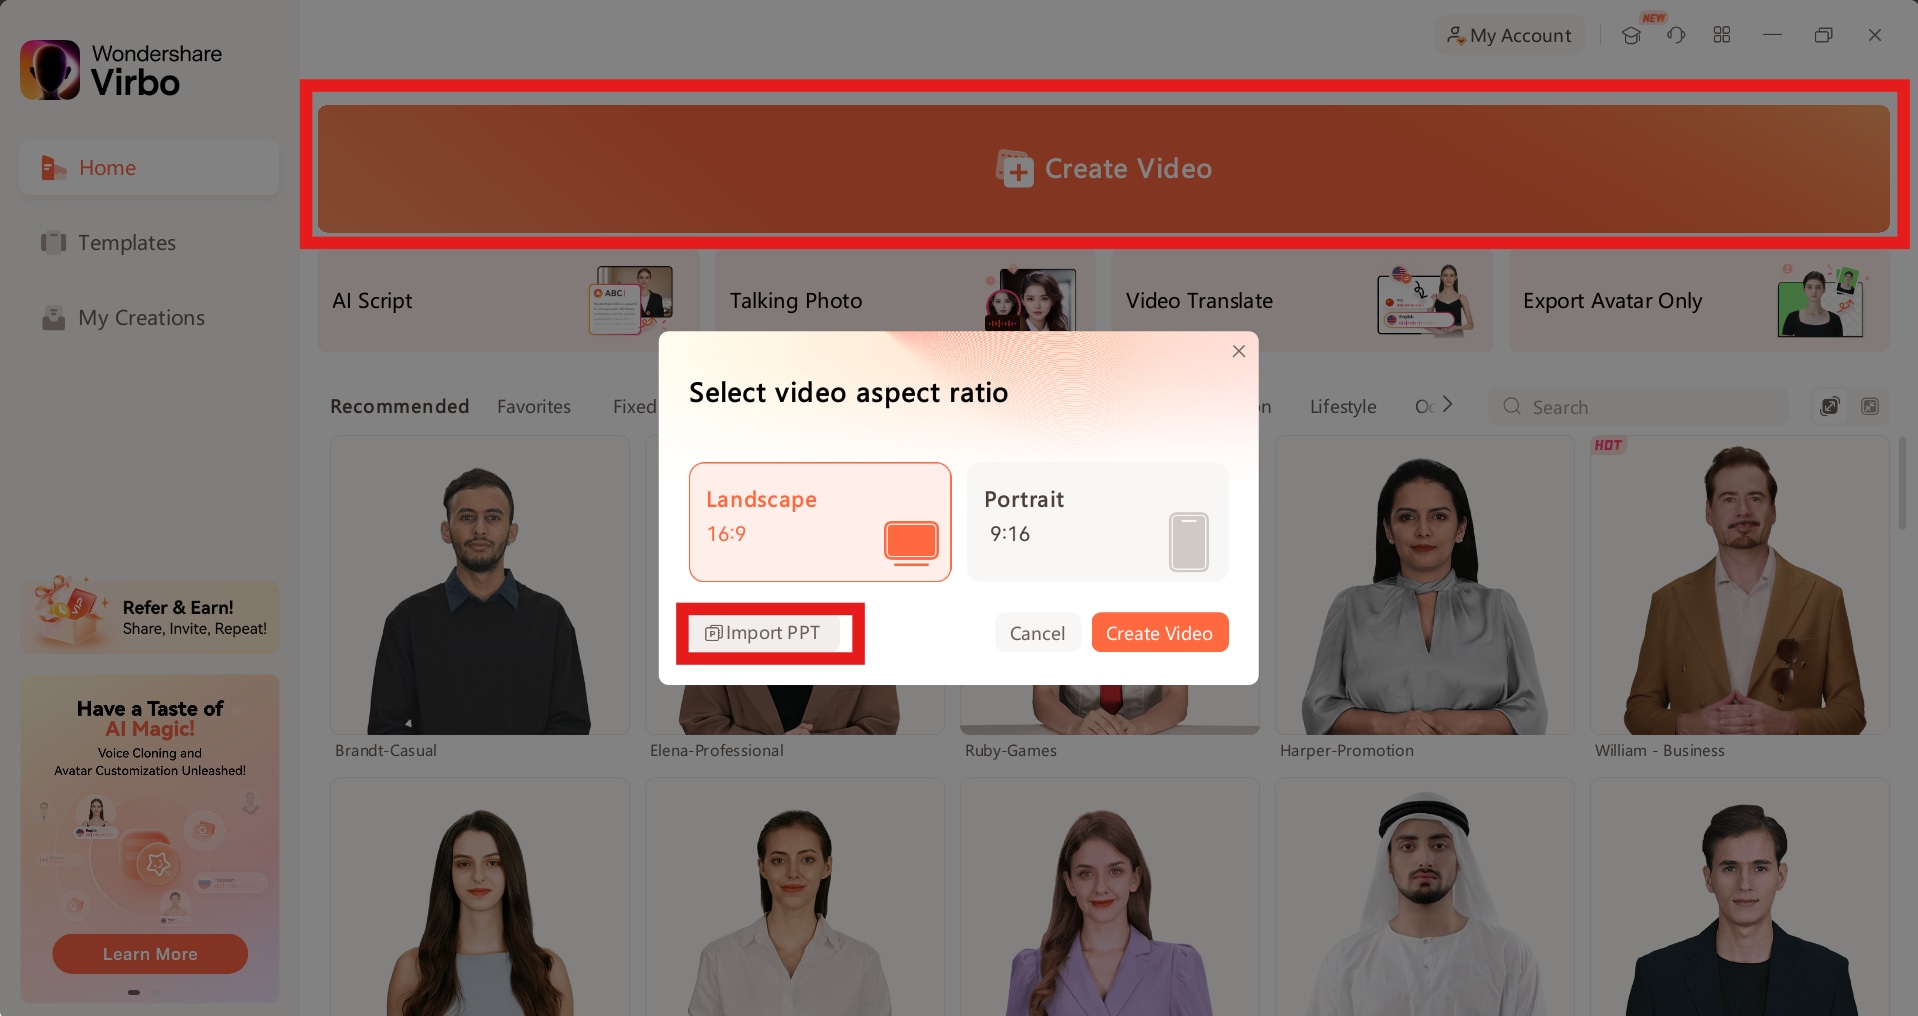
Once you have installed Wondershare Virbo on your computer, it is time to create your voice-over PowerPoint presentation. To get started, import your PPT to Virbo. To do so, click open the Wondershare Virbo app, click on Create Video, and then click Import PPT.
Click "Select file" on the open popup and then choose your PPT file.
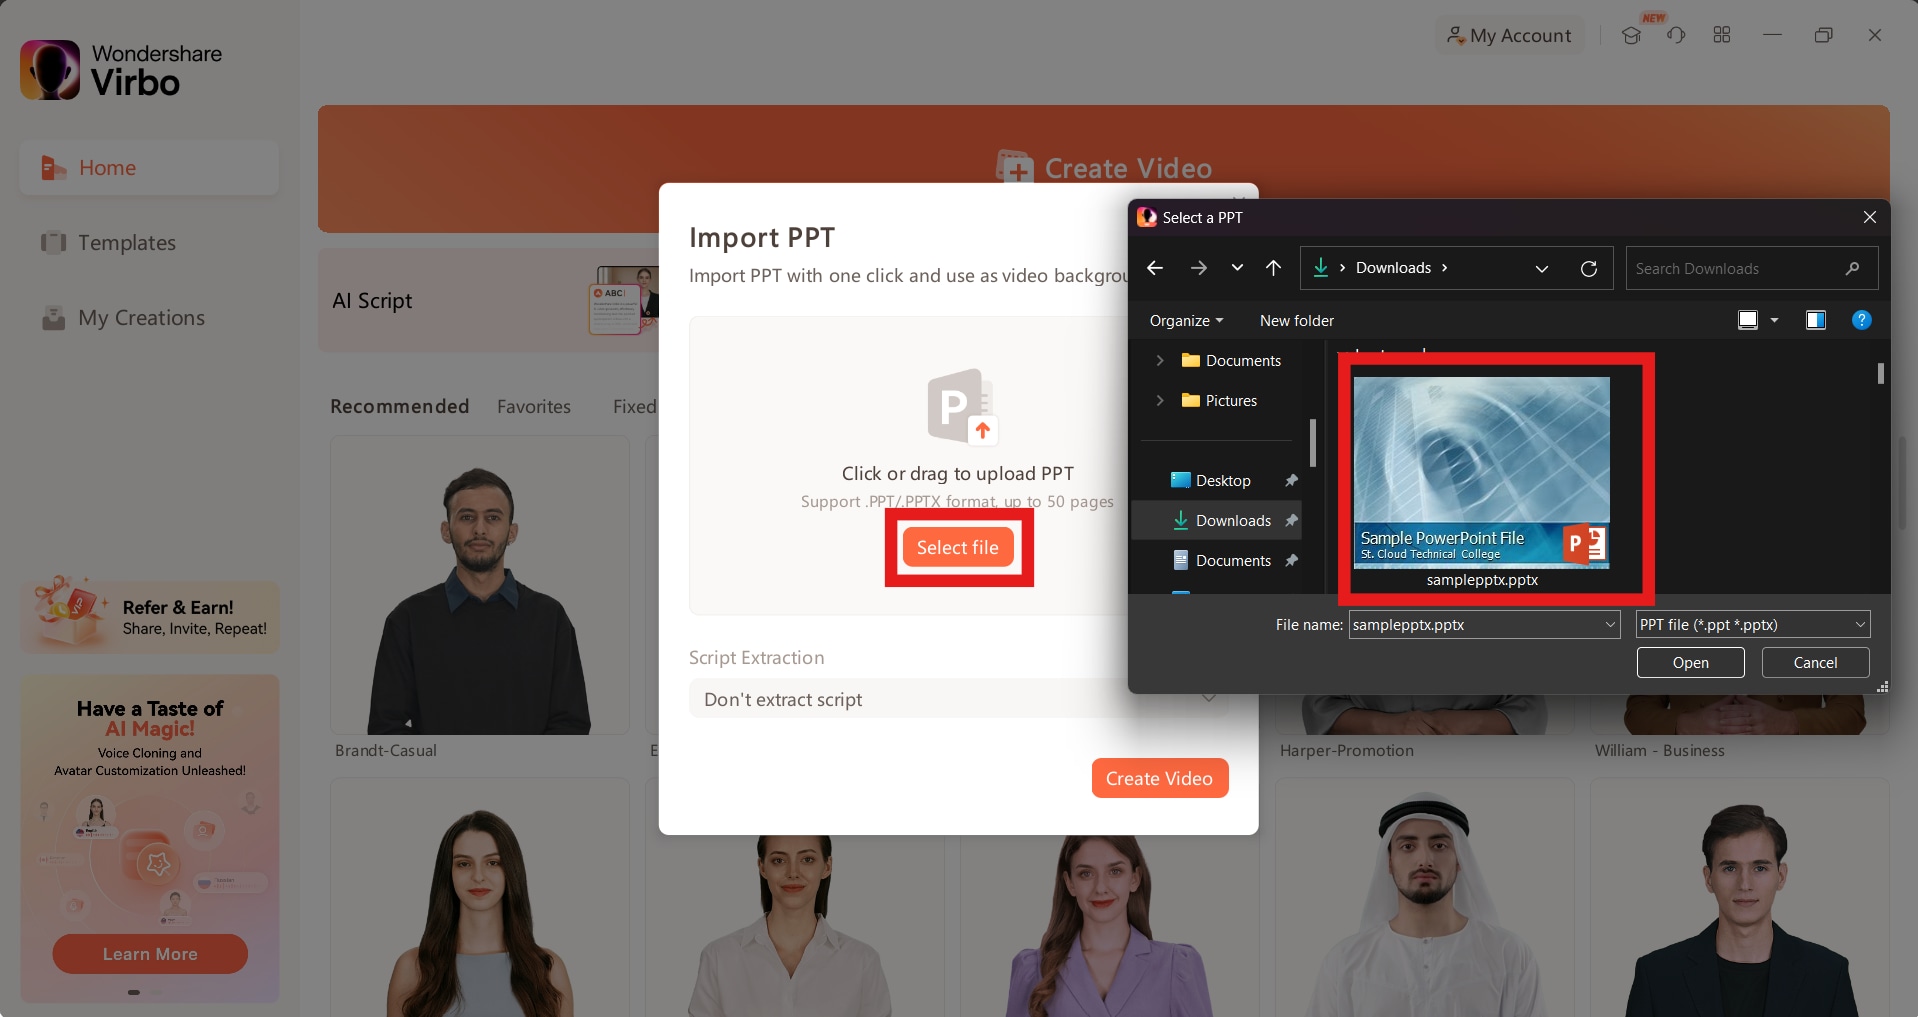
Keep the "Script Extraction" box as "Don't extract script" and click on "Create Video."
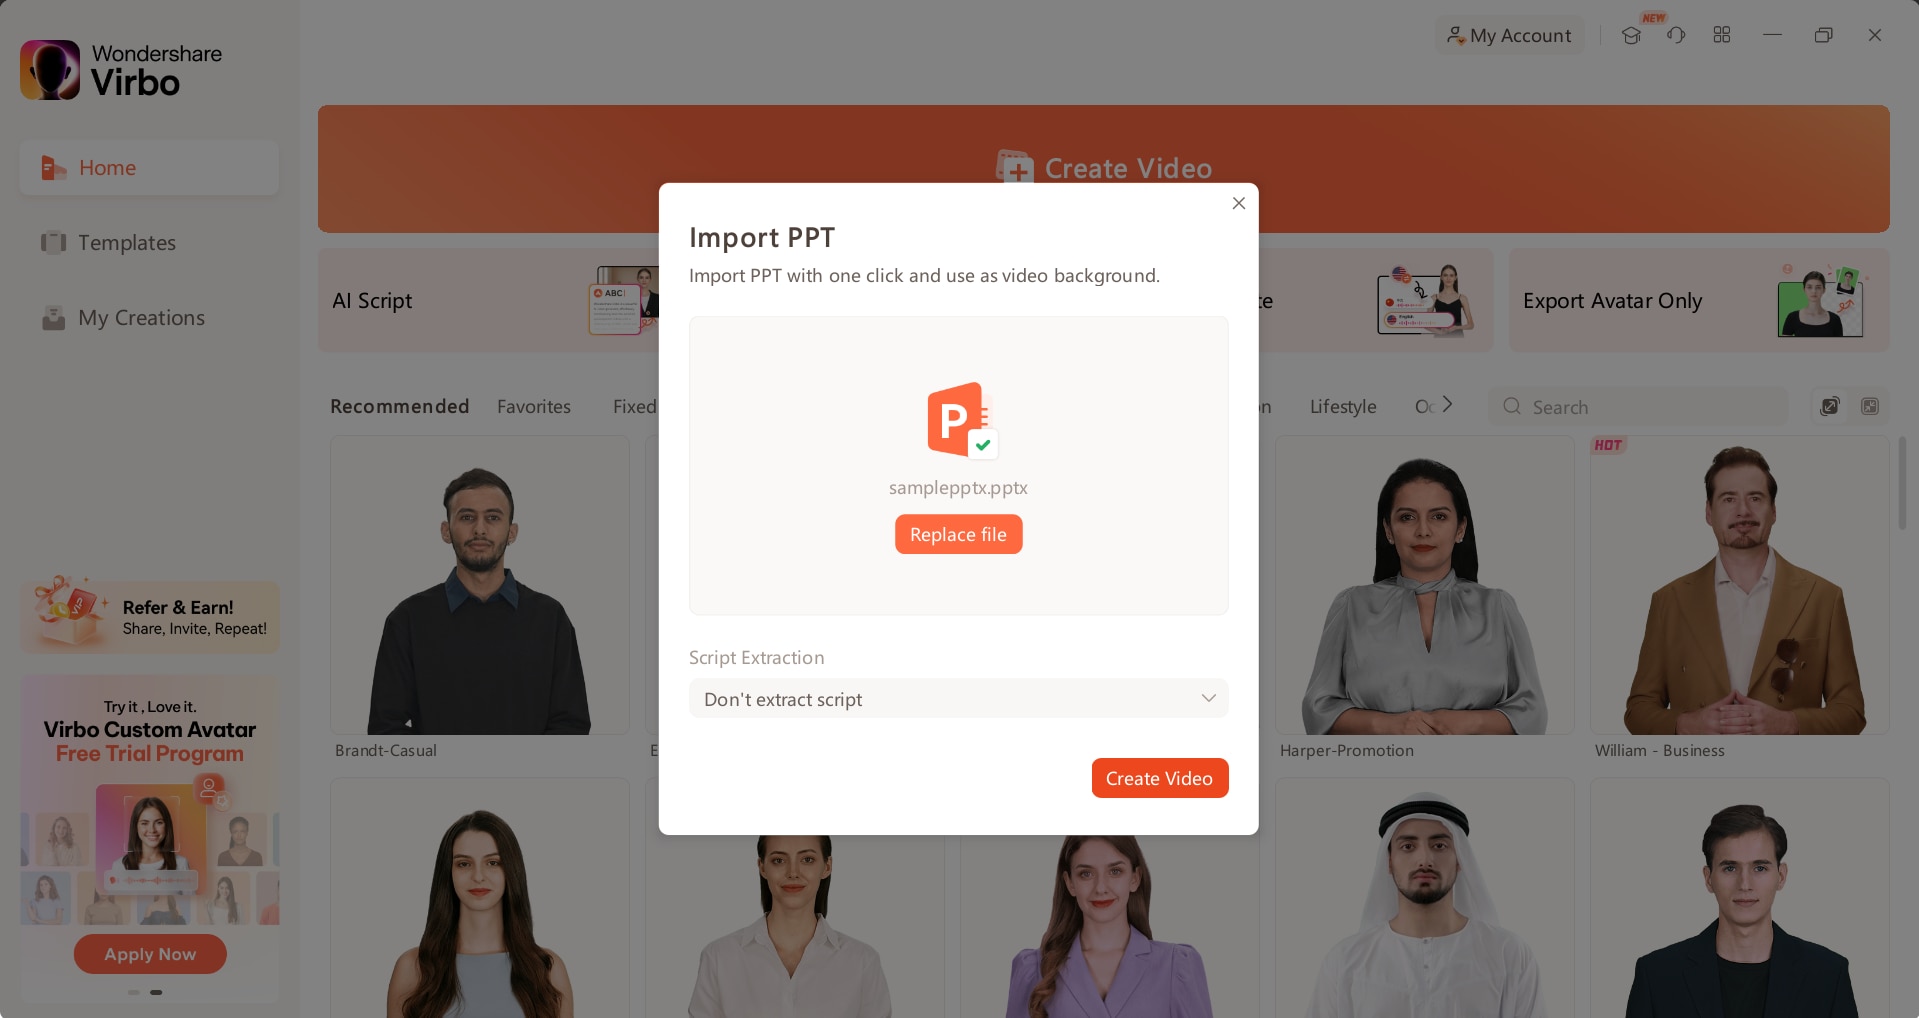
Once the PPT has finished importing, move on to the next step.
Step 3: Write Text Script or Upload Audio:
You can create a voiceover PowerPoint presentation with Wondershare Virbo in two different ways. You can either paste your written script or do a voiceover yourself.
Paste your script in the Text Script box to add a written script.
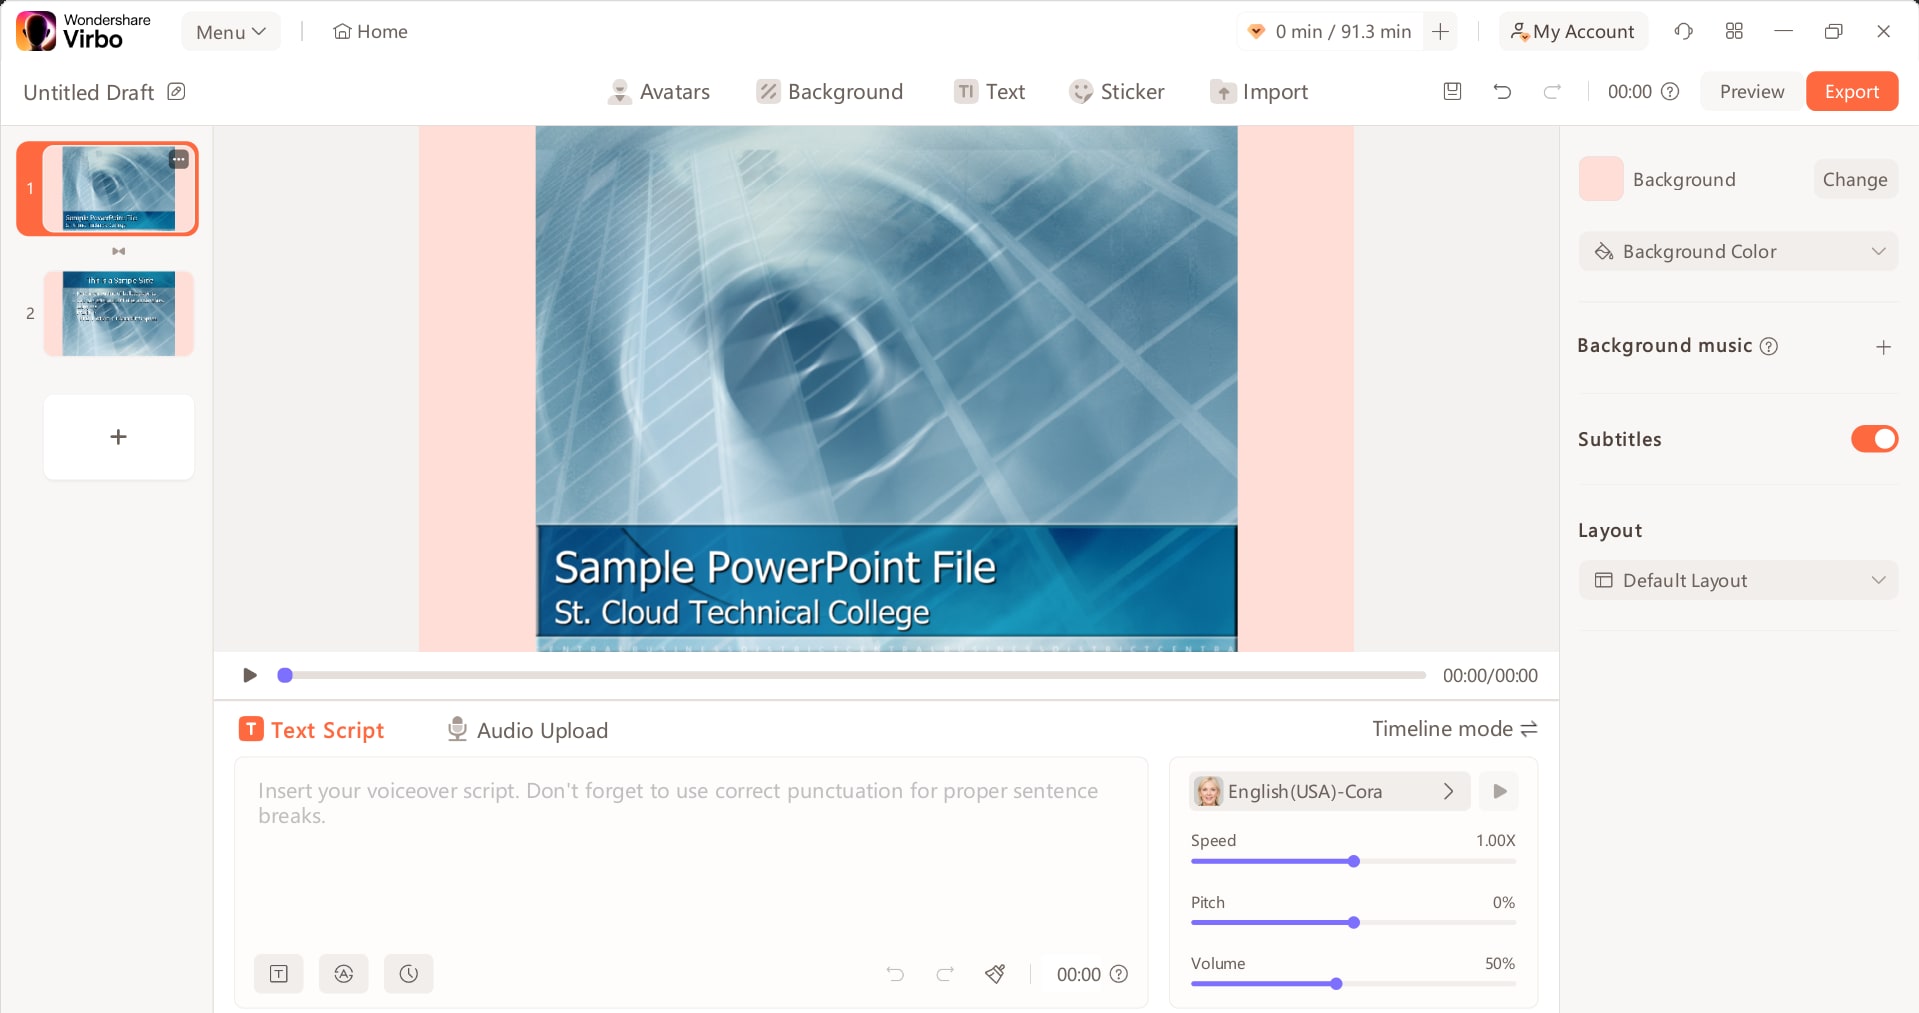
You can see the AI voice options next to the text box. First, choose the language or accent you want for your script. You can choose from many options by clicking on the language box at the top. You can also use filters to select your language.
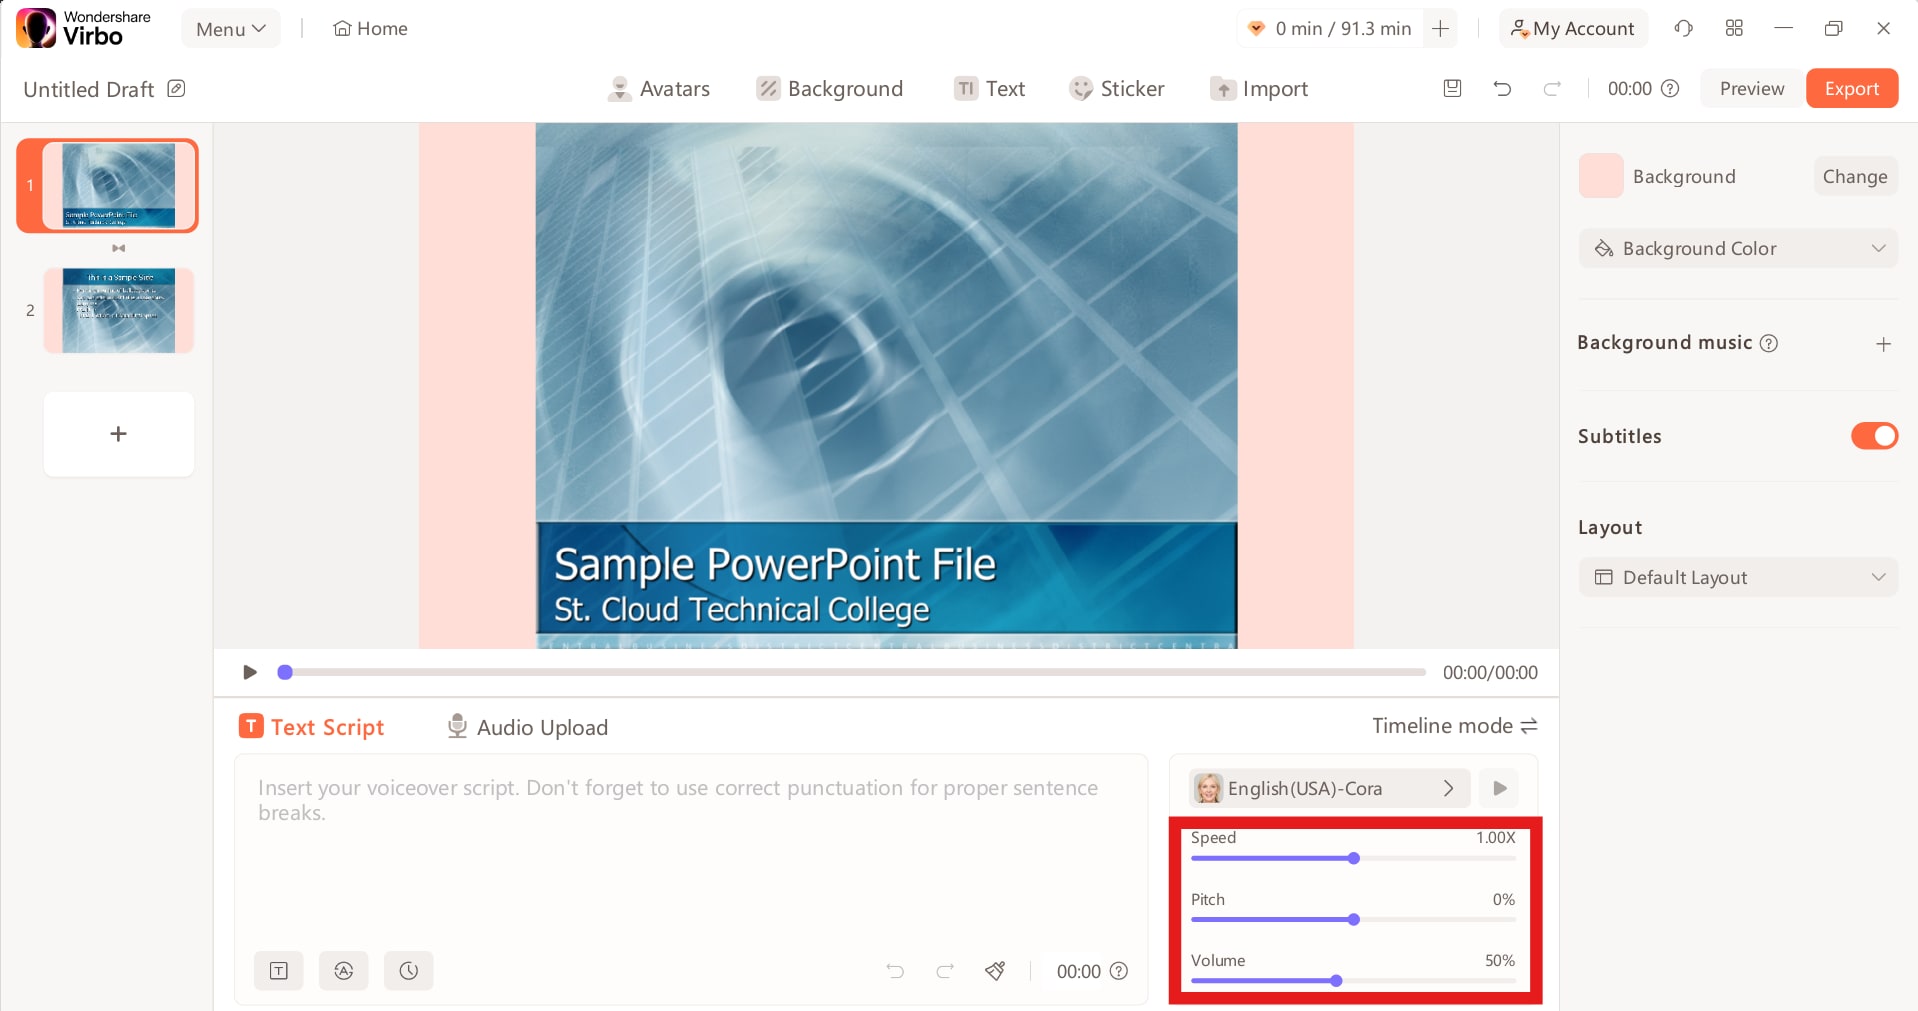
You can also set the Speed, Pitch, and Volume for the AI voiceover.
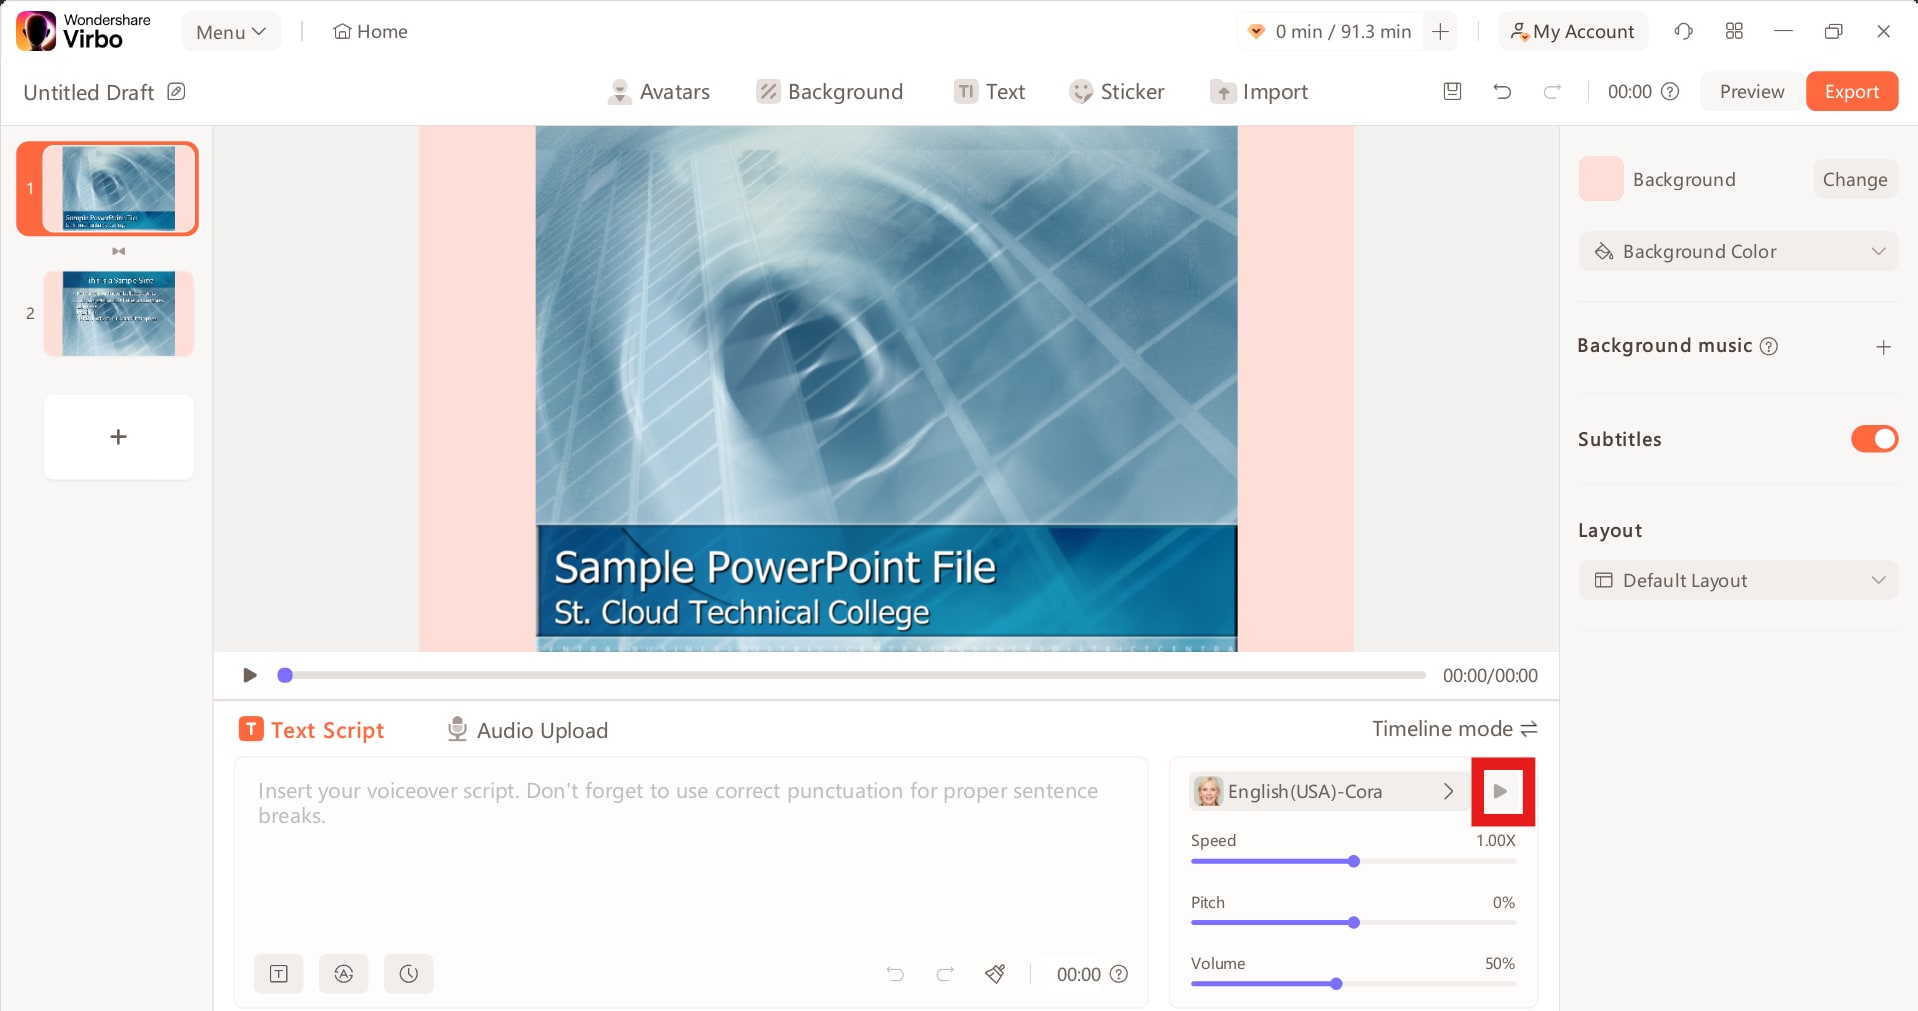
Once you set everything up, click the play button to check if this is your desired voice.
To add your voiceover, go to the Audio Upload tab. Here, you can see a bunch of different audio options. You can upload your audio file, extract audio from an MP4 file, or do a live recording for each slide.
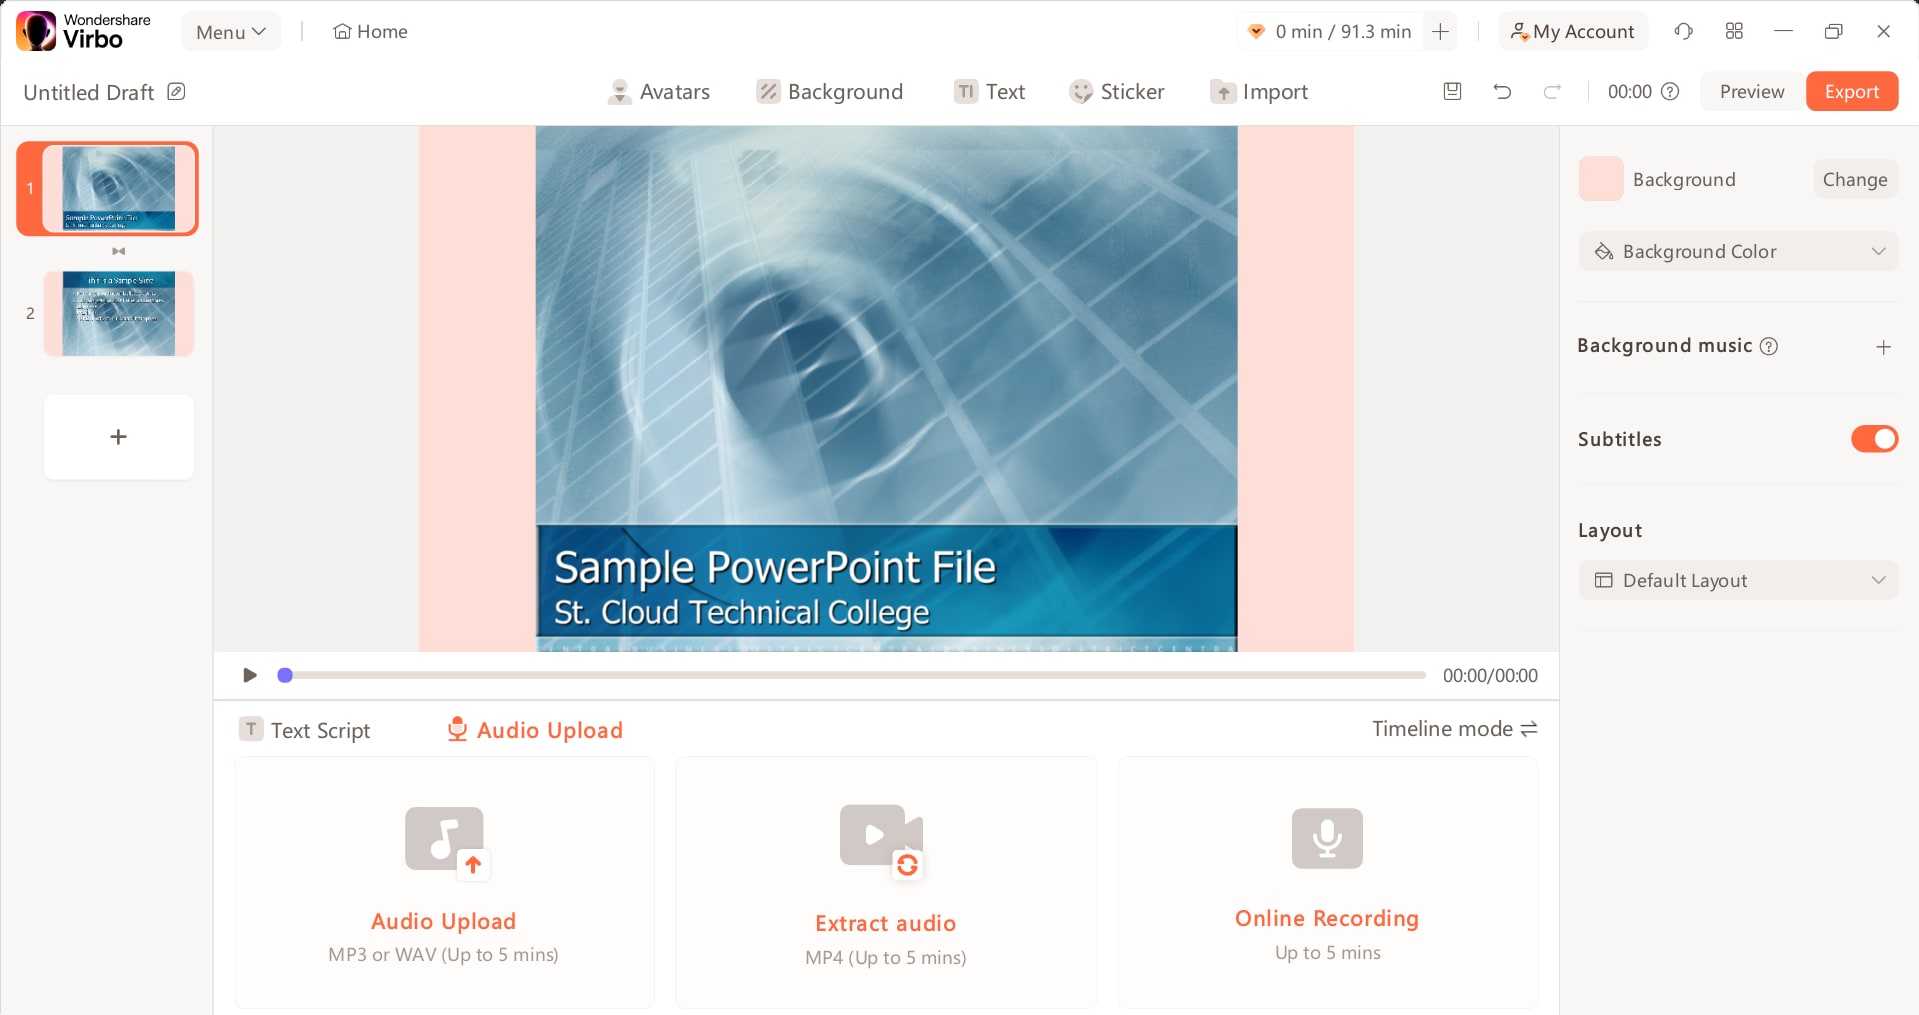
Choose an option that fits your scenario and move on to the next step.
Step 4: Preview and Export Your File
Once you have added the voiceover for your PPT, check to see if everything is perfect. To do this, click Preview to see your presentation's appearance.
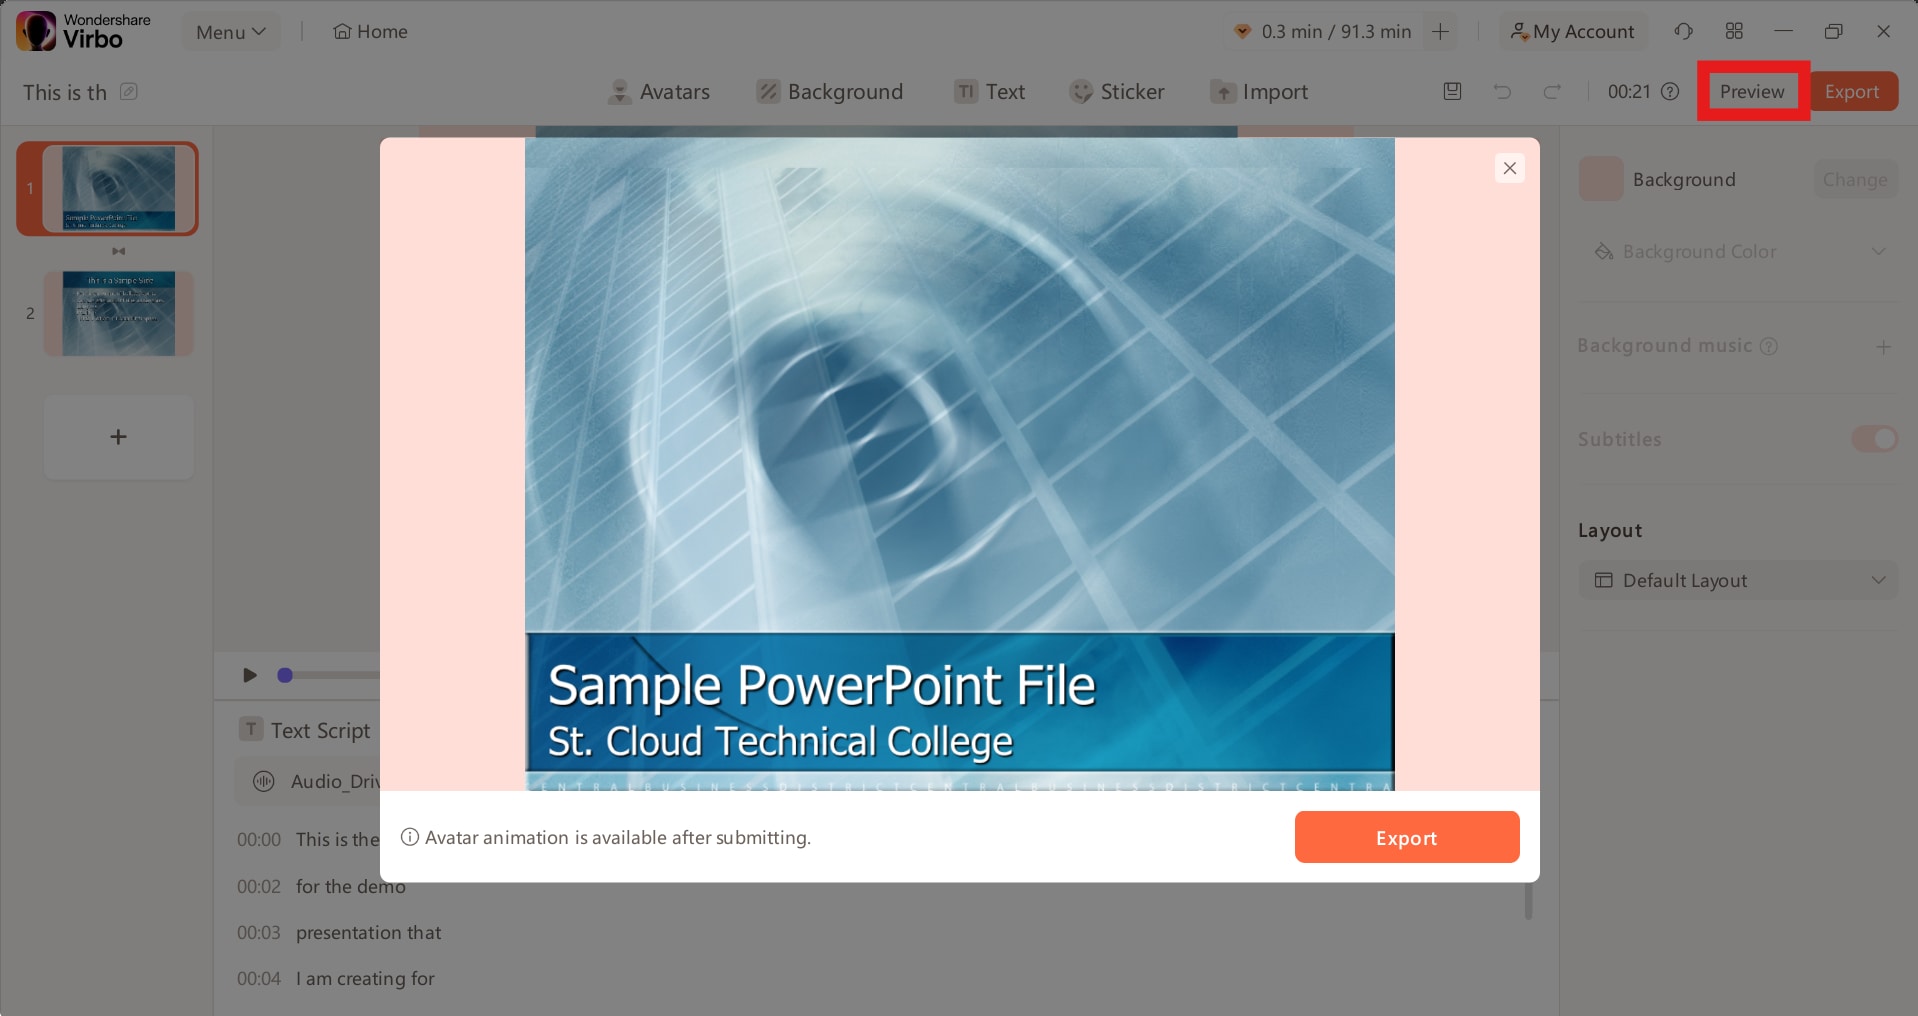
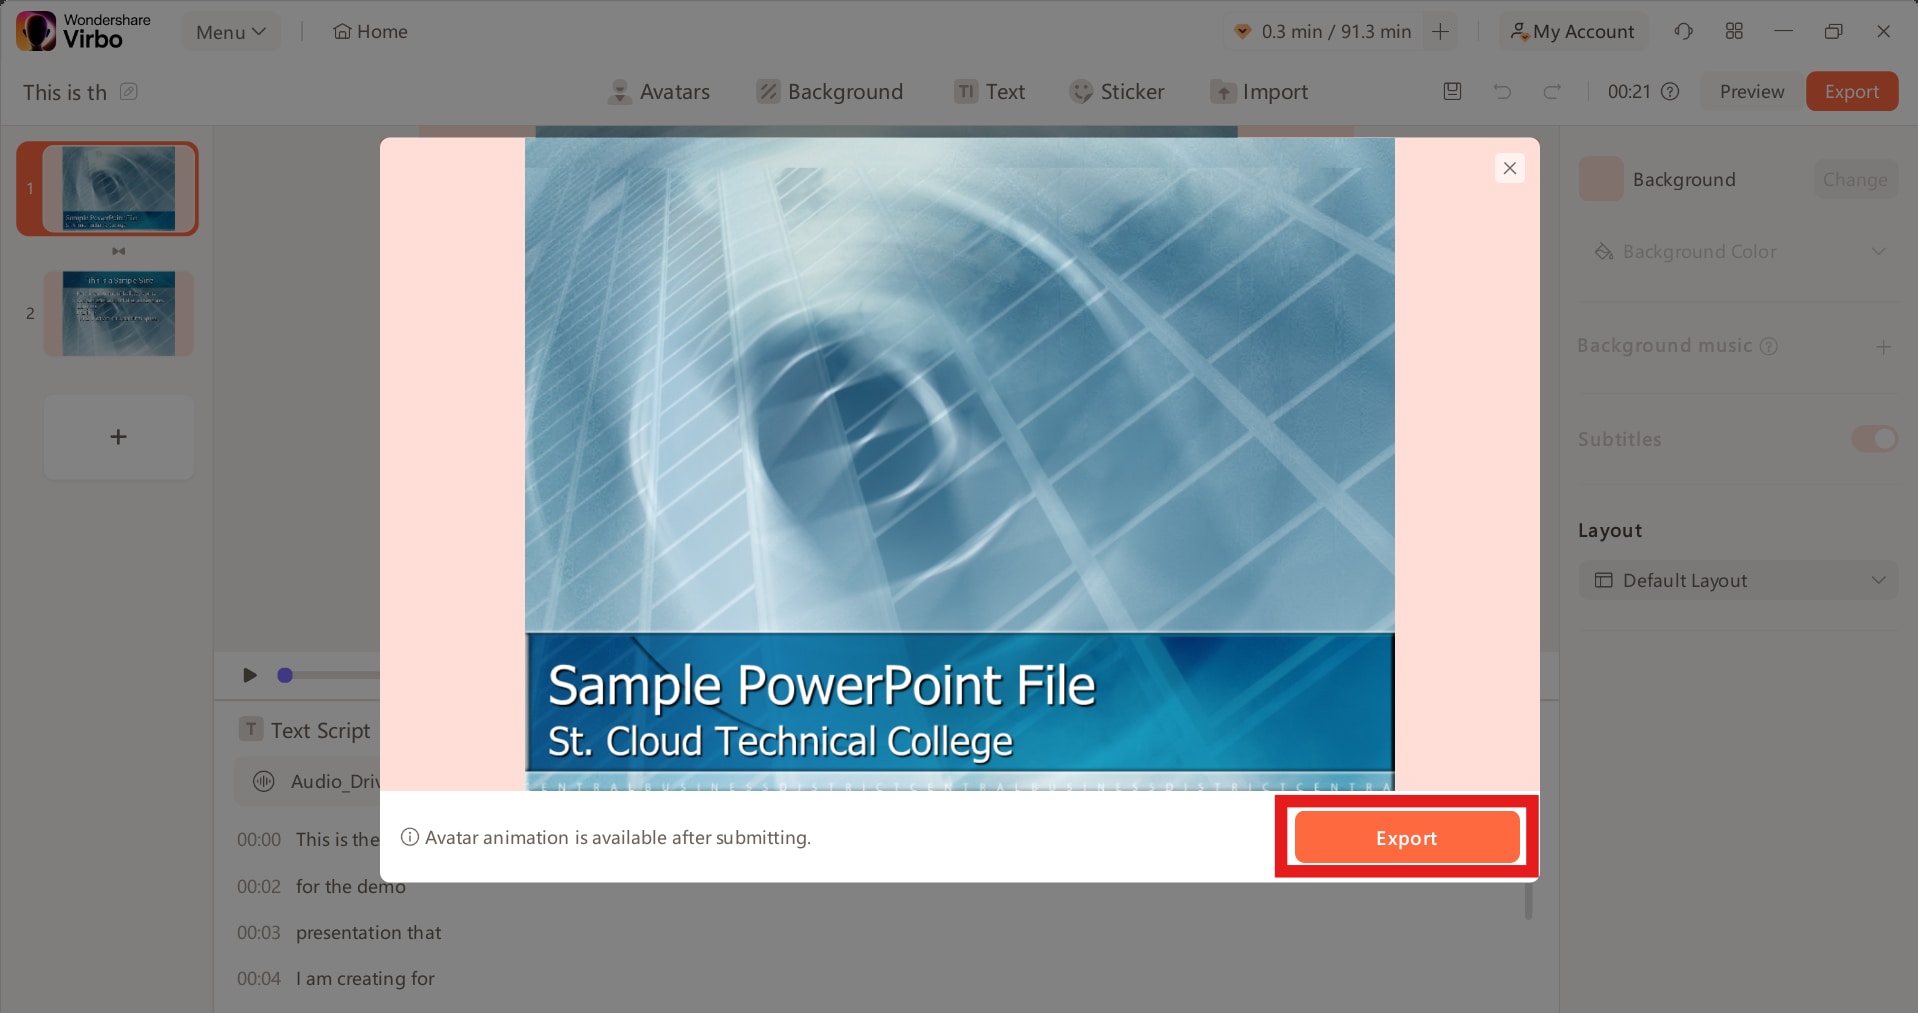
If everything is perfect, you can click Export to download your voice-over PowerPoint presentation as a video.
How To Add a Voiceover to a Video Using Recording Software
The key benefits of using dedicated recording software are better audio quality control, editing capabilities, and the ability to separately record and fine-tune the voiceover before combining it with your video project
here are the key steps to add a voiceover to a video using recording software:
Step 1. Set up your recording environment
Find a quiet room with minimal background noise and echo. You can use blankets or acoustic foam to reduce echo if needed. Ensure there will be no interruptions during recording.
Step 2. Choose your microphone
While built-in laptop/phone mics can work in a pinch, it's recommended to use an external USB microphone for better audio quality. Even an inexpensive mic ($50-100) will produce superior results compared to built-in mics.
Step 3. Select recording software
There are many options for audio recording software like Audacity (free), Audiate by TechSmith, or your video editing software's audio recording tool. Choose one that allows easy editing and exporting of audio files.
Step 4. Prepare your script
A written script helps maintain a consistent tone and pacing and reduces awkward pauses. Read it aloud beforehand to practice.
Step 5. Record your voiceover
Open your recording software, select the correct microphone input, and record your voiceover following the script. Do multiple takes if needed.
Step 6. Edit the audio
Use the recording software to trim out mistakes, remove silence, adjust volumes, and add any audio effects like equalization or noise reduction.
Step 7. Export the voiceover file
Export your final edited voiceover as an audio file (MP3, WAV, etc.) to import into your video editing software.
Step 8. Import and sync in the video editor
In your video editor, import the voiceover audio file and sync it with your video footage. Adjust audio levels as needed.
Why Isn't The Recording Working?
There are several reasons why your recording may not be working. Some common problems to check include:
-
Faulty Microphone
The most common issue that may be preventing your recording from working is a faulty microphone. If you are recording using an external microphone, try using another one to see if the option persists. Another thing you can do to diagnose the issue is to open a recording app on your computer and see if the recording works. If it doesn't, try changing your microphone.
-
Issues with Permissions
Another common reason the recording does not work for your voice-over PowerPoint presentation is permission issues. Make sure apps have permission to access your microphone. On your Windows laptop, go to Settings → Privacy & Security → Microphone and ensure Microsoft Access is on.
AI Video in Minutes!

While recording software is suitable for capturing live voiceovers, Virbo provides an all-in-one AI-powered solution tailored for efficient multilingual video voiceover production with realistic avatars. This can greatly streamline video creation workflows for businesses and content creators.
Conclusion
All you need to know is adding a voice-over to your PPT file. We have listed the process to help you create a perfect voice-over PowerPoint presentation. Wondershare Virbo is an excellent choice for this job.
Along with adding a voice-over to your PPT file, Wondershare Virbo offers many other features. You can use it to create videos with AI hosts, Translate videos, and perform many different video operations. It is a perfect tool for creating and editing videos and PPT files.
This blog post has helped you create impressive PPT files. If you have any questions about Wondershare Virbo or adding a voiceover to your PPT, let us know in the comments below. We would also appreciate your feedback and suggestions.


