

Adding different types of media, like GIFs and images, to your PowerPoint presentations can make them more engaging and immersive. But did you know that making GIFs from your slides can be even more beneficial?
It can help you highlight key concepts from your presentation, better explain steps in a tutorial, and ensure that your audience retains as much knowledge from your PPT files as possible.
All you have to do is learn how to make a GIF from PowerPoint. Fortunately, the entire process is easy when you have the right tools.
In this article
How to Make a GIF From PowerPoint
Depending on your version of the program, you could make a GIF from a PPT file without ever leaving this tool:
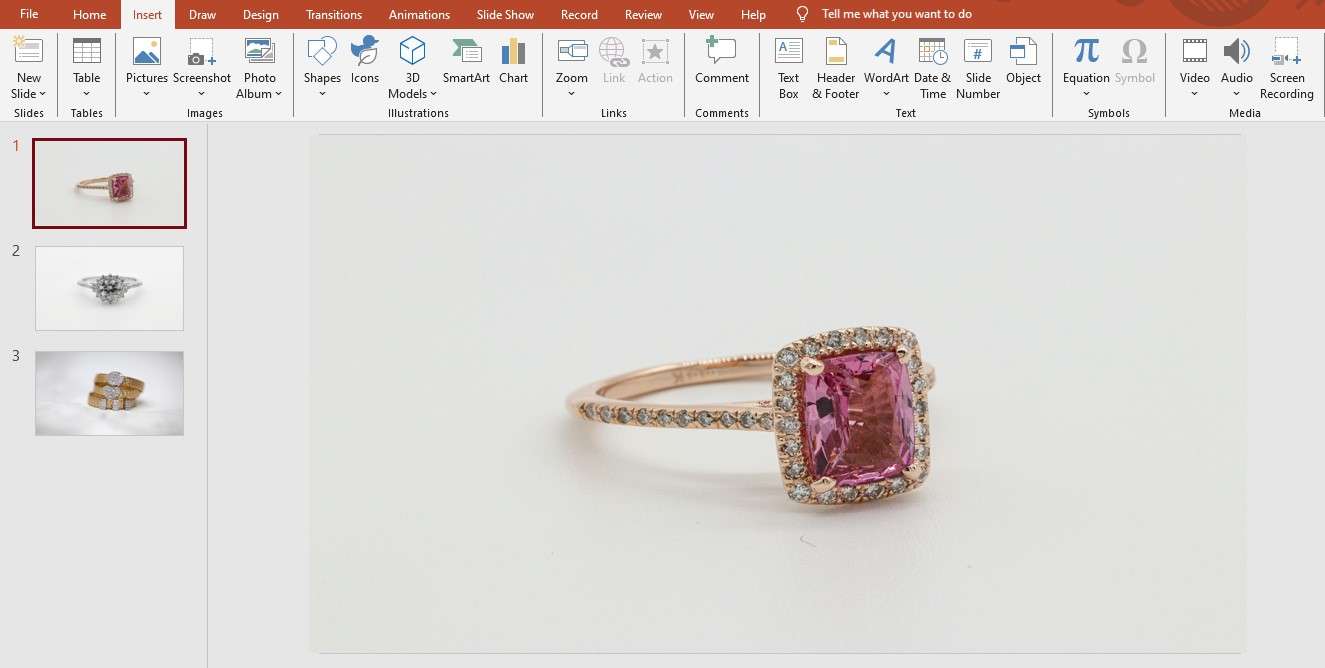
Step 1: Launch PowerPoint and create your slides.
Step 2: Add text, images, or other media to your slides that you want included in your GIF.
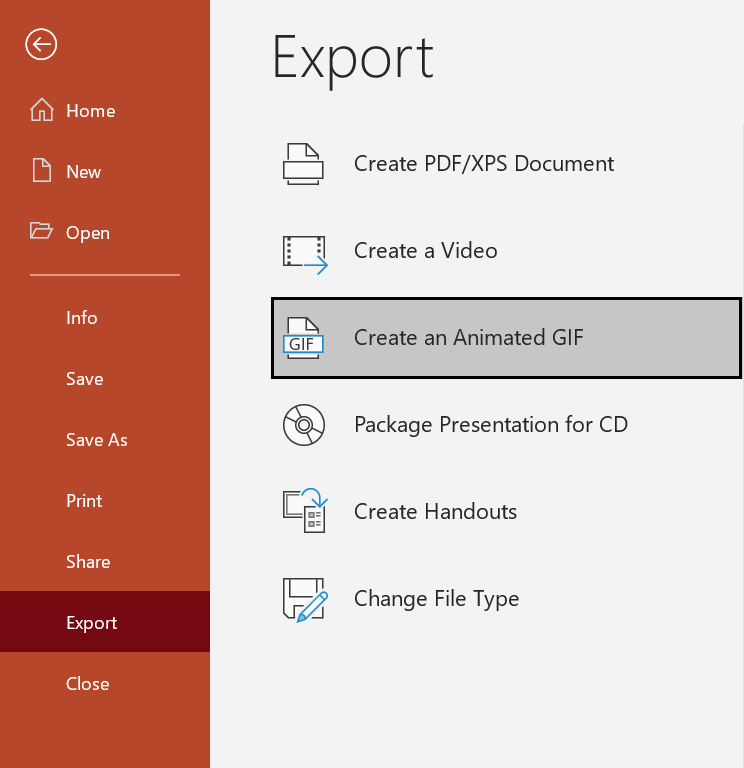
Step 3: When your slides are ready, go to File > Export.
Step 4: Select Create an Animated GIF.
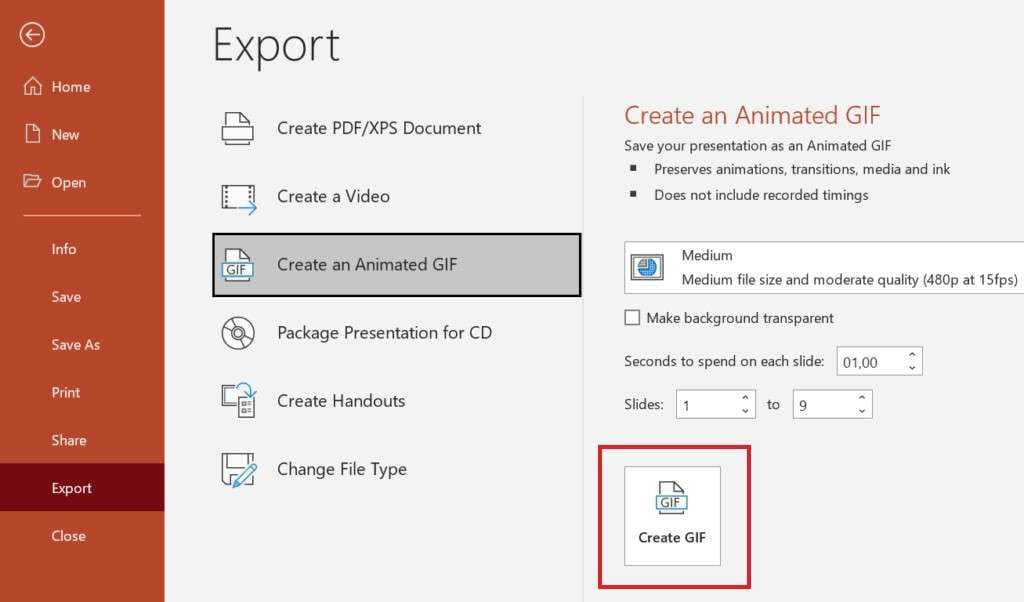
Step 5: Adjust the GIF settings (quality, slide duration, and slides to include).
Step 6: Select Create GIF.
It might take a moment for PowerPoint to make a GIF out of the slideshow (the more slides you include in the GIF, the longer it will take). Once the process is complete, make sure to double-check the results.
If the GIF is too fast or too slow, too long or too short, simply repeat the steps above and keep configuring the GIF settings a bit differently until you’ve found what you’re after.
Tips
Requirements
Now, while it’s relatively easy to create a GIF from your slideshow in PowerPoint, it’s not always possible. You’ll need to meet the version and system requirements if you’re to take advantage of this feature.
Primarily, you’ll need a version with the Office 365 subscription. If you have the perpetual license – PowerPoint 2016 or 2019 – this feature won’t be available. So, make sure to get one of the available Microsoft 365 plans.
Secondly, even with a subscription, you might not be able to export your slides as a GIF unless you have the right OS version.
For Windows, you’ll need, at the very least, Microsoft Windows 2001 (Build 16.0.12410). As far as Mac is concerned, you’ll need at least version 16.33 (Build 19121106). If you don’t meet these system requirements, you must find other ways to create GIFs from your slides.
How to Quickly Create Videos You Can Turn into GIFs
If you don’t have the right PowerPoint or operating system version, you’ll need a different approach. You could first turn the presentation into a video and then convert that video into GIF.
To solve the first part of this equation, you’ll need Wondershare Virbo. An exceptional, AI-powered video creation tool, Virbo comes with many unique features that can take your presentations up a notch.
You can use it to import your PPT files and convert them to flawless videos in MP4 format. But more than that, you can use it to embed AI avatars into your PowerPoint presentations, generate scripts, convert text to speech using over 300 AI voices, and so much more.
To convert PPT files into videos using Virbo desktop, you’ll need to follow these steps:
Step 1: Download and install Wondershare Virbo on your computer;
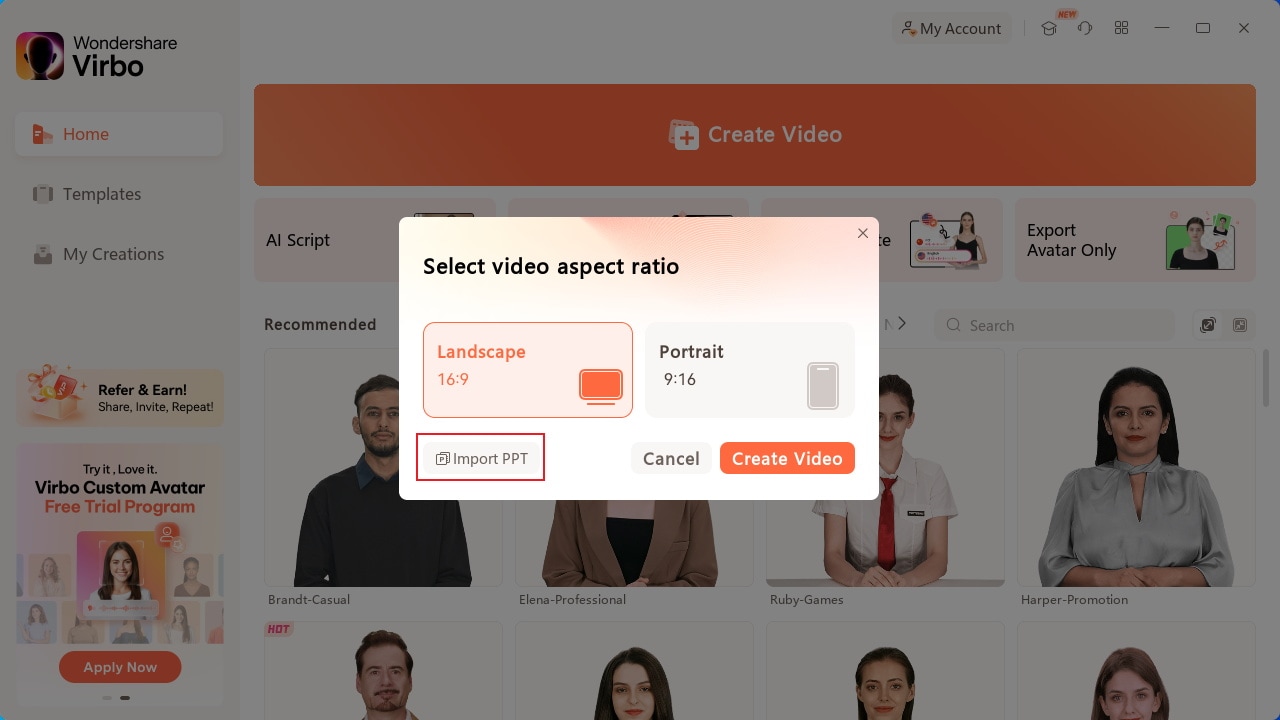
Step 2: Select Create Video and click Import PPT to import your presentation;
Step 3: Choose whether you want to extract your script or not, and click Create Video;
Step 4: If you want, click Avatars to embed an AI avatar and select Text Script or Audio Upload for video narration;
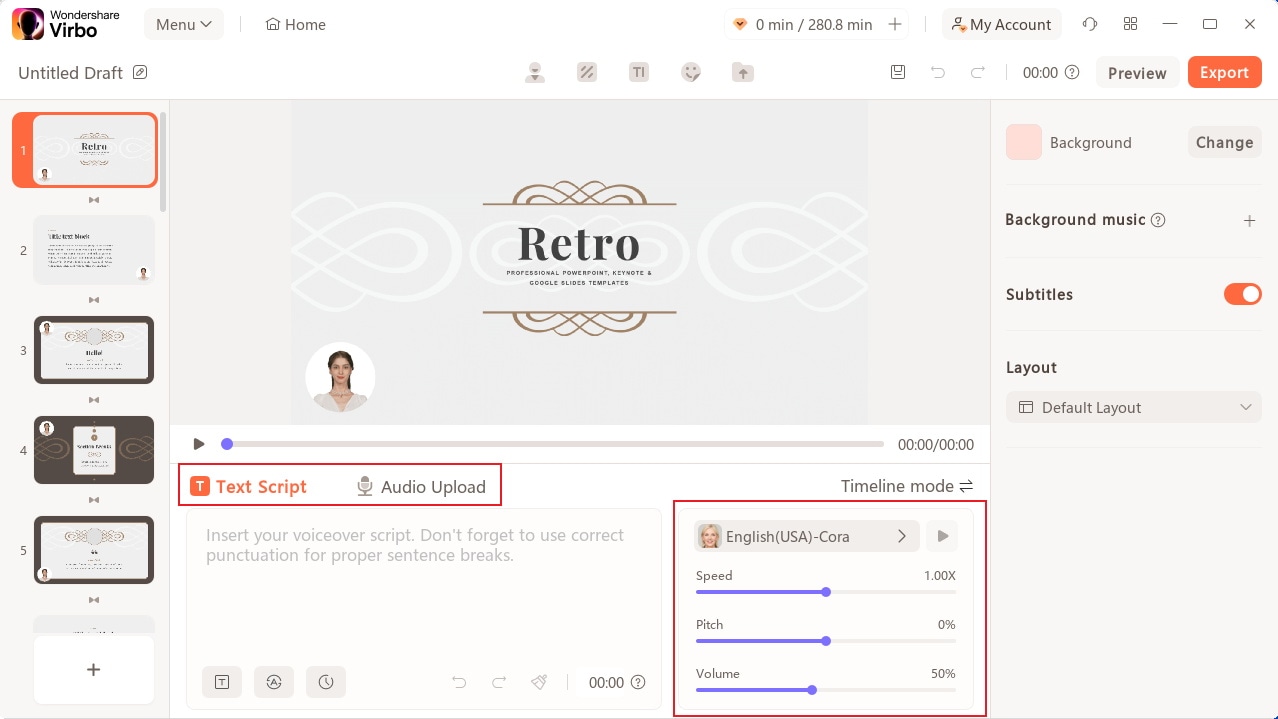
Step 5: Make other edits as needed (change layout, add background music, etc.);
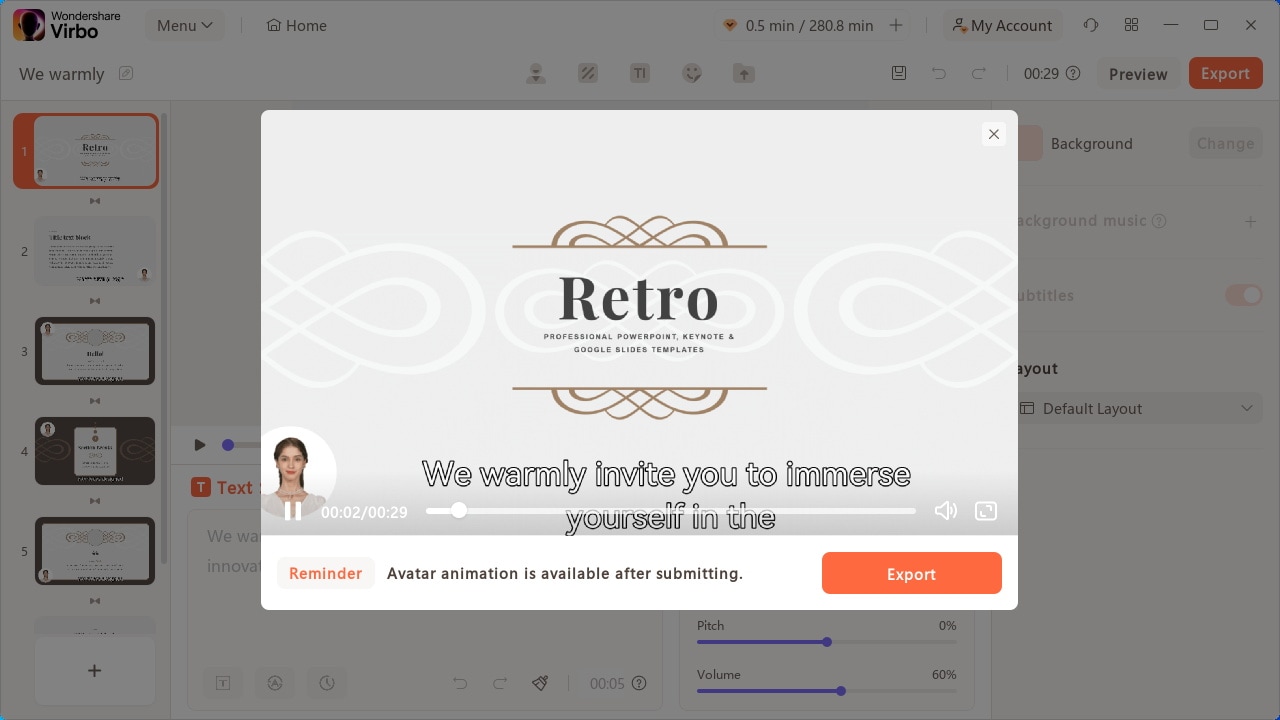
Step 6: Preview the video and click Export to save your presentation as an MP4 file.
For the second part of the equation, you’ll need to convert the PowerPoint video you’ve created with Virbo to GIF. For that, you can use one of the many available tools – Ezgif, Adobe Express, or FreeConvert.
Most of these tools work similarly, and you’ll have to follow more or less the same steps to convert your video. Here’s an example of how you could do that in Ezgif:
Step 1: Access the Ezgif website.
Step 2: Drag and drop your video or select Choose File to upload your PowerPoint video.
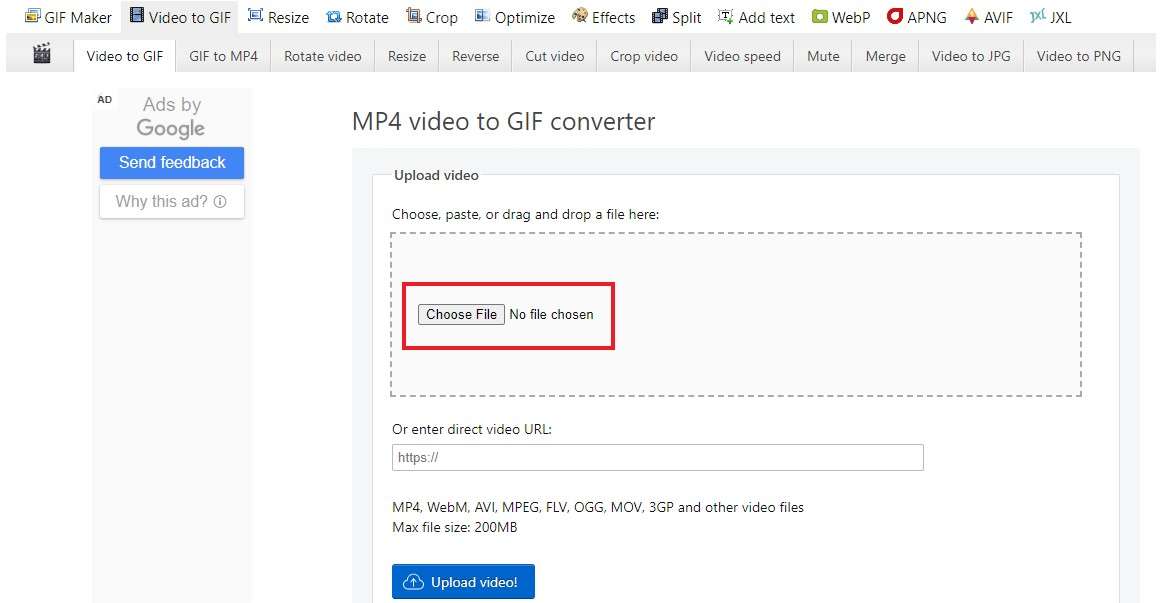
Step 3: Wait for the video to upload.
Step 4: Adjust start, end time, and other configurations.
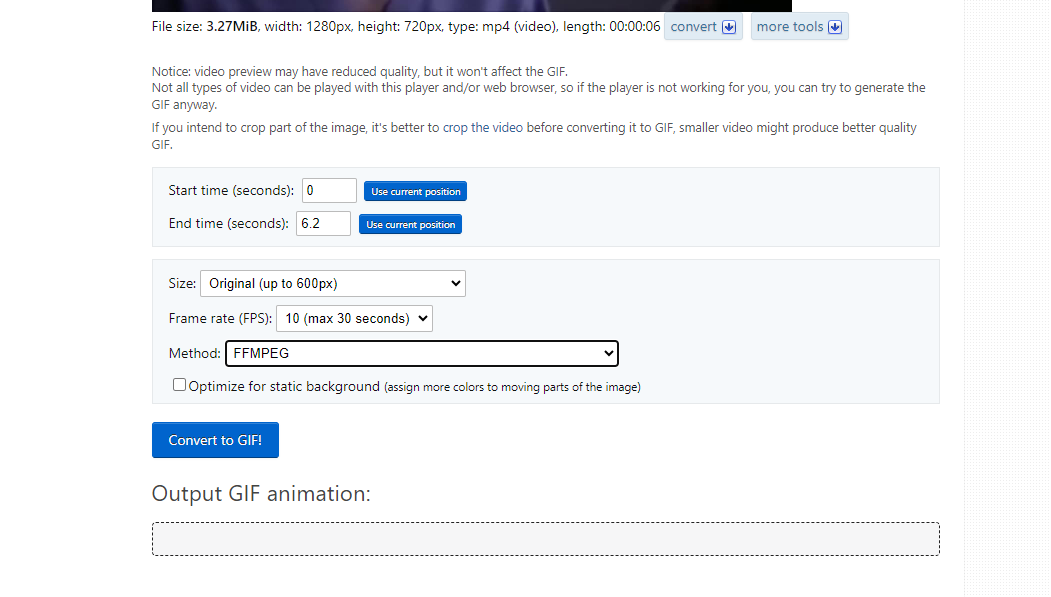
Step 5: Select Convert to GIF.
Step 6: Click Save.
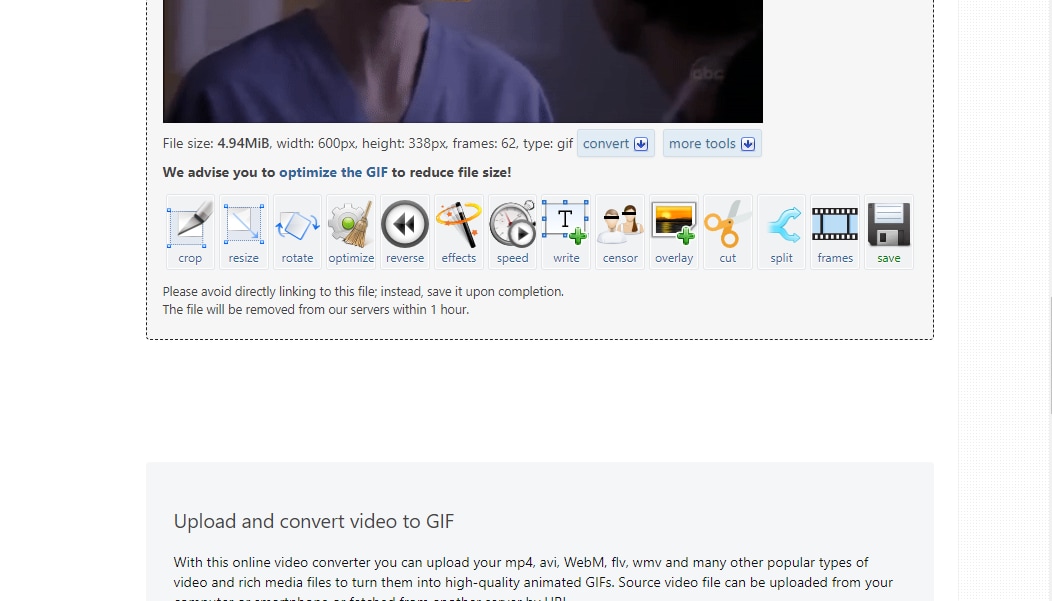
From there, you can use your newly created GIF however you see fit – embed it into your PowerPoint presentation, send it via email, share it on social media, and more.
Tricks You Can Use to Create Interesting GIFs
While it seems easy, creating interesting GIFs can take some work. Here are some tricks you should keep in mind when turning your PowerPoint slides into GIFs:
- Keep things short – GIFs aren’t supposed to be long. If you’re using them to entertain your audience, keep the length up to 10 seconds. If you’re trying to make a point or highlight an important part of your presentation, 30 seconds should be enough. Anything longer, and you’ll be much better off creating a video instead;
- Include captions – a short sentence in your GIFs can capture your audience’s attention. So, whether you’re doing it for laughs or education, make sure to include a caption;
- Only use higher quality images/videos – GIFs are by design of poorer quality than images or videos, and if you’re using low-res media, they’ll turn out much worse. Make sure to minimize blurring by only using high-quality content to create them.
Aside from this, you’ll also want to remember to keep your GIFs relevant to your PowerPoint presentation. Unrelated GIFs will only confuse your audience and distract them from what’s important in your PPT files.
Top Practices for Good Results
Creating GIFs, whether from PowerPoint slides, images, or videos, can be frustrating. You’ll likely notice that your GIFs are of somewhat low quality or overall unsatisfactory. That’s mainly because GIFs are an 8-bit format with only 256 colors. They don’t hold much data, and when they’re compressed and shared, the little data they have can become somewhat compromised.
To get higher-quality GIFs, you could do the following:
- Reduce the number of frames – by using fewer frames, you’ll avoid unnecessarily compressing your GIFs and sacrificing their quality;
- Avoid overly colorful images/videos – as mentioned, GIFs can hold only 256 colors, so using overly colorful media to create them will only make them look more choppy;
- Reduce the size – the bigger the size of the GIF, the more it will take to load it, and the more glitchy the frames will become. So, reduce the size to keep things as clean as possible.
Additionally, you could use tools like Adobe Photoshop to enhance your GIFs and clean them up a bit, thus reducing their graininess.
Conclusion
Depending on your operating system and the version you have, you can use PowerPoint to create a GIF of your slides. However, even if you don’t meet the system requirements, with the help of Wondershare Virbo and Ezgif, for instance, you can convert your PPT files to videos and then to GIFs. Whatever approach you use, it will be well worth it.
GIFs are a great way to grab your audience’s attention, highlight important parts of your presentations, or better explain key concepts.