Creating GIFs has become a popular way to share animated moments and add a touch of fun to our digital conversations. While many people think that making a GIF requires video footage, iPhone users have a convenient alternative right at their fingertips: Live Photos. This is because both GIFs and Live Photos can capture a few seconds of motion.
If you're looking for how to turn Live Photo into GIF, there are several effective methods to do so. Understanding how to turn Live Photos into shareable GIFs can help you effortlessly convert your favorite moments into dynamic images. In this article, we will break down a few of the best techniques to help you create stunning GIFs from your iPhone Live Photos.
In this article
Part 1. What are the Differences between GIFs and Live Photos?
If you want to know how to make a gif from a live photo, it's important to understand the differences between the two. Although both capture motion, they differ in format, functionality, and usage. By understanding their differences, you can decide when to use a GIF or a Live Photo, depending on your needs for compatibility, editing flexibility, and sharing preferences.
For starters, GIFs, or short for Graphics Interchange Format, are image files that support both static and animated images. They are widely compatible with various platforms and devices, making them easy to share and view anywhere.
Live Photos, on the other hand, are an Apple feature combining a high-resolution photo with a 3-second video clip (1.5 seconds before and after the photo is taken). They are saved in the HEIC/HEIF format, which is less universally compatible.
Here are some other key differences between GIFS and Live Photos:
| GIFs | Live Photos | |
| Format | Universally compatible | Primarily for Apple devices |
| Motion | Loop continuously | Fixed 3-second motion |
| Sound | Silent | Sound included |
| Editing | Easily editable with various tools | Editing is limited |
| Sharing | Shareable on almost any platform | Mainly shared within the Apple ecosystem. |
| Creation | Made from a series of images or video clips | Captured automatically with an iPhone camera |
| File Size | GIFs can be optimized to be small but may be large if detailed | Live Photos take more space than standard photos but are smaller than equivalent GIFs |
Part 2. How to Make Live Photo into a GIF
Now that you understand the key differences between GIFs and Live Photos, it's time to learn how to turn a Live Photo into a GIF. In this section, we will explore three different methods: setting the Live Photo to bounce, converting a Live Photo to a GIF using GIPHY, and making a GIF from a Live Photo using a converter.


Method 1: Convert Live Photo to GIF Using iPhone Shortcuts
If you’re an iPhone user, the Shortcuts app is a powerful tool for quickly converting Live Photos into GIFs without needing third-party apps. Here’s how you can do it:
Step 1: Open the Shortcuts App
- Ensure that the Shortcuts app is installed on your device (it’s pre-installed, but if not, download it from the App Store).
- Open the app, tap the Gallery tab in the bottom-right corner, and search "Make GIF" in the search bar.
- Tap the "+" icon next to "Make GIF" to add it to your shortcuts.
Step 2: Run the Shortcut
- Return to the main Shortcuts screen and tap the "Make GIF" shortcut.
- Select the Live Photo you want to convert. Once you’ve made your selection, the shortcut will automatically process the Live Photo and turn it into a GIF.
Step 3: Save or Share the GIF
- After the GIF is generated, tap the "Done" button in the bottom-right corner of the preview screen. The GIF will be saved to your Photos app automatically.
- From your Photos app, you can now share the GIF via social media, messaging apps, or email.
Using this method, you can effortlessly create GIFs from Live Photos with just a few taps, making it a convenient and built-in solution for iPhone users.
Method 2: Set the Live Photo to Bounce
Turning a Live Photo into a GIF can be easily done by using the "Bounce" effect on your iPhone. This method is simple and quick, allowing you to create a fun, looping GIF from your Live Photo with just a few taps. Here's how:
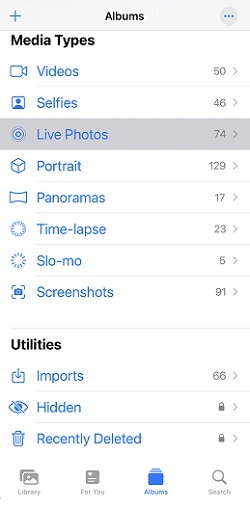
Step 1. Choose the "Live Photo" on your photos app
The first thing you need to do is simply open the Photos app on your iPhone. Then you can tap on the "Albums" button, scroll down to "Media Types" and choose the Live Photos you want to turn into a GIF.
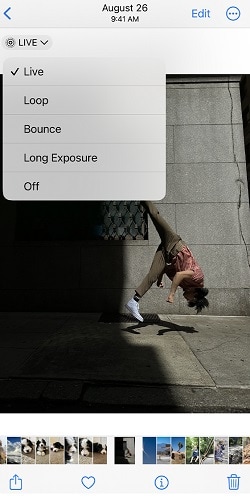
Step 2. Choose bounce
The next thing you need to do is simply select the "Bounce" effect from the menu by clicking on the Live Photo icon in the top left corner. This makes the Live Photo play forward and backward in a continuous loop, similar to a GIF.
Step 3. Save and share
Your Live Photos now has a loop effect of a GIF!
Method 3: Convert Live Photo to GIF using GIPHY
If you didn't know already, GIPHY is a popular app that makes it easy to convert Live Photos into GIFs. If you haven't downloaded it yet, you can get the GIPHY app from the App Store. This method is a fun and simple way to personalize your Live Photos and share them as GIFs. Here's how to do it step by step:
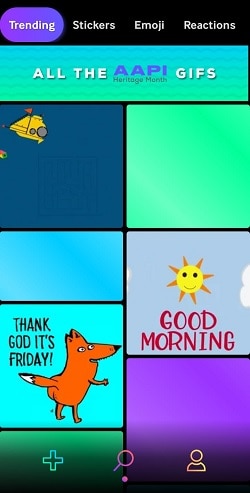
Step 1. Open the GIPHY app and create a new GIF
Once the GIPHY app is installed on your iPhone, open the app and click on the "+" button to create a new GIF.
Step 2. Select your live photo
You can do this by clicking the "Library" button to access your photos. Choose "Live Photos" and then select the Live Photo you want to convert.
Step 3. Edit your live photo
For this step, you can use GIPHY's editing tools to customize your GIF. You can add text, stickers, and filters as desired. Then, you can click on the "Next" button once you're satisfied with your editing.
Step 4. Save your GIF
If you want to save your edited Live Photo as a video, you can simply choose "Save Video" to save your Live Photo as a video file. This will store the video in your Camera Roll, allowing you to view and share it as a standard video clip.
If you want to save it as a GIF, simply click on the "Save GIF" button to save your Live Photo as a GIF file. This will convert your Live Photo into a GIF and save it in your Camera Roll, making it easy to share on social media, messaging apps, or any platform that supports GIFs.
Method 4: Make a GIF from a Live Photo using a Live Photo Converter
Another great choice for converting Live Photos to GIFs is the popular app Live Photo Converter. It's easy to use and gets the job done quickly.
However, it's important to note that the app has some limitations. You can't add text or filters to your Live Photos, and the converted GIFs or videos will have a watermark. To get rid of ads and watermarks and ensure high-quality conversions, you can upgrade to the premium version with a one-time purchase.
For those who are interested, here is how it works:
Step 1. Upload your Live Photo
Open Live Converter and upload a Live Photo from your iPhone.
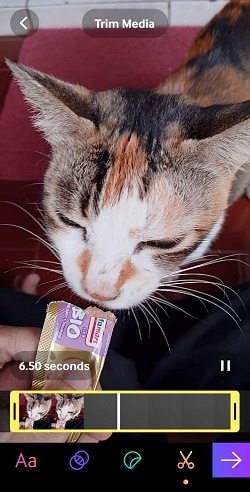
Step 2. Select GIF and adjust the speed
Select the GIF option and adjust the speed as you'd like.

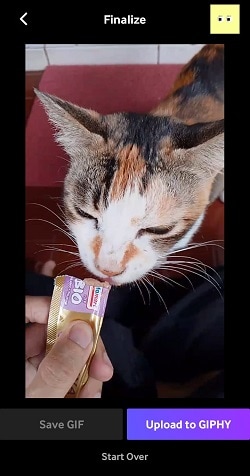
Step 3. Save your GIF file
Once you're satisfied, click the Save button or share it to your preferred social media platform directly from the app.
Bonus: Make Your Photo Live and Talk
Aside from using Live Photos to animate your photo, you can also take your photo to a new level by making it move and talk according to your voice or inputted text. Lucky for you, Wondershare Virbo is here to give the perfect solution.
With its innovative Talking Photo feature, you can record your voice directly within the tool and sync it with your photo. This enables you to add a personal touch to your creations such as a fun meme, a personalized greeting video, or a unique social media post.
Thus, in this section we will explain to you how to make a talking photo with Virbo:
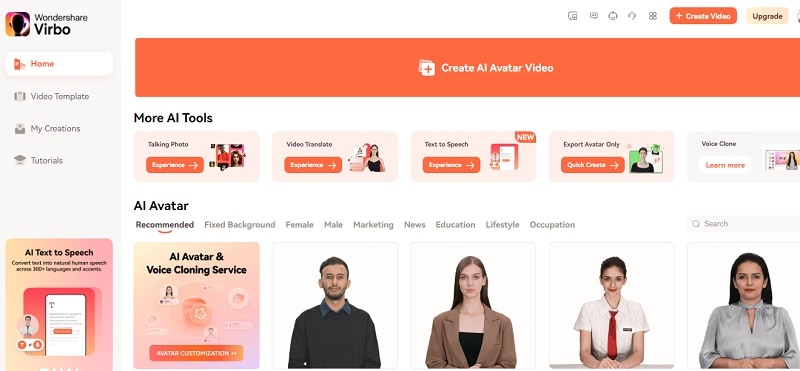
Step 1. Visit Wondershare Virbo's online tool and choose the talking photo feature.
The first thing you need to do is simply visit Wondershare Virbo's online tool. Once you're on the tool, click on the "Talking Photo" tab. For a more convenient option, you can also download the app on your phone.
Make Photo Talk Online Get App Free
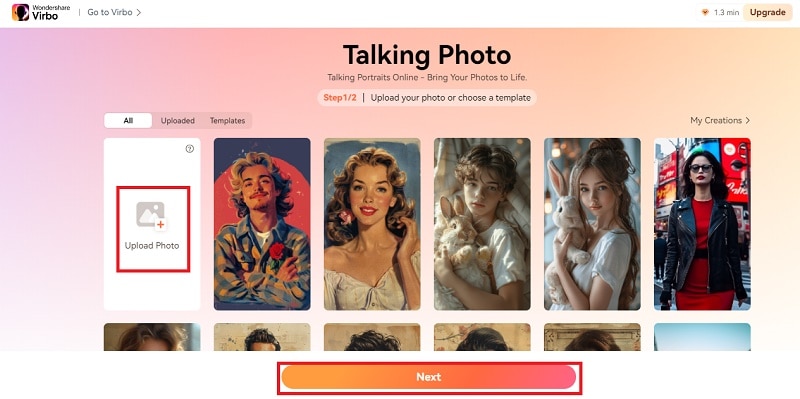
Step 2. Upload your photo.
Once you're in their talking photo feature, you will see various templates provided by Virbo that you can try on. To upload your photo, just click on the "Upload Photo" button. After your photo is uploaded, simply click it and choose "Next".
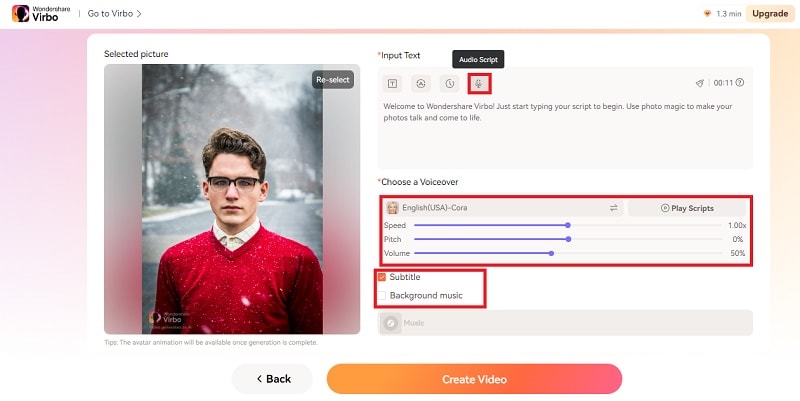
Step 3. Write your text and set a voiceover.
The next step is to input your text. You can write your message in the "Input Text" tab or upload your voice using the "Audio Script" tab. Afterward, you can customize the language, playback speed, pitch, volume, and background music, or upload your own. To add subtitles, simply select the "Subtitles" option.
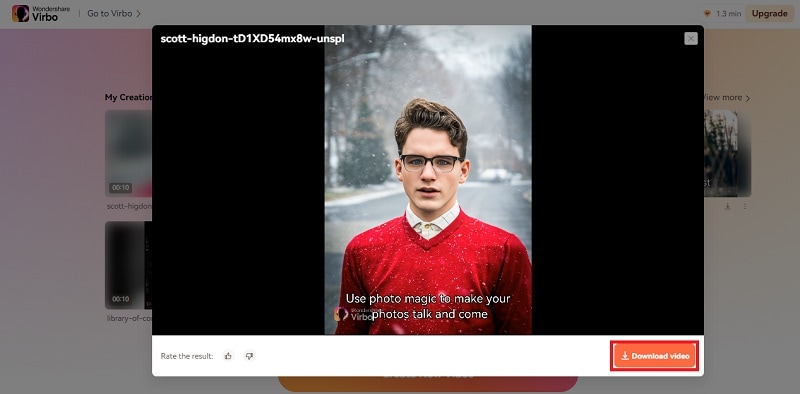
Step 4. Create Video.
Once you've finished editing your photo, the next step is to bring it to life. Click on the "Create Video" button, and Virbo will generate it in just a few seconds. You can find the resulting talking photo in "My Creations." From there, you can view it and click "Download Video" to save it to your computer.
Make Photo Talke Online Get App Free
Conclusion
Creating GIFs is a fun and popular way to share animated moments, and iPhone users can conveniently transform their Live Photos into GIFs. By understanding the differences between GIFs and Live Photos, you can choose the best option for your needs.
In this article, we've explored three simple methods to convert Live Photos into GIFs: setting the Live Photo to bounce, using the GIPHY app, and employing a Live Photo converter. Additionally, with tools like Wondershare Virbo's Talking Photo feature, you can add voice and text to your photos, creating even more engaging and personalized content.
Make Photo Talk Online Get App Free
FAQs
-
How to create a GIF from a photo on iPhone?
Creating a GIF from a photo on an iPhone is easy, especially if you’re using a Live Photo. To turn Live Photos into shareable GIFs, open the Photos app, select your Live Photo, swipe up, and choose either the “Loop” or “Bounce” effect. If you want more control over the GIF, third-party apps like GIPHY or ImgPlay allow you to adjust speed, add filters, and customize your GIF before sharing. -
how to turn a video into a live photo?
To turn a video into a Live Photo, you’ll need an app like IntoLive. Simply upload your video, trim it to fit within the Live Photo time limit, and save it as a Live Photo. This is a great way to bring your favorite video moments to life and use them as dynamic wallpapers or share them with friends. -
How to turn live photo into sticker?
If you’re wondering how to turn a Live Photo into a sticker, several apps like Sticker Maker or WhatsApp’s built-in sticker tools can help. Convert your Live Photo into a GIF, remove the background if needed, and save it as a sticker to use in messaging apps. This allows you to personalize your chats with animated stickers made from your favorite Live Photos.