PowerPoint presentations have long been a fantastic way of teaching an audience about a particular topic with multimodal elements. We regularly use them at school or work, creating a multimedia-rich method for conveying information.
However, while they’re great for students, teachers, and business people, standardized presentations can quickly become dull if they only include pictures, graphs, and text on slides.
That’s where PowerPoint screen recordings come in. These elements help make your presentations more interesting by adding audio and video elements. Stay with us to learn how to add a screen recording to PowerPoint and captivate your audience with exciting information.
In this article
How to Make Screen Recordings in PowerPoint
Whether you’re a business person teaching your colleagues or an educator trying to make a tutorial, PowerPoint screen recordings can significantly help your presentations. Adding these elements can make learning fun, and here’s how you can do that:
Step 1: Launch the PowerPoint app and import your presentation.
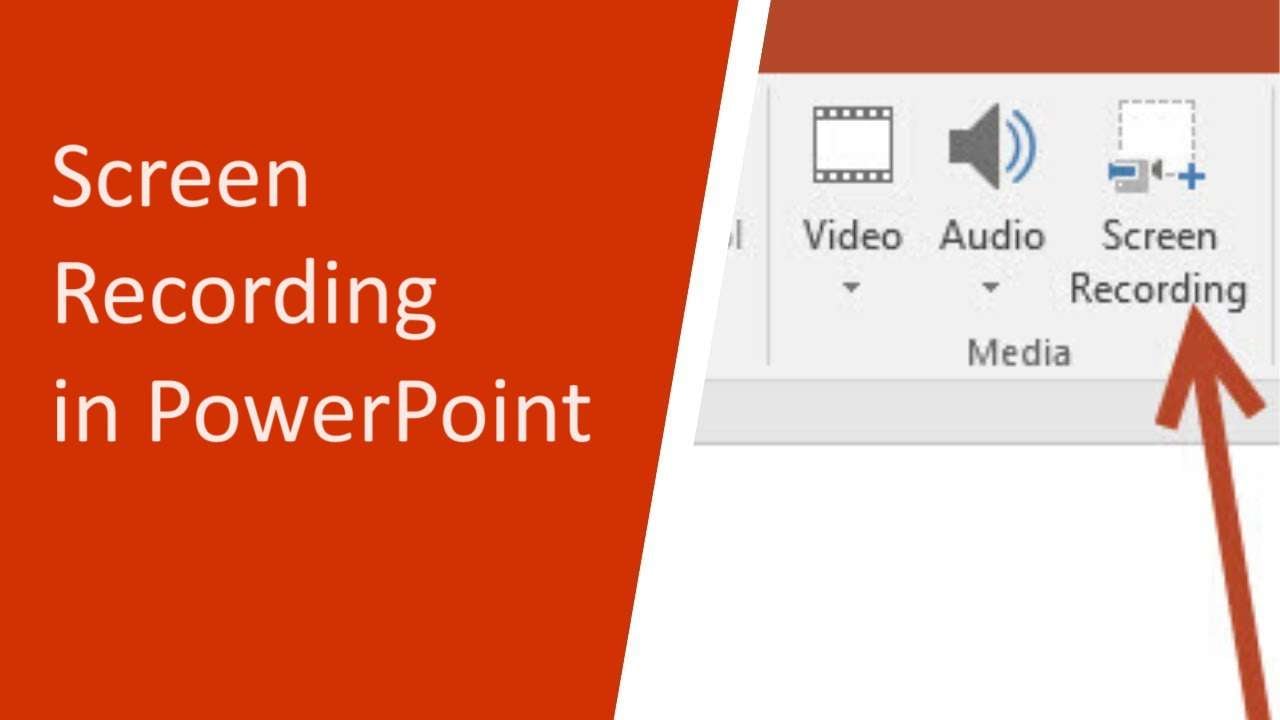
Step 2: Head to the Insert tab and tap Screen Recording.

Step 3: Tap the Select Area button in the popup toolbar, select the part of the screen you want to record, and click the Record button.
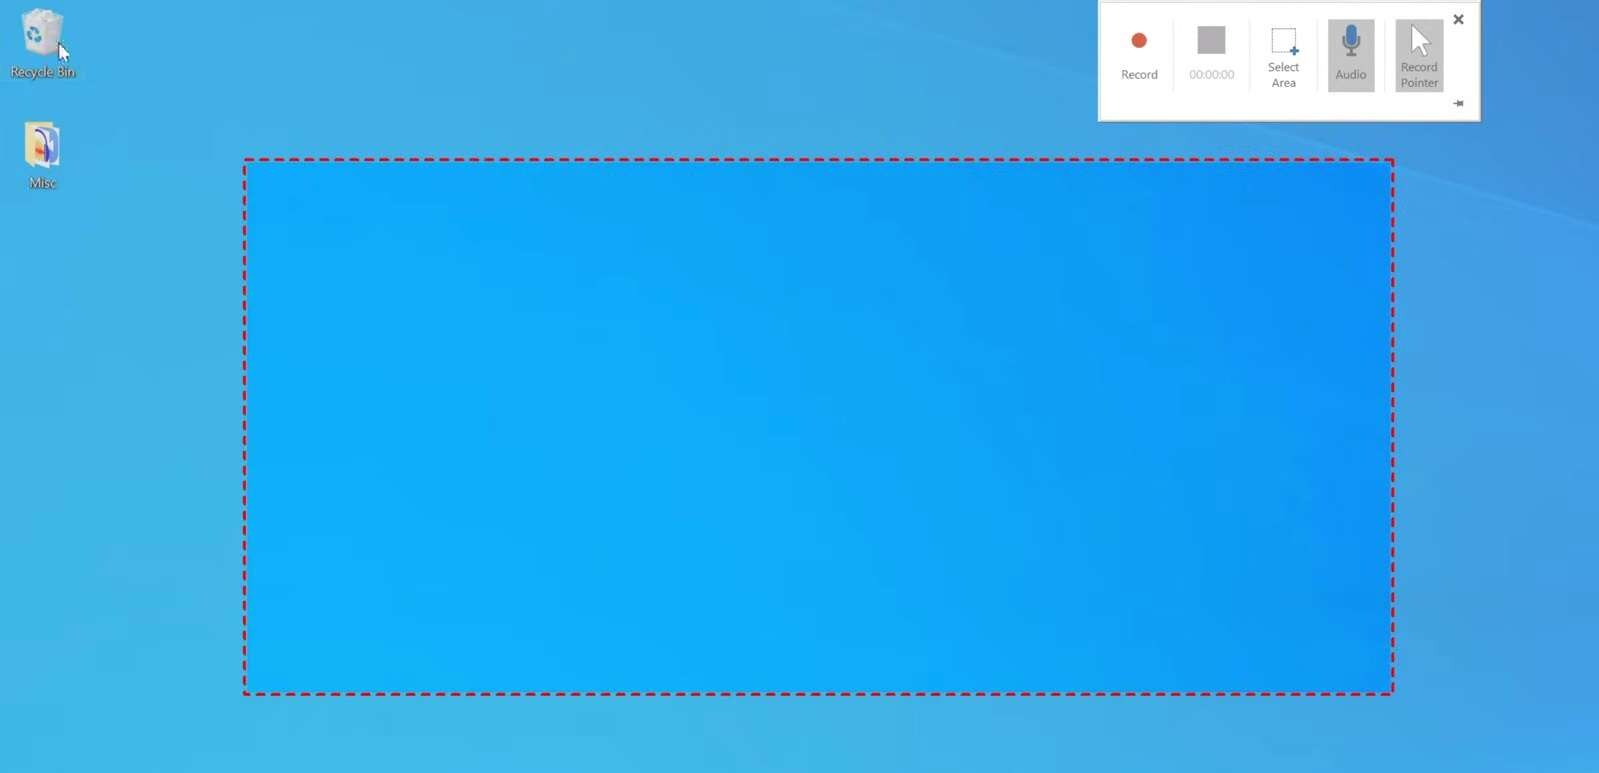
Step 4: Once done, tap Windows + Shift + . to stop the recording or hover over the area where the toolbar was to unhide it and press the Stop button. (You can also pin the toolbar to prevent it from hiding when you start recording by clicking the tiny Pin button in the toolbar’s bottom right corner.)

When you stop the recording, it automatically inserts into the presentation slide. You can then view the recording, add effects, perform elementary color correction, etc.
How to Pause and Resume Screen Recordings in PowerPoint
If you want to add a PowerPoint screen recording of multiple processes, you can pause and resume the screen recording tool instead of creating a new recording for each process. Here’s how you can do that:
Step 1: Repeat the first two steps from the section above to get to the screen recording toolbar.
Step 2: Start recording by tapping the .ecord button or hitting the Windows + Shift + R keys.
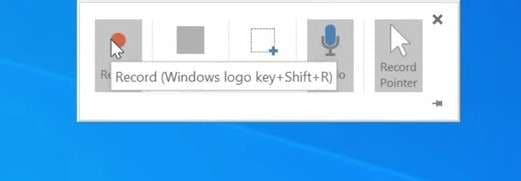
Step 3: To pause a recording, tap the same button again or click the Windows + Shift + . keys.
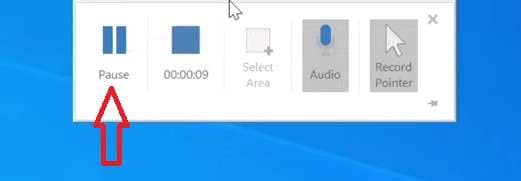
Step 4: Once paused, you can resume the recording by clicking the same button. Alternatively, hit Stop to stop the recording entirely.
That’s all there is to it, as it’s that simple.
How to Enable Audio Recording in PowerPoint
As you’ve likely noticed, there’s also an Audio button in the PowerPoint screen recorder toolbar, meaning you can make PowerPoint screen recordings with audio. Here’s how:
Step 1: Repeat the first two steps from the first section to open the recording toolbar.
Step 2: Toggle sound by clicking the Audio button before you click Record.

You can also capture only particular audio parts by toggling the PowerPoint screen recorder’s Audio feature in the middle of the recording (Windows + Shift + .).
How to Embed Audio Into PowerPoint Screen Recordings
If you already have an audio recording and want to add it to your PowerPoint screen recordings, you can follow these steps to embed the audio file into the presentation:
Step 1: Click the Insert tab in Microsoft PowerPoint and tap the Audio option to the far right.
Step 2: Choose Audio on My PC, find your audio file, and tap Insert.

Step 3: You’ll be presented with the Playback tab, and an audio icon and controls will appear. Adjust them to your liking. For example, tap Play in Background to add an audio file to the background of your screen recording.

Of course, you can also choose the Record Audio option when you click Insert > Audio and create a new voiceover or an audio recording for your presentation.
How to Make Your PowerPoint Presentations Even Better
While screen recording in PowerPoint, with or without audio, is relatively simple, it’s not the best tool for making your presentations more engaging. You’ll need something more powerful to get your audience’s attention, and that’s where Wondershare Virbo and its Import PPT feature come in.
Available as a Windows, Android, iOS, and online app, this robust AI-powered video generator tool can effortlessly make your presentations significantly more exciting. Geared with royalty-free assets and templates, multinational AI avatars, and natural-sounding AI voices, Virbo can help make your presentations appear and sound more professional.
Let’s explore how Virbo can take your presentations to another level:
Step 1: Save your PowerPoint presentation, launch the Virbo app on your PC, and click Create Video.

Step 2: Select the Landscape or Portrait aspect ratio and tap the Import PP button.
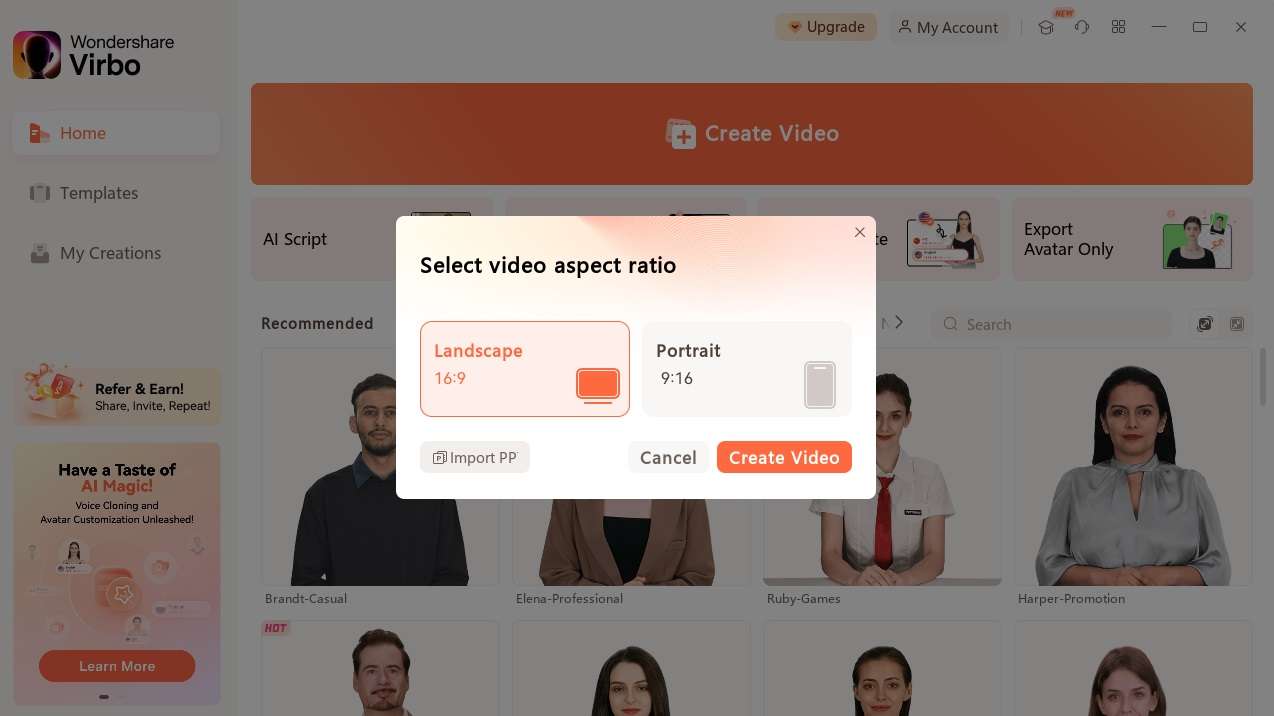
Step 3: Locate your presentation file and choose whether to extract a script from the PPT or Notes. Then, hit the Create Video button.

Step 4: You’ll automatically be taken to Virbo’s video creation tool. Add scripts or upload them as audio files, try one of the 350+ templates, or use one of the app’s 460+ voiceovers or virtual avatars. You can adjust every aspect of the voice or avatar, add subtitles, and more.

Step 5: Once you’re done with AI avatars, voiceovers, and adjustments, hit Export to save your presentation as a video
Like that, AI magic can make your PowerPoint presentations significantly more enjoyable. Use the app to your advantage, elevate your presenting skills to another level, and quickly grab your audience’s attention.
How to Edit Screen Recordings in PowerPoint
Editing screen recordings directly in PowerPoint is also possible. You can follow these steps for it:
Step 1: Select a presentation slide with your screen recording and click on the video.
Step 2: Navigate to the Playback tab.

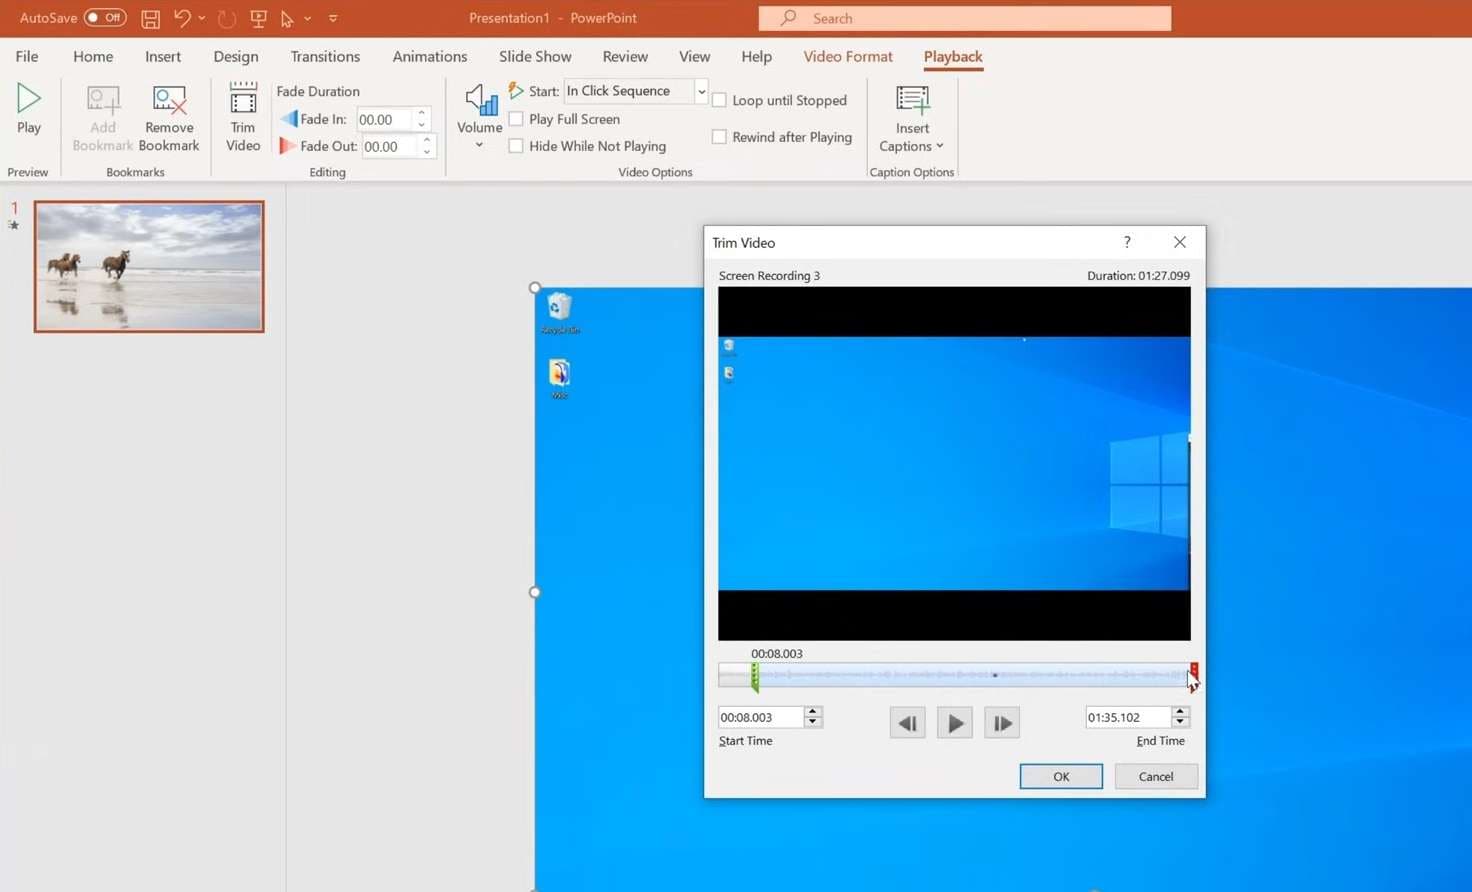
Step 3: Add bookmarks, insert captions, set fade-ins and outs, etc.
Step 4: Optionally, tap Trim Video to cut the screen recording shorter.
How to Save Your PowerPoint Screen Recordings on Your Computer
Once you’re satisfied with your PowerPoint screen recording, export the file and save it to your PC. While you can save it in standard presentation format, such as PPT, you can also export these as GIFs or MP4 files. Here’s how:
Step 1: Finish your presentation and head to File > Export > Create a Video.
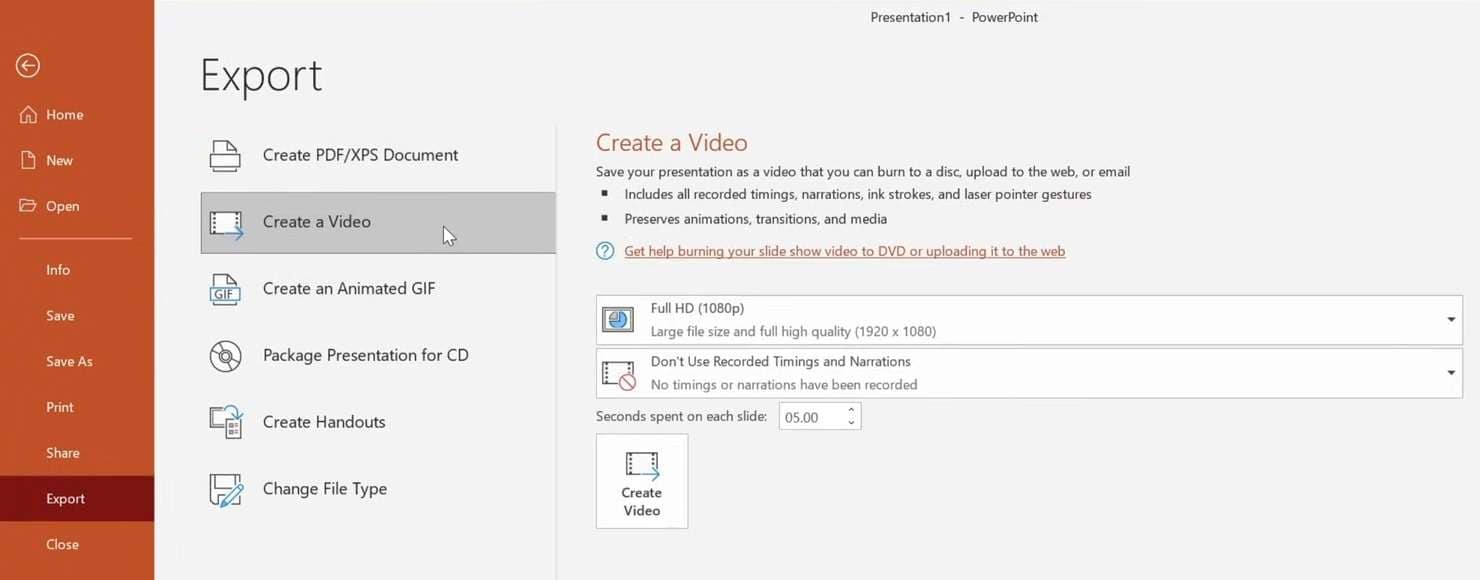
Step 2: Select the quality of the video.
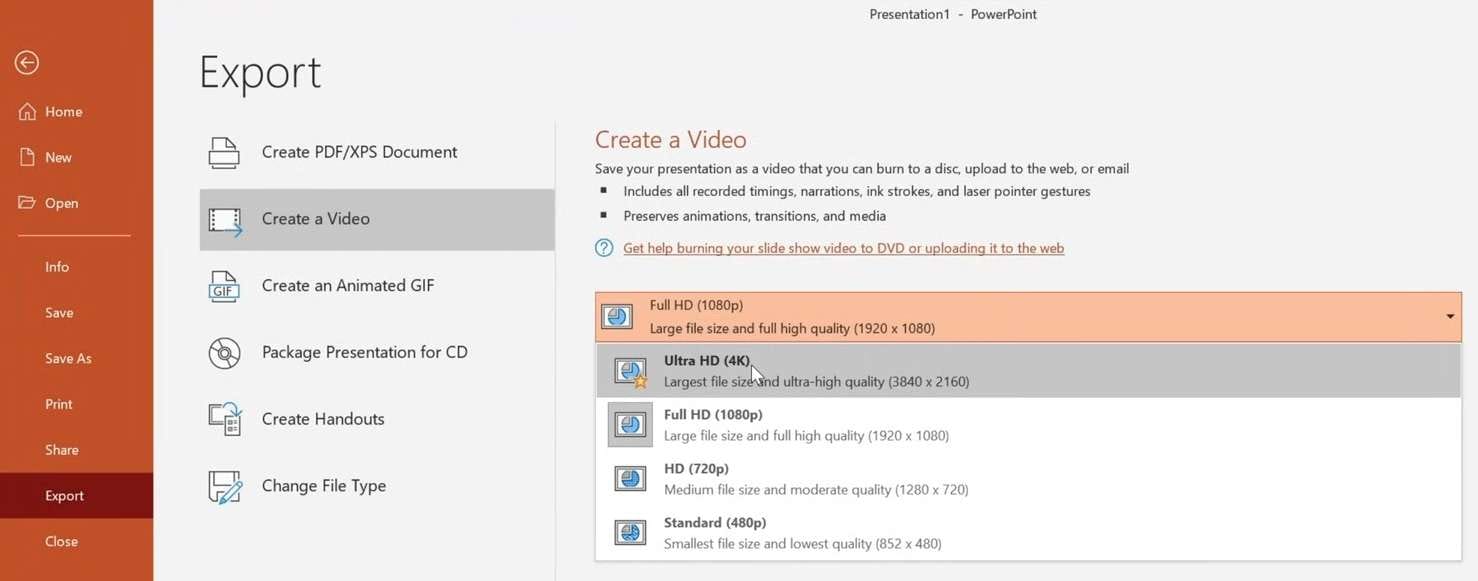
Step 3: Choose whether to use narrations or recorded timing and modify the timing between the slides. Then, tap Create Video.
Step 4: Select a location, change the name, and export the PowerPoint screen recording as an MP4 file.
Conclusion
Presentations are a fantastic multimodal method for showing off your work, teaching, and conveying information in various fields. Yet, the simple ones with just pictures and text can quickly become dull and bore your audience.
To grab the audience’s attention, create PowerPoint screen recordings with audio. This action adds multimodal elements to your presentations and makes them more exciting. We’ve shown you how to add these elements in PowerPoint and improve your presentations.
On another note, using a professional AI-powered tool like Wondershare Virbo is an even better option, as its 400+ royalty-free templates and 460+ AI voiceovers and avatars can spice up your presentations.
With Virbo, your presentations will look and feel significantly more professional, making them unique and helping you stand out as a presenter.
